If you are using somehow a managed or unmanaged VPS server then this article will definitely helps you to create a backup of your webserver on schedule basis with the help of cronjob.
In this article, we’re going to show you how to use tar for Backup Files and Directories in Linux along with automatic scheduling with cronjob.
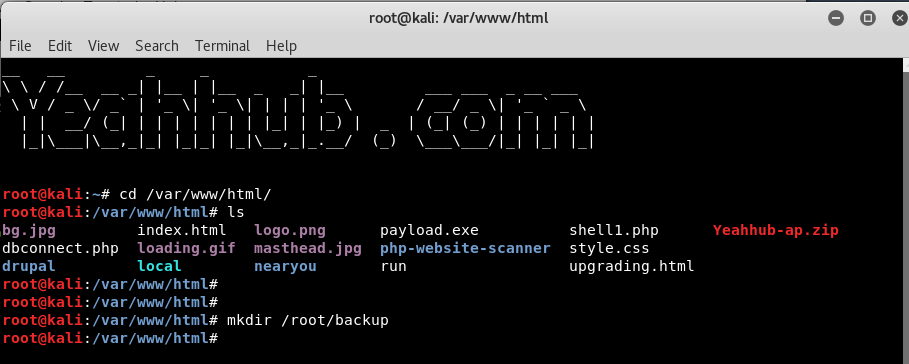
In our case, our Apache Server is running on Port 80 and /var/www/html is the default root folder of web server where we’ve installed one CMS under Drupal directory.
Your first step is to create a backup directory in any location where you want to place all backups in an organized manner.
Command: mkdir /root/backup
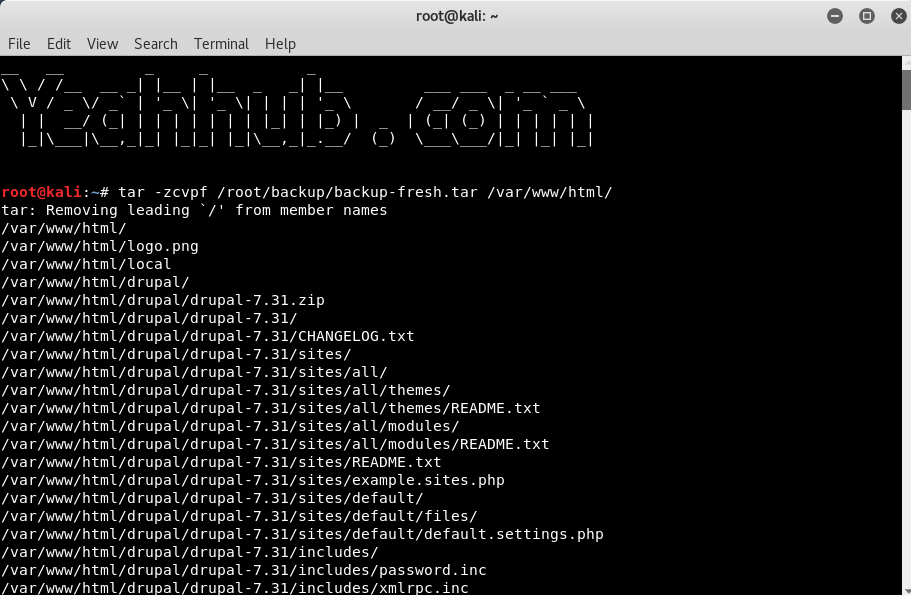
To create a tar archive file, the simple command is:
Command: tar -zcvpf /root/backup/backup-fresh.tar /var/www/html/
Which will create a archive file of whole /var/www/html/ directory and save it in /root/backup/ folder.
Where,
- tar = Tape archive
- c = Create
- v = Verbose mode
- p = Preserving files and directory permissions.
- z = This will tell tar that compress the files further to reduce the size of tar file.
- f = It allows tar to get file name.
If you want to take backup on daily basis, then you need to run the above command manually every day which is not a good idea though.
So to overcome this, we’ve created a simple bash script for taking backup in an organized format.
Code: (Pastebin Link)
#!/bin/bash
DATE=$(date +%d-%m-%Y)
BACKUP_DIR=”/root/backup”# take each website’s backup in separate name, use below format #
tar -zcvpf $BACKUP_DIR/yeahhub-$DATE.tar.gz /var/www/html# Delete files older than 10 days #
find $BACKUP_DIR/* -mtime +10 -exec rm {} \;
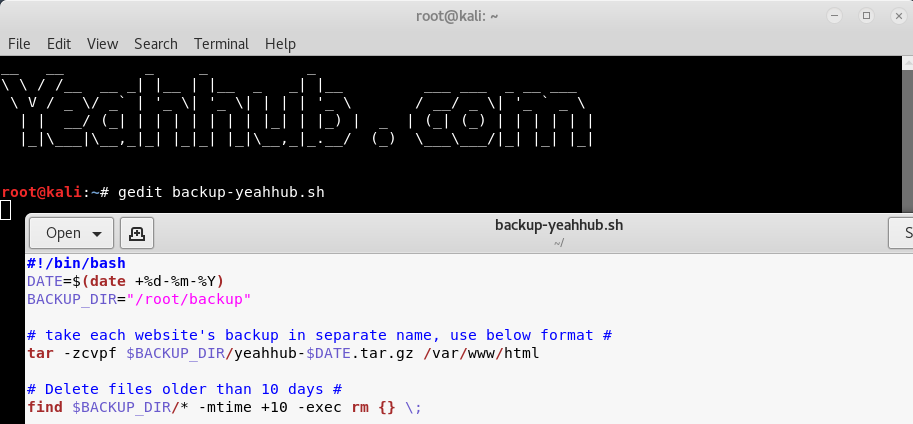
In above script, we’ve defined a BACKUP_DIR variable which contains your backup directory location and an automated removal command which will delete all old backups files which is older than 10 days, so that your HD space won’t be fillup quickly.
Now give the executable permissions to above script with the help of chmod command as shown below:
Command: chmod +x backup-yeahhub.sh
And run the script by typing “./backup-yeahhub.sh” as shown below:
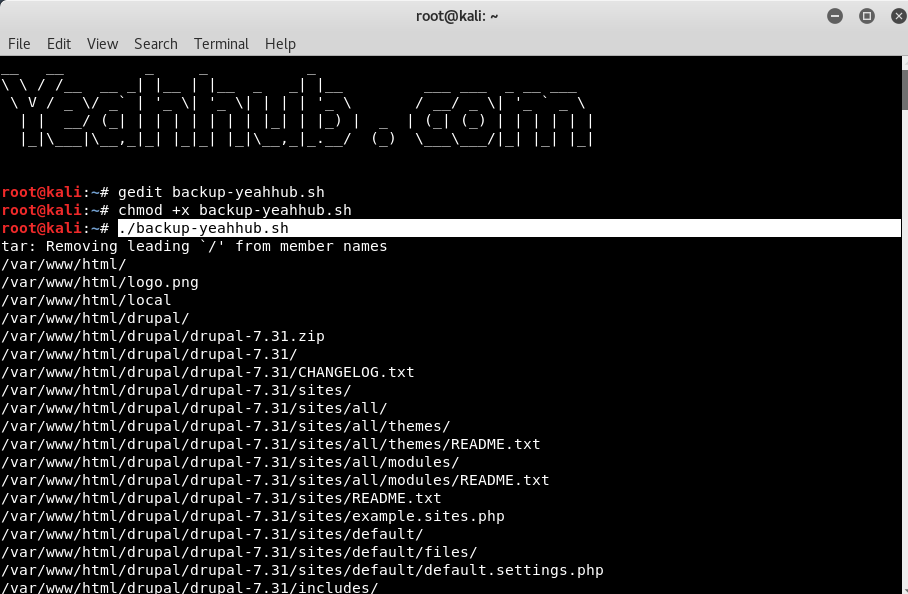
Here you can see that, a tar.gz archive file has been created with format (name-date.tar.gz) but this process is still not automated.

To make it automated, you need to first move this script into /bin directory and give 755 permission to bash file as shown below:

You need to use the crontab command for fully automation. Each user can have their own crontab file, and though these are files in /var/spool/cron/crontabs, they are not intended to be edited directly.
The crontab syntax is:
1 2 3 4 5 /path/to/command arg1 arg2
OR
1 2 3 4 5 /root/backup.sh
Where,
1: Minute (0-59)
2: Hours (0-23)
3: Day (0-31)
4: Month (0-12 [12 == December])
5: Day of the week(0-7 [7 or 0 == sunday])
/path/to/command – Script or command name to schedule
You need to use crontab command for editing or setting up your own cron jobs.
Command: crontab -e
Choose any editor for editing the crontab configuration file (we choose No. 2 i.e. /bin/nano)

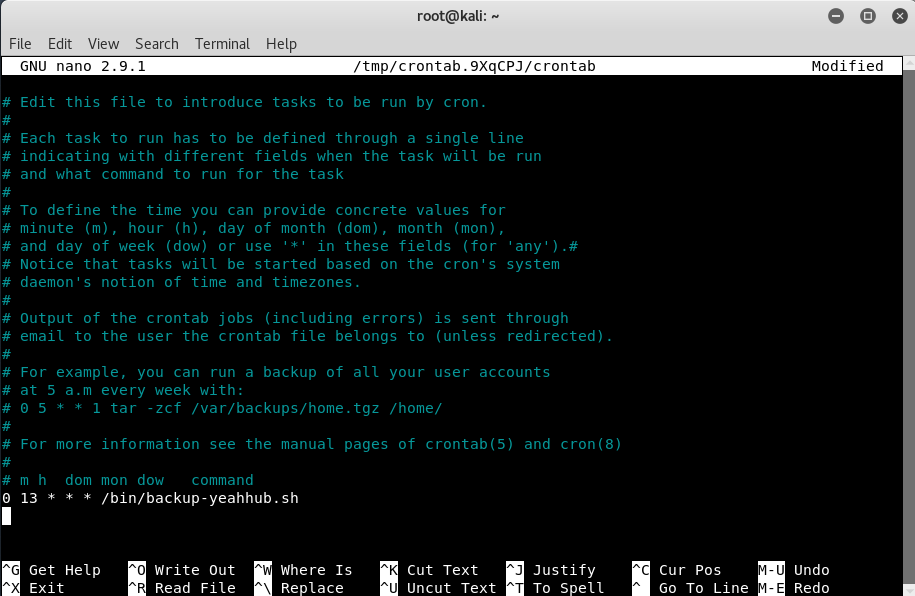
If you wished to have a script named /bin/backup-yeahhub.sh run every day at 1 PM, your crontab entry would look like as follows.
0 13 * * * /bin/backup-yeahhub.sh
Save and close the file.