
This article describe how to quickly enable SSL for local apache web server under Linux. This has been done on a Kali Linux virtual machine of version 2018.1, the one maintained and funded by Offensive Security.
This procedure may not work or may differ on older or different distribution.
You need to already have apache server running on http port 80 (or whatever) and when you try to go to your website for example http://localhost/ you should have the well know page.
1. Install OpenSSL
The very first step is to install the openssl package by typing the following command into the terminal.
Command: sudo apt-get install openssl
Which will install openssl and any other packages on which it depends.

2. Generate the self signed SSL certificates:
Next step is to generate the self-signed SSL certificates with the help of below command.
Command: sudo openssl req -x509 -nodes -days 1095 -newkey rsa:2048 -out /etc/ssl/certs/server.crt -keyout /etc/ssl/private/server.key
We strongly recommend you use 2048 strength or higher as anything lower is not secure. You will be asked many questions when creating your CSR like County Name, State or Province Name, Locality Name, Organization Name, Organizational Unit Name, Common Name and Email Address.

You’ve now started the process for generating the following two files:
- Private-Key File (server.key): Used to generate the CSR and later to secure and verify connections using the certificate.
- Certificate Signing Request (CSR) file (server.crt): Used to order your SSL certificate and later to encrypt messages that only its corresponding private key can decrypt.
After filling all the details, a new file of extension .csr will be created.
3. Enable SSL for Apache
Furthermore, you also need to enable to SSL module for apache by typing the following command:
Command: sudo a2enmod ssl

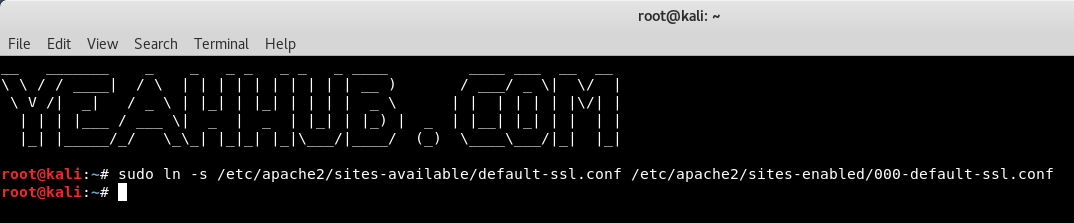
4. Creating a symbolic link
Next put the default-ssl sites available by creating the symbolic link with ln -s command as shown below:
Command: sudo ln -s /etc/apache2/sites-available/default-ssl.conf /etc/apache2/sites-enabled/000-default-ssl.conf
5. Edit the file default-ssl.conf
Now edit the default-ssl.conf file with the help of gedit utility and change the following lines as shown below.
SSLCertificateFile /etc/ssl/certs/server.crt
SSLCertificateKeyFile /etc/ssl/private/server.keyCommand: sudo nano /etc/apache2/sites-enabled/000-default-ssl.conf

6. Restart Apache
At the end, just restart the apache server by typing:
Command: sudo /etc/init.d/apache2 restart

Just keep in mind that you’ll see a warning in their browsers (like the one below) when connecting to localhost site that uses a self signed certificate until it is permanently stored in their certificate store.
Note: You should never use a self signed certificate on an e-commerce site or any site that transfers valuable personal information like credit cards, social security numbers, etc.

To avoid warning by browser, you can add the certificate to Trusted Root Certificate Authority of your computer. .
If the Apache site is public, you can use our SSL Checker to verify that it is installed correctly (ignoring the warning that it is not trusted because it is self signed). Otherwise, just go to the website in your web browser using https in the address bar (https://yourdomain.com) and verify that the certificate is being given out by the server by clicking the certificate icon (after clicking through the warnings).

Now you can go with your favorite browser like Mozilla or Chrome, the browser will warn you because it is a self signed certificate, but if you accept it you will now have the same famous “It works!” but with encryption.


