
OpenSSL is a software library for applications that secure communications over computer networks against eavesdropping or need to identify the party at the other end. It is widely used by Internet servers, including the majority of HTTPS websites.
Self-signed certificates are convenient when developing locally, but we don’t recommend them for production environments because self-signed certificates are trusted by any 3rd party verified provider. If you want to run a public website, getting a trusted signed certificate can be a better option.
With a self-signed certificate, users will get a warning on their first visit to your site that is using an untrusted certificate. You can purchase one from somewhere like GoDaddy, Bigrock, Comodo or you can get a free certificate with Let’s Encrypt from SSLFORFREE.COM.
The two important files you will need when this is all done is the private key file and the signed certificate file. Those two files are required when setting up an SSL/TLS server. The private key should always be kept secret.
Suggested Read: Testing all SSL Vulnerabilities with TestSSL Script
Before to generate SSL certificate, make sure that you must have installed OpenSSL in your Kali Linux machine. To check if it is already installed, type the following Command in your terminal:
Command: openssl version
And in case, if you are getting some error like Unrecognized command, then you will need to install it by typing “sudo apt-get install openssl“.

Step 1 – Generate a Private RSA Key
To generate a private RSA key without any passphrase, run the following command in your terminal.
Command: openssl genrsa -out privkey.pem 2048
The above command will generate 2048-bit RSA Private Key.

To add a passphrase while generating the RSA key, the command is:
Command: openssl genrsa -aes256 -out privkey1.pem 2048
You can easily include any cipher like -aes256 or -des3 etc while generating RSA key.

Step 2 – Generate CSR with Key
Now next step is to generate CSR (Certificate Signing Request) with above created private key. This can easily be done with an interactive prompt by typing the following command:
Command: openssl req -new -key privkey.pem -out signreq.csr
You can also generate CSR by providing the extra certificate information in the command line arguments:
Command: openssl req -new -key privkey.pem -out signreq.csr -subj “/C=IN/ST=Punjab/L=Mohali/O=Yeahhub Infotech Ltd./OU=Yeahhub/CN=www.yeahhub.com/emailAddress=info@yeahhub.com”

Step 3 – Sign the CSR with Key
This is almost the last step to sign the CSR with private key. Here in below example, we are signing the certificate request with the same key that was used to create it.
Command: openssl x509 -req -days 365 -in signreq.csr -signkey privkey.pem -out certificate.pem

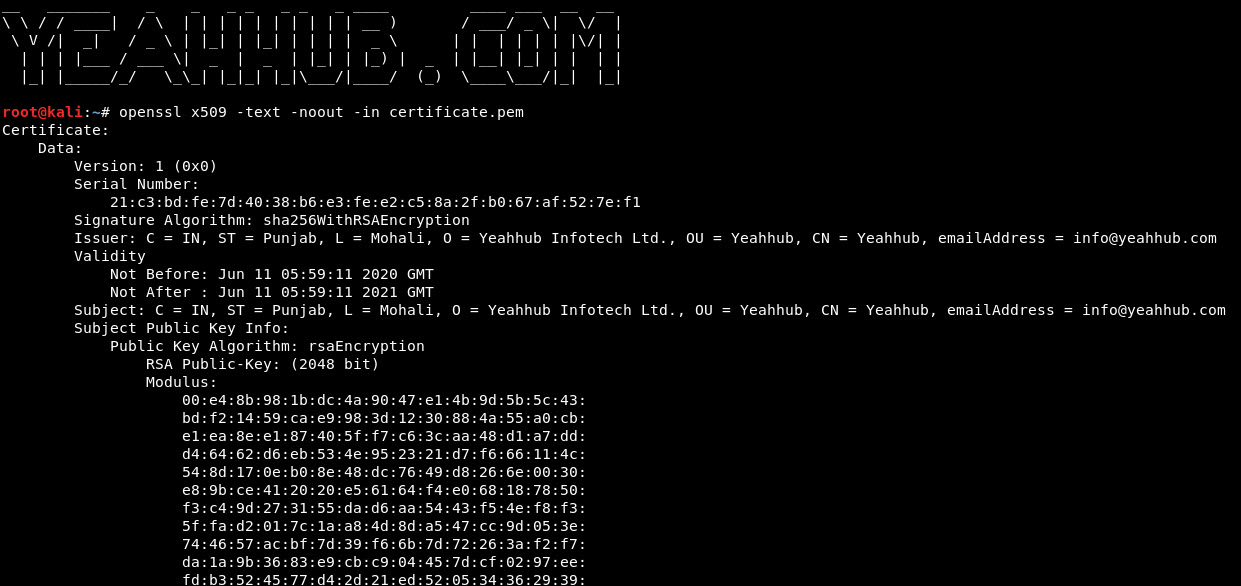
And to view and verify the details of a certificate, you can use the following command:
Command: openssl x509 -text -noout -in certificate.pem
Furthermore, you can even create a self signed certificate with a single command without creating the Intermediate CSR file.
Command: openssl req -newkey rsa:2048 -nodes -keyout privatekey.pem -x509 -days 36500 -out newcertificate.pem

Similarly, you can also add all command line arguments like Country Name, State Name etc to avoid the interactive prompt:
Command: openssl req -newkey rsa:2048 -nodes -keyout privkey.pem -x509 -days 36500 -out newcertificate.pem -subj “/C=IN/ST=Punjab/L=Mohali/O=Yeahhub Infotech Ltd./OU=Yeahhub/CN=www.yeahhub.com/emailAddress=info@yeahhub.com”


