
Today, Wireless Network has become more and more present in open area or large companies and security enhancement is needed to control authentication and confidentiality. The 802.11 Working Group introduced the 802.11i amendment as the final stage of the Robust Security Network standard, superseded the old WEP technology.
Today we’ll show you a detailed step by step tutorial which explains how you can connect to a Wi-Fi network in Kali Linux from terminal.
The first step is to find the available wireless adapters which you can easily list out all by typing the following command:
Command: iw dev
iw is a new nl80211 based CLI configuration utility for wireless devices. It supports all new drivers that have been added to the kernel recently. The old tool iwconfig, which uses Wireless Extensions interface, is deprecated and it’s strongly recommended to switch to iw and nl80211.
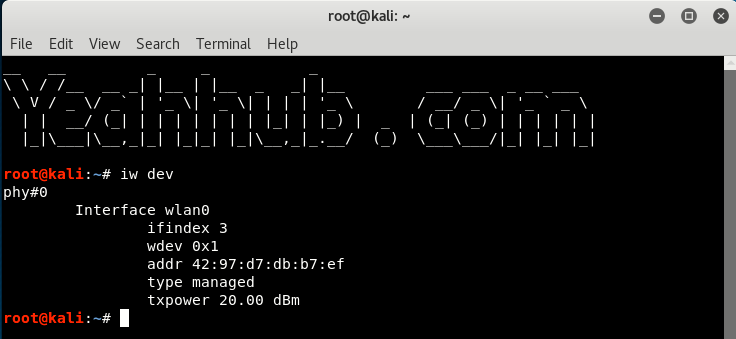
From above output, it seems that we’ve only single wireless adapter whose interface name is “wlan0” and designated as phy#0 and of type managed (means the device is a Wi-Fi station or client that connects to an access point) and hardware address (Mac Address) is 42:97:d7:db:b7:ef.
Alternatively, you can also find out all the above things by typing “iwconfig“.
Next step is to check the device status whether your wireless device is UP or DOWN by typing the following command:
Command: ip link show wlan0
ip is used to show / manipulate routing, devices, policy routing and tunnels. It is used for enabling/disabling devices and it helps you to find general networking information.

Use the following command to bring up the wifi interface i.e. wlan0:
Command: ip link set wlan0 up
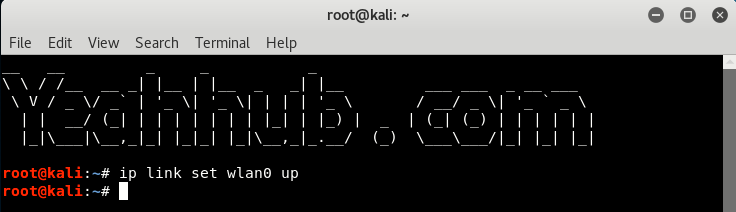
Now confirm the same by typing, “sudo ip link show wlan0” to check the status, and now it shows UP 🙂

You can also check the WiFi network connection status by typing “iw wlan0 link” which shows Not Connected at this time, because we didn’t connect yet.

Next step is to scan all WiFi networks near by your adapter by typing the following command:
Command: iw wlan0 scan
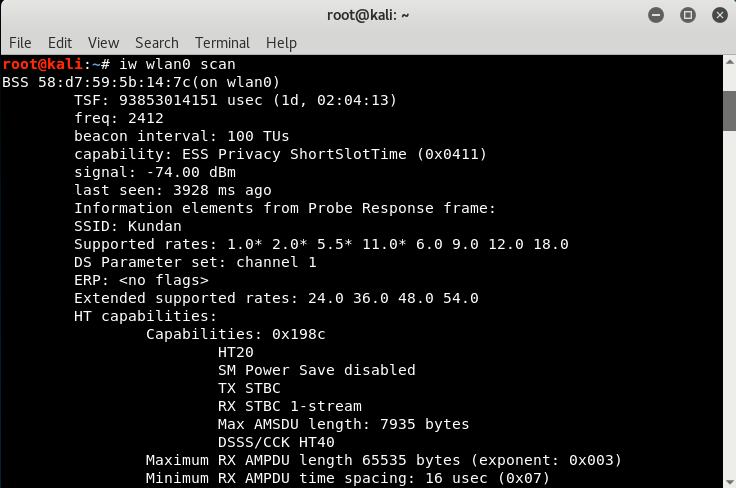
In below screen, as you can see that the SSID name is “Yeahhub” which we need to connect and the security protocol is RSN, also commonly referred to as WPA2 Protocol.

Now we’ll generate a configuration file for wpa_supplicant that contains the pre-shared key (password) for the WiFi network
Command: wpa_passphrase Yeahhub >> /etc/wpa_supplicant.conf
In this case, our Yeahhub wireless password is “12345678“.
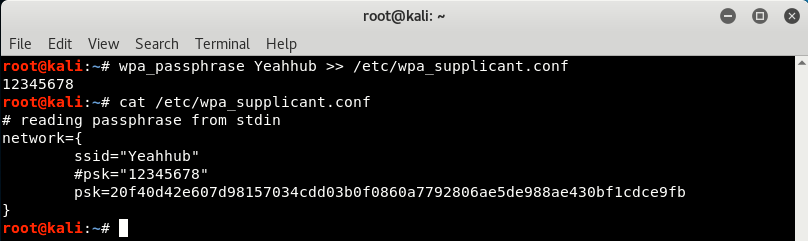
wpa_passphrase will create the necessary configuration entries based on your input. Each new network will be added as a new configuration (it wont replace existing configurations) in the configurations file /etc/wpa_supplicant.conf.
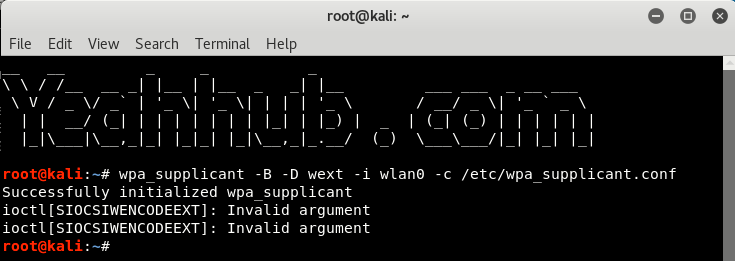
Now we’ve the configuration file, SSID name, we can use it to connect the wifi network using wpa_supplicant command as shown below:
Command: wpa_supplicant -B -D wext -i wlan0 -c /etc/wpa_supplicant.conf
wpa_supplicant is a WPA Supplicant for Linux, BSD, Mac OS X, and Windows with support for WPA and WPA2 (IEEE 802.11i / RSN). It is suitable for both desktop/laptop computers and embedded systems. Supplicant is the IEEE 802.1X/WPA component that is used in the client stations. It implements key negotiation with a WPA Authenticator and it controls the roaming and IEEE 802.11 authentication/association of the wlan driver.
Here,
- -B means run wpa_supplicant in the background,
- -D specifies the wireless driver, wext is the generic driver,
- -c specifies the path for the configuration file.
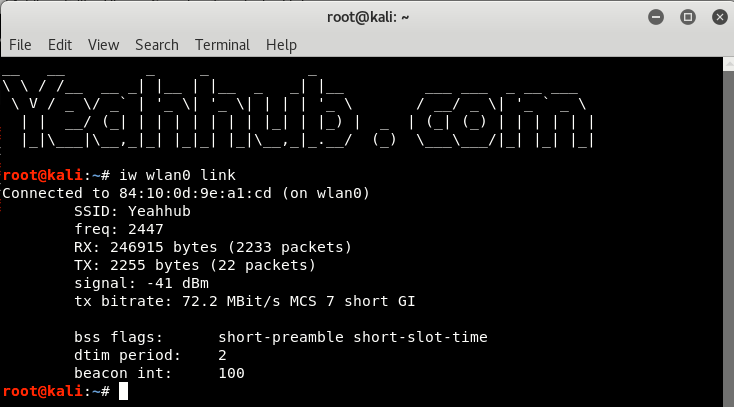
Use the iw command to verify that you are connected to same SSID or not.
Command: iw wlan0 link
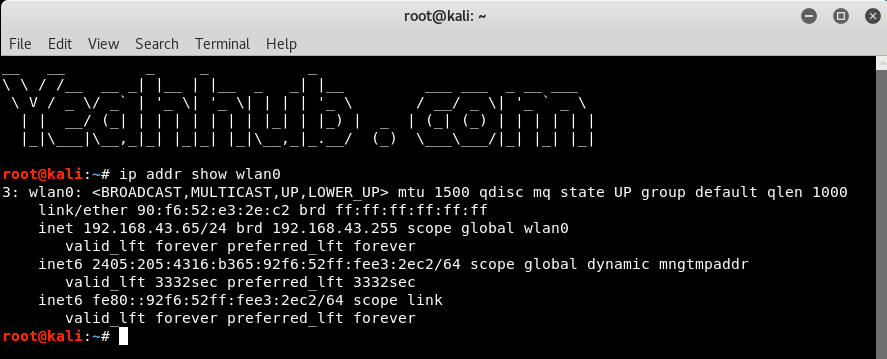
If in case, you aren’t getting any IP Address, then you can easily get it via “dhclient wlan0” command.
To check the IP Address, type “ip addr show wlan0” which seems that we got our IP address which is 192.168.43.65
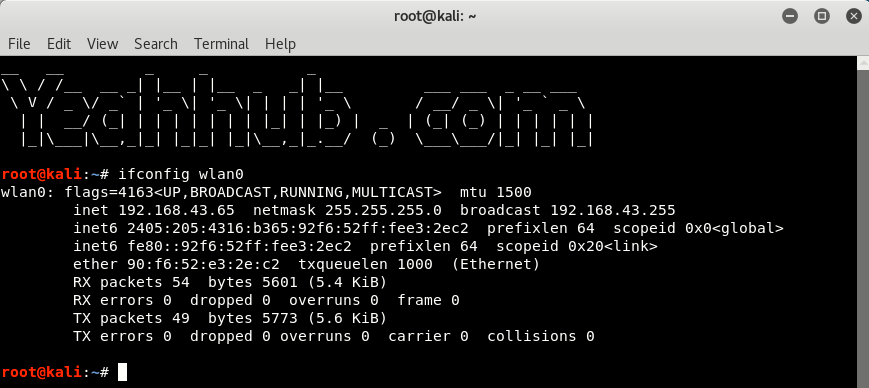
You can also confirm it by typing “ifconfig wlan0“.
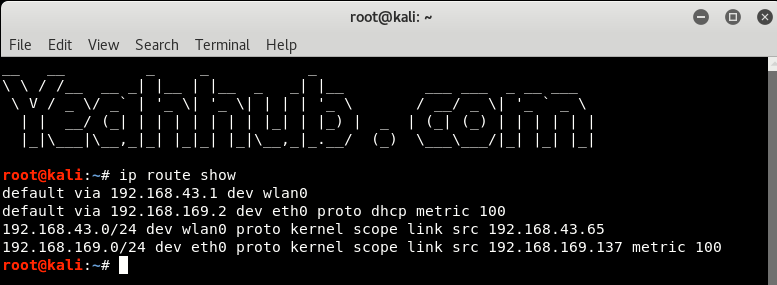
The last configuration step is to make sure that you have the proper routing rules which you can confirm by typing “ip route show“.
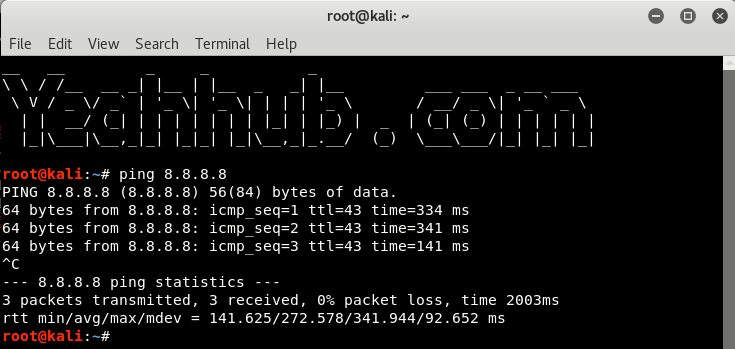
Now Ping Google’s Public DNS IP to check the network connectivity or simply you can browse any website.
In case, if you are getting some problem/error then you can set routing manually by typing “ip route add default via 192.168.43.1 dev wlan0”


how do you undo all this as now i managed to get my gui working im connected to wifi but it says on the gui wifi that there is no wifi adapter