Network Mapper (Nmap) is one of the most effective and functional tools in Kali Linux. Nmap can be used to perform a large range of different scanning techniques and is highly customizable.
Nmap is by far the most popular information-gathering tool. It is a powerful tool that is used to scan a computer or a complete network for open ports along with services running on those ports. This information can be useful for professional auditors and pen-testers in order to target certain services to compromise the target. Passing the following command will list the various scan options available:
Command: nmap -h
Typing nmap [hostname] or nmap [ip address] will initiate a default scan. A default scan uses 1000 common TCP ports and has Host Discovery enabled.
Suggested Read: 5 Most Commonly Used Nmap Commands
[#] Scan Single IP Address/Domain –
Syntax: nmap <IP/Hostname>
The above command will initiate a default scan against the target. When the scan is complete, you should see an Nmap scan report similar to the one shown in the image below.
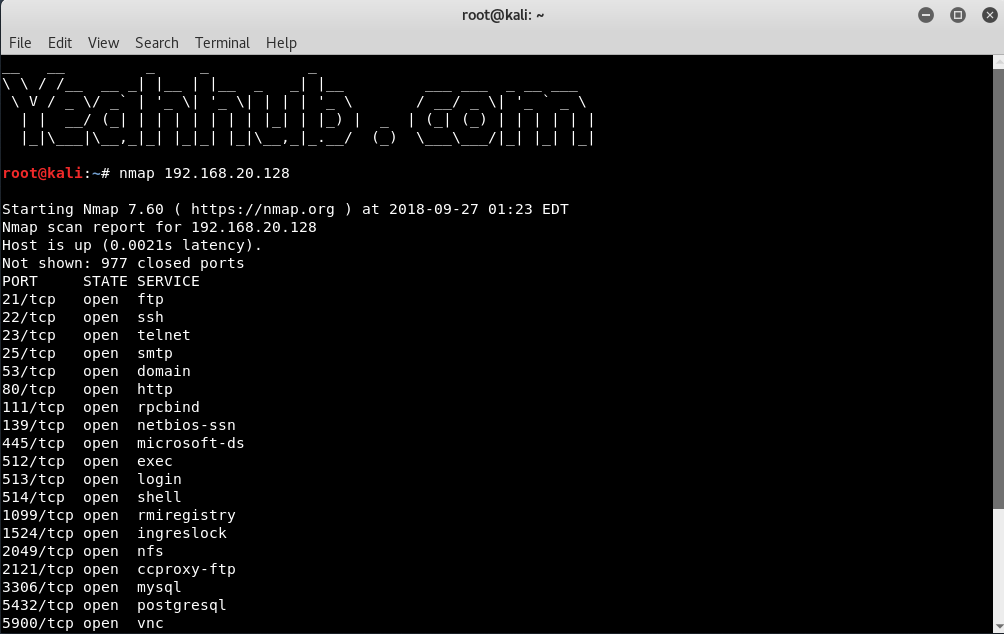
You will notice the information returned is PORT | STATE | SERVICE. Before we take a deeper dive into the commands, it would be valuable to know what the different “STATES” mean.
- Open – The target port actively responds to TCP/UDP/SCTP requests.
- Closed – The target port is active but not listening.
- Filtered – A firewall or packet filtering device is preventing the port state being returned.
- Unfiltered – The target port is reachable but Nmap cannot determine if it is open or closed.
- Open/Filtered – Nmap cannot determine if the target port is open or filtered.
- Closed/Filtered – Nmap cannot determine if the target port is closed or filtered.
Similarly, you can do the same for any target domain as shown below:
Syntax: nmap <domain>

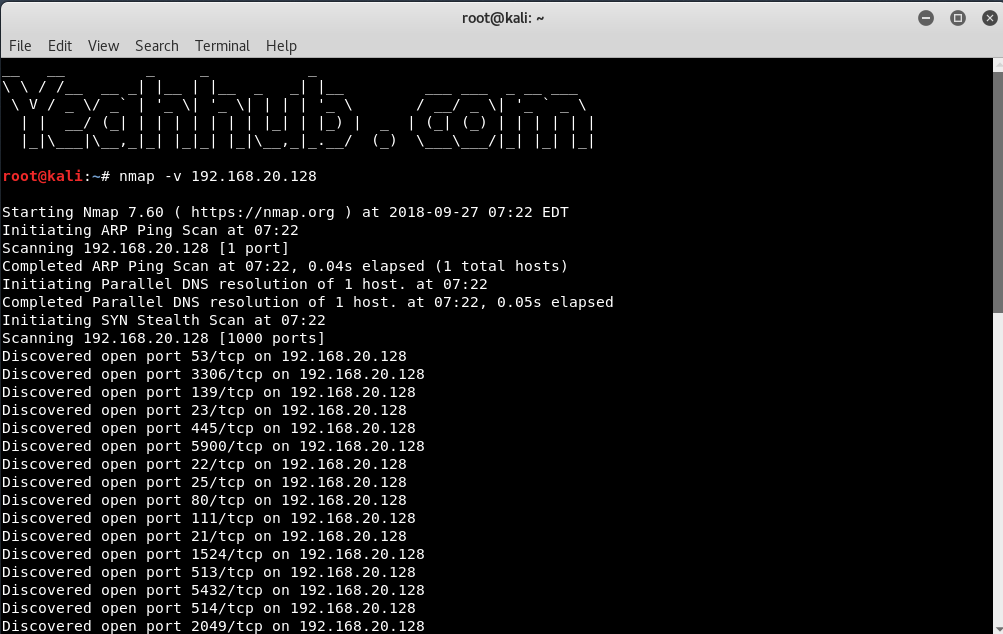
In case, if you want to increase the verbosity level, you can use -v option as shown below:
Syntax: nmap -v <IP/Domain>
[#] Scan a Range of IP Addresses –
If you want to specify a range like 192.168.20.1 to 192.168.20.128, then you can use the following command:
Syntax: nmap <IP Range 1 – IP Range 2>

[#] Scan Network for Active Computers (Skip the Port Scan) –
In its standard mode, nmap does two different types of scan: a host scan, to determine which hosts are available for further port scanning, and a port scan, which reveals the status of ports on available machines.
With -sn does no port scan, but it does a host scan, this is particularly useful when scanning a range with nmap, where it will print out those hosts that responded to the scan or you can say that, it will scan for active hosts only.
Syntax: nmap -sn <IP/Domain/Range>

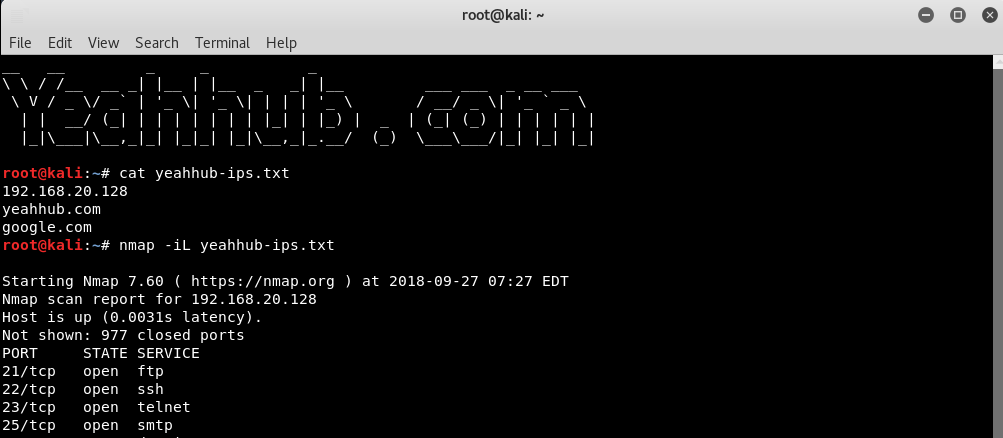
[#] Scan a List of Hosts From Input File –
Syntax: nmap -iL <file>
With this option, you can even pass a huge list of hosts. Entries can be in any of the formats accepted by Nmap on the command line (IP address, hostname, CIDR, IPv6, or octet ranges). Each entry must be separated by one or more spaces, tabs, or newlines.
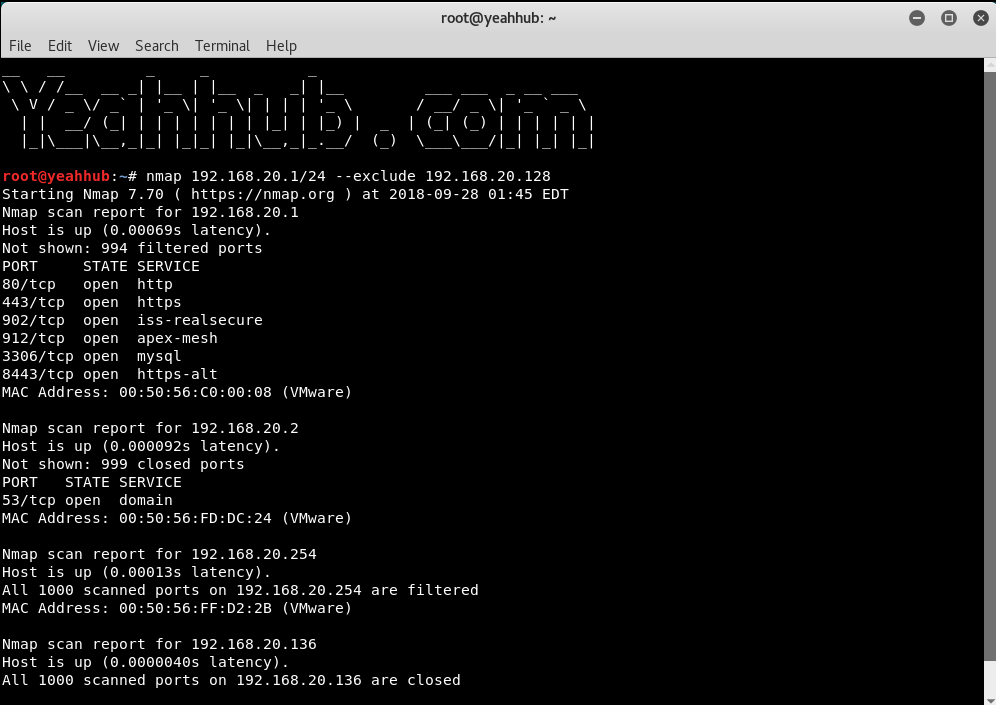
[#] Exclude IP/Hosts/Network –
You can even exclude any IP/Host/Network from the scan with option –exclude as shown below:
Syntax: nmap <IP-Range> –exclude <IP>
And in case, if you want to exclude a large number of hosts/IP then you can use –excludefile option.
[#] Scan for Specific Port –
The -p option specifies which ports you want to scan and overrides the default.
Individual port numbers are OK, as are ranges separated by a hyphen (e.g. 1-1023).
Syntax: nmap -p 80 <IP>

The beginning and/or end values of a range may be omitted, causing Nmap to use 1 and 65535, respectively. So you can specify -p- or -p “*” to scan ports from 1 through 65535.
Syntax: nmap -p “*” <IP>

To scan for top most common ports, you can use –top-ports option.
For example, if you want to scan top most 10 ports for scanning against any target then the command should be:
Command: nmap –top-ports 10 <IP/Domain>

[#] Scan for TCP Ports –
TCP connect scan is the default TCP scan type when SYN scan is not an option. This is the case when a user does not have raw packet privileges. Instead of writing raw packets as most other scan types do, Nmap asks the underlying operating system to establish a connection with the target machine and port by issuing the connect system call.
Syntax: nmap -sT <IP>

And in case, if you want to scan for only particular TCP port, then the command is:
Syntax: nmap -p T:80 <IP>

[#] Scan for UDP Ports –
Similarly, you can do the same for UDP ports also with -sU option.
While most popular services on the Internet run over the TCP protocol, UDP services are widely deployed. DNS, SNMP, and DHCP (registered ports 53, 161/162, and 67/68) are three of the most common. Because UDP scanning is generally slower and more difficult than TCP, some security auditors ignore these ports.
Syntax: nmap -sU <IP>

[#] Perform a Fast Scan –
With -F option, nmap has capability to work in Fast mode.
Syntax: nmap -F <IP/Domain>

[#] Display the Reason status –
With –reason option, you can even display the reason for which port is in a particular state.
Syntax: nmap –reason <IP/Domain>

[#] Display only OPEN Ports –
Sometimes you only care about ports you can actually connect to (open ones), and don’t want results cluttered with closed, filtered, and closed|filtered ports.
Syntax: nmap –open <IP/Domain>

[#] Detect OS Detection –
With -O (Capital O), you can even detect the target Operating System behind it using TCP/IP stack fingerprinting. Nmap sends a series of TCP and UDP packets to the remote host and examines the responses. After performing dozens of tests, Nmap compares the results to its database and prints out the OS details if there is a match.
Command: nmap -O <IP/Domain>

[#] Service Version Detection –
The below command is used to scan for running service. Nmap contains a database of about 2000+ well-known services and associated ports. Examples of these services are HTTP (port 80), SMTP (port 25), DNS (port 53), and SSH (port 22):
Syntax: nmap -sV <IP>
Alternatively, you can use -A, which enables version detection among other things.

[#] Firewall Detection –
You can even find out a host if it is protected from Firewall/Packet Filters or not by typing the below command:
Syntax: nmap -sA <IP>

[#] MAC Address Spoofing –
Asks Nmap to use the given MAC address for all of the raw Ethernet frames it sends.
- If it is simply the number 0, Nmap chooses a completely random MAC address for the session.
- If the given string is an even number of hex digits (with the pairs optionally separated by a colon), Nmap will use those as the MAC.
- If fewer than 12 hex digits are provided, Nmap fills in the remainder of the six bytes with random values.
- If the argument isn’t a zero or hex string, Nmap looks through nmap-mac-prefixes to find a vendor name containing the given string (it is case insensitive).
- If a match is found, Nmap uses the vendor’s OUI (three-byte prefix) and fills out the remaining three bytes randomly.
The –spoof-mac option only affects raw packet scans such as SYN scan or OS detection, not connection-oriented features such as version detection or the Nmap Scripting Engine.

[#] TCP Null/Fin/Xmas Scan –
These three scan types exploit a subtle loophole in the TCP RFC to differentiate between open and closed ports.
Nmap exploits this with three scan types:
- Null scan (-sN) Does not set any bits (TCP flag header is 0).
- FIN scan (-sF) Sets just the TCP FIN bit.
- Xmas scan (-sX) Sets the FIN, PSH, and URG flags, lighting the packet up like a Christmas tree.
These three scan types are exactly the same in behavior except for the TCP flags set in probe packets. If a RST packet is received, the port is considered closed, while no response means it is open|filtered.
For Null Scan, the command is:
Syntax: nmap -sN <IP>

For FIN Scan, the command is:
Syntax: nmap -sF <IP>

For XMAS Scan, the command is:
Syntax: nmap -sX <IP>

[#] Stealthy Scan –
SYN scan is the default and most popular scan option for good reasons. It can be performed quickly, scanning thousands of ports per second on a fast network not hampered by restrictive firewalls.
It is also relatively unobtrusive and stealthy since it never completes TCP connections.
SYN scan works against any compliant TCP stack rather than depending on idiosyncrasies of specific platforms as Nmap’s FIN/NULL/Xmas, Maimon and idle scans do.
It also allows clear, reliable differentiation between the open, closed, and filtered states.
Syntax: nmap -sS <IP>

[#] Disable Host Discovery –
It tells Nmap to never do reverse DNS resolution on the active IP addresses it finds. Since DNS can be slow even with Nmap’s built-in parallel stub resolver, this option can slash scanning times.
Syntax: nmap -Pn <IP>

[#] Save Nmap Output –
Any security tool is only as useful as the output it generates. Complex tests and algorithms are of little value if they aren’t presented in an organized and comprehensible fashion. Given the number of ways Nmap is used by people and other software, no single format can please everyone. So Nmap offers several formats, including the interactive mode for humans to read directly and XML for easy parsing by software.
To simply save the result of Nmap, you can use the below command.
Syntax: nmap <IP> > filename.txt

In case, if you want to save the output of Nmap in XML format, then the command will be:
Syntax: nmap -oX filename.xml <IP>