WHM or Web Host Manager is a powerful program that permits administrative access to cPanel backend and also enables the user with more flexibility and control while managing some very popular resource intensive websites, or large no: of websites.
WHM not only enables the user to with the ability to sell web hosting services but also gives the option to create and manage multiple cPanel accounts with various options. WHM saves your money and time by automating and streamlining the tedious task of server management. WHM allows you to manage all things under one roof.
Here we’ve explained 9 easy ways through which you can easily secure your WHM panel and improve your overall security for all hosted domains:
1. Disable Cpanel-ID Login
Basically, a Cpanel Server allows 2 types of logins –
The first is the default username/password and the second is to login to the server with a Cpanel-ID which allows users to deploy a single username/password to gain access to a wide variety of services whcih should be disabled for security purposes.
To Disable Cpanel-ID Login,
- Login to your WHM and navigate to Home -> Security Center -> Manage External Authentication
- Change the Cpanel-ID login to disable as shown in below screenshot.

2. Force HTTPS URL to access Cpanel/WHM
Well, we all knows that HTTPS provides an extra layer of security at transport layer which encrypts your data while transmitting from one sourc to another, so its always useful if you enforce your Cpanel/WHM login pages to access via HTTPS protocol only.
To force HTTPS,
- Login to your WHM and navigate to Home -> Server Configuration -> Tweak Settings
- Scroll to Redirection tab and use the following settings as shown in below screenshot.

3. Use sFTP for File Transfer
From the name sFTP, it clearly seems that the sFTP(Secure File Transfer Protocol) encrypts both commands and data which also prevents passwords and other sensitive information from being transmitted in clear text over the network. Cloudpages described 2 key methods on how to use sftp to securely transfer files
In simple FTP protocol, the transmission always carried out in clear text manner which is very risky inside a network.
To allow sFTP connection and disable plain FTP,
- Login to your WHM and navigate to Home -> Service Configuration -> FTP Server Configuration
- In TLS Encryption Support, Change it to “Required (Command)” option as shown in below screenshot.

4. Hide PHP Version Information
The PHP configuration, by default allows the server HTTP response header “X-Powered-By” to display the PHP version installed on a server. For server security reasons, it is recommended that you disable or hide this information from attackers who might be targeting your server by wanting to know whether you are running PHP or not.
This can be done by editing a line in PHP.INI file which is located at /etc/php.ini or you can directly change via WHM panel too
- Login to your WHM and navigate to Home -> Software -> MultiPHP INI Editor
- Go to Editor Mode and Select your current PHP Version from the drop-down list
- And find the option “expose_php“, change it to “OFF” as shown in below screenshot.

5. Disable Apache Header Information
When remote requests are sent to your Apache web server, by default, some valuable information such as the web server version number, server operating system details, installed Apache modules plus more, is sent along in server-generated documents back to the client.
This information is always good for attackers to exploit based on the Apache version and gain access to your web server. To disable your apache header information, you need to change two settings, i.e. ServerSignature and ServerTokens
This can be done by:
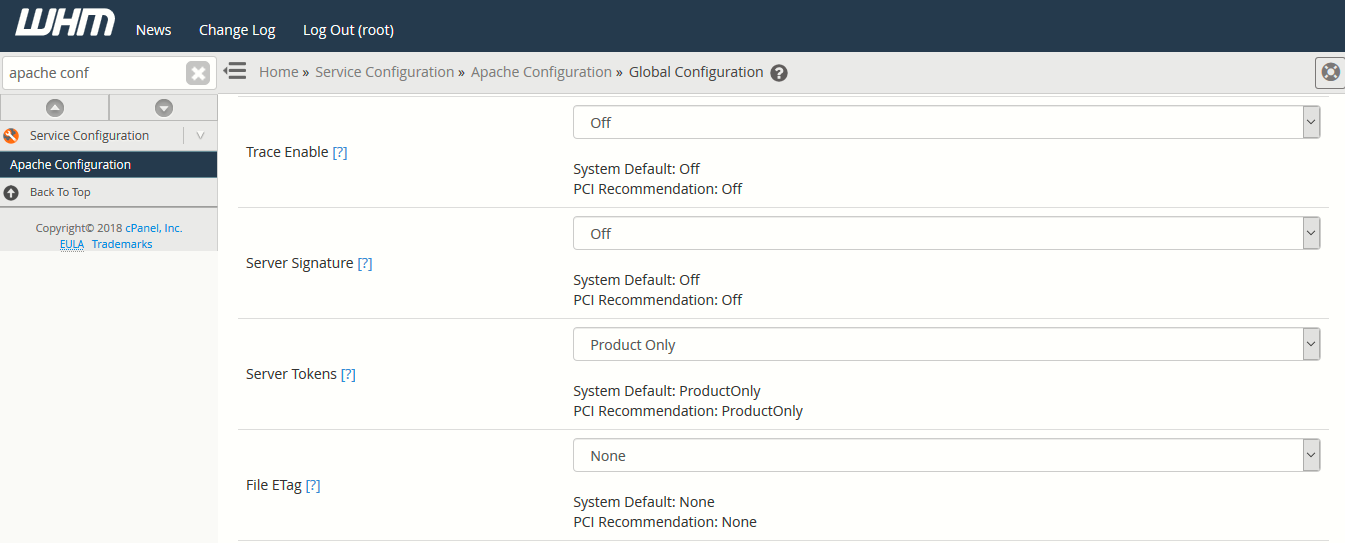
- Login to your WHM and navigate to Home -> Service Configuration -> Apache Configuration
- Go to Global Configuration and set the following values as shown in below screenshot:
Server Signature = OFF
Server Tokens = Products Only
6. Disable Ping Request
A Ping is a ICMP request, and it should be disabled to avoid Ping of Death and Flood type of attacks.
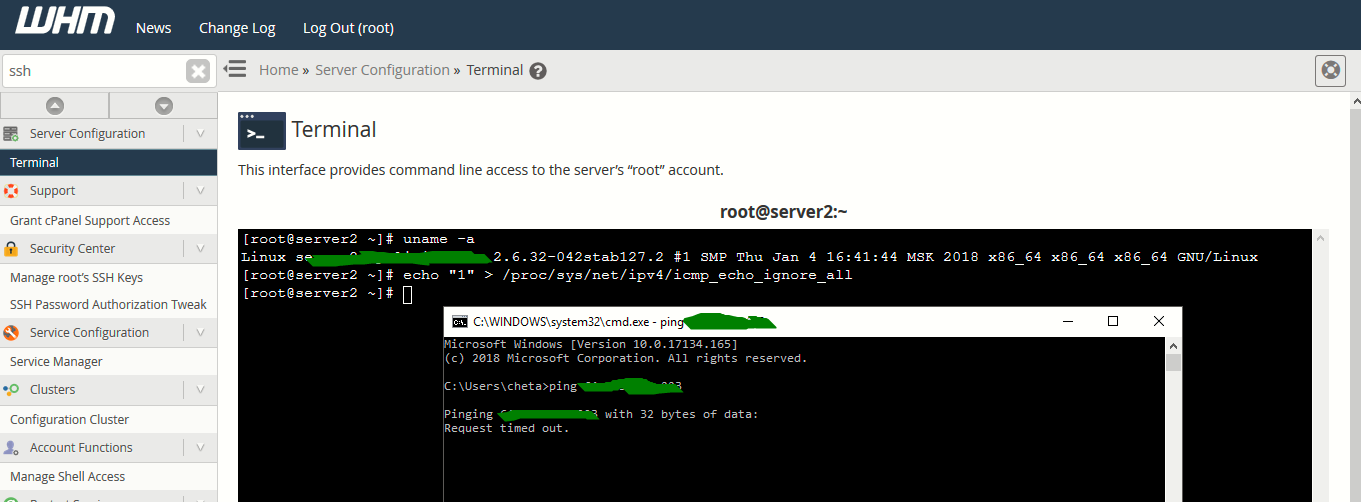
To disable Ping response, run the following command as a root user.
echo “1” > /proc/sys/net/ipv4/icmp_echo_ignore_all
You can also disable Ping response using Iptables as well by typing the following command from your terminal.
iptables -A INPUT -p icmp -j DROP
7. Enabling CPHulk Protection
By enabling CPHulk protection, actually protects your server against most bruteforce attacks.
To enable CPHulk Protection,
- Login to your WHM and navigate to Home -> Security Center -> CPHulk Brute Force Protection
- Click on Enable option as shown in below screenshot.

8. Setup ClamAV Antivirus
Linux servers are much secured than Windows servers but still its good if you install some kind of Antivirus which protects your Linux server from rootkits, Malwares, shells etc.
ClamAV is an open source antivirus for Cpanel Servers and allows individual users to scan their home directory and emails for potentially malicious files.
To install ClamAV,
- Login to you WHM and navigate to Home -> Cpanel -> Manage Plugins
- Enable ClamAV for Cpanel as shown in below screenshot

Furthermore, you can more configure your ClamAV antivirus by navigating to Home -> Plugins -> Configure ClamAV Scanner and set the following options as shown in below screenshot.

You can also set a CronJob for running ClamAV daily by typing the following command in your terminal via root.
Command: for i in `awk ‘!/nobody/{print $2 | “sort | uniq” }’ /etc/userdomains | sort | uniq`; do /usr/local/cpanel/3rdparty/bin/clamscan -i -r /home/$i 2>>/dev/null; done >> /root/infections&

This command recursively searches the home directory for spam and infected files.
9. Configure Host Access Control
In some cases, you might want to allow some specific services to some specific IP only which is always a great option. In order to accomplish this goal, all you need to do is properly configure your Host Access Control which helps you to create rules based on Allow/Deny.
In order to do this,
- Login to your WHM and navigate to Home -> Security Center -> Host Access Control
- Here you need three things if you want to configure a rule for SSH service as shown in below screenshot.
Following is an example of locking down SSH service:
| Daemon | Access List | Action | Comment |
| sshd | 192.168.1.3 | allow | Allow local SSH |
| sshd | 122.xxx.xxx.xxx | allow | Allow SSH from my IP |
| sshd | ALL | deny | Deny all others |

Other things which you can also do in context of server security are:
- Secure SSH (Change SSH Port, Disable Root Login and Disable SSHv1 Protocol)
- Setup CSF (Config Server Firewall)
- Setup Mod_Security Firewall
- Install Rootkit Hunter
- Install Linux Malware Detect Scanner (Maldet)
By implementing above all tips to your VPS or dedicated server you will immediately reduce your vulnerability to attacks both internally and externally and boost your system’s security within a matter of hours.
For any kind of help/query, feel free to contact us at yeahhub@gmail.com.