The Apache Web server is a remarkable piece of software. The basic package distributed by the Apache Software Foundation is quite complete and very powerful, and a lot of effort has gone into keeping it from suffering software bloat. One facet of the package makes it especially remarkable: it includes extensibility by design.
Apache is the dominant web server on the Internet today, filling a key place in the infrastructure of the Internet. Apache has more than twice the market share than its next competitor, Microsoft. This is not just because it is freeware and costs nothing.
It is also open source, which means that the source code can be examined by anyone so inclined. If there are errors in it, thousands of pairs of eyes scan it for mistakes. Because of this constant examination by outsiders, it is substantially more reliable than any commercial software product that can only rely on the scrutiny of a closed list of employees. This is particularly important in the field of security, where apparently trivial mistakes can have horrible consequences.
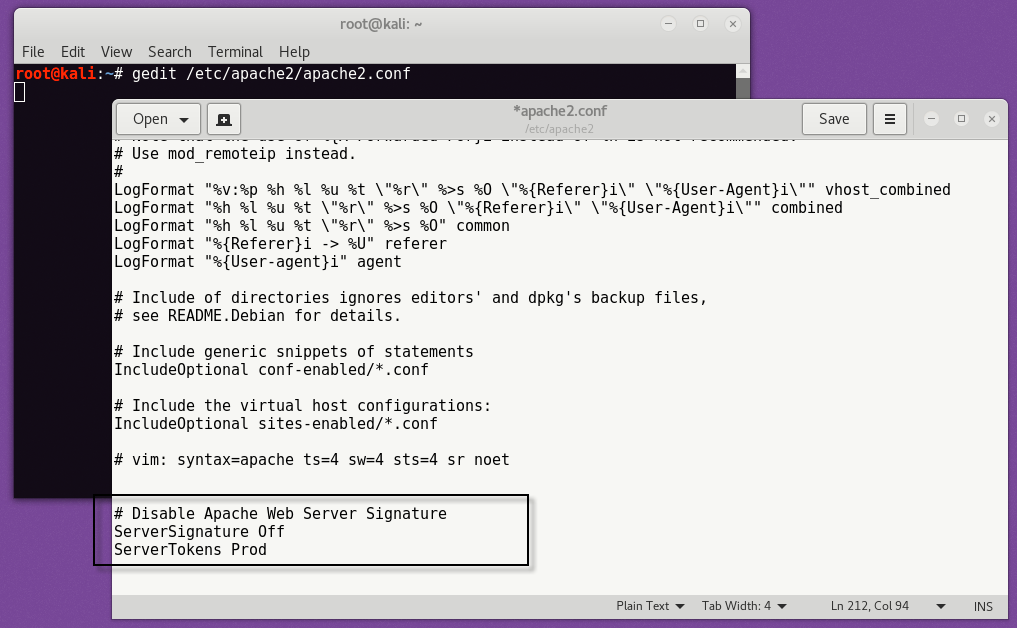
To Disable Apache Web Server Signature –
To disable the Apache’s web server signature, edit the following file and embed the following code into it as per below screenshot.
File Name – /etc/apache2/apache2.conf
Code –
ServerSignature Off
ServerTokens Prod
To Hide PHP Version –
To hide the version of PHP, just edit the php.ini file and turned off the environment variable so called as “expose_php” as per below screenshot.
File name – /etc/php/7.0/apache2/php.ini
Code – expose_php = Off

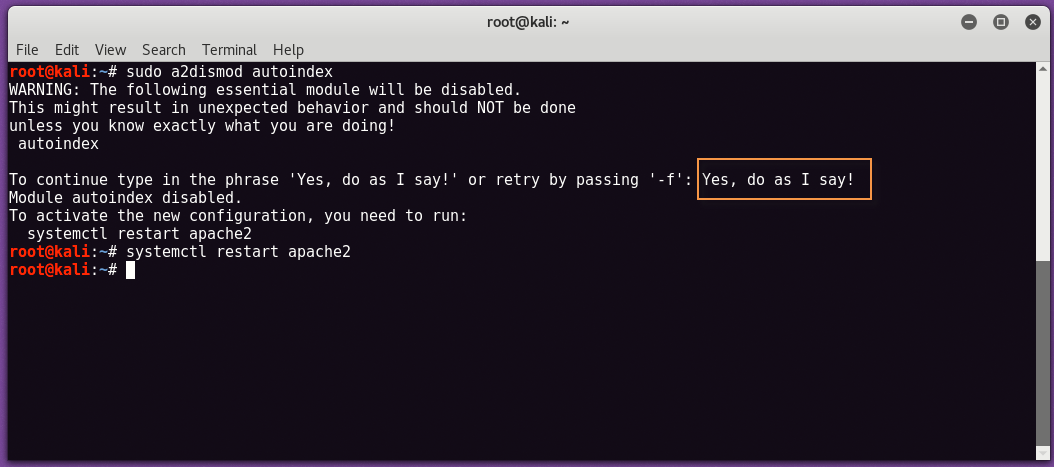
To disable Directory Browsing Globally –
To disable the directory browsing, just run the following command into your and don’t forget to restart your Apache server.
Command: sudo a2dismod autoindex
To Securing root directory –
To secure the root directory, you need to uncomment the below lines in file “/etc/apache2/conf-enabled/security.conf“ as per below screenshot;

And add the following piece of code in the same file i.e. “/etc/apache2/conf-enabled/security.conf“.
<Directory /var/www/html>
Options None
AllowOverride All
Order Allow,Deny
Allow from All
</Directory>

To disable SSLv2 and SSLv3 –
In order to disable SSL 2.0 and SSL 3.0 and make sure that the stronger TLS protocols are used; edit the following file “/etc/apache2/mods-available/ssl.conf” and the change the SSLProtocol to:
Code: SSLProtocol -all +TLSv1

To disable Weak Ciphers –
It is again very important to disable the weak ciphers when you are using SSL. To disable it, just change the SSLCipherSuite code as per below code & screenshot:
Code: SSLCipherSuite HIGH:!MEDIUM:!aNULL:!MD5:!RC4

Limit the HTTP Methods –
HTTP Methods always plays an important role in website security especially when we talk about GET and POST. To disable HTTP Methods, either you can use whitelisting approach or blacklisting approach.
In below code, we are only allowing the 3 methods i.e. GET, POST and HEAD in following file:
File: /etc/apache2/mods-available/userdir.conf

Set Cookie with HttpOnly and Secure Flag –
To set the cookie parameters, you need to run the following command in your terminal.
Command: sudo a2enmod headers
Don’t forget to restart your Apache web server by typing “systemctl restart apache2”

Additionally, you also need to add the following code in same security.conf file under “/etc/apache2/conf-available/security.conf”
Code: Header edit Set-Cookie ^(.*)$ $1;HttpOnly;Secure

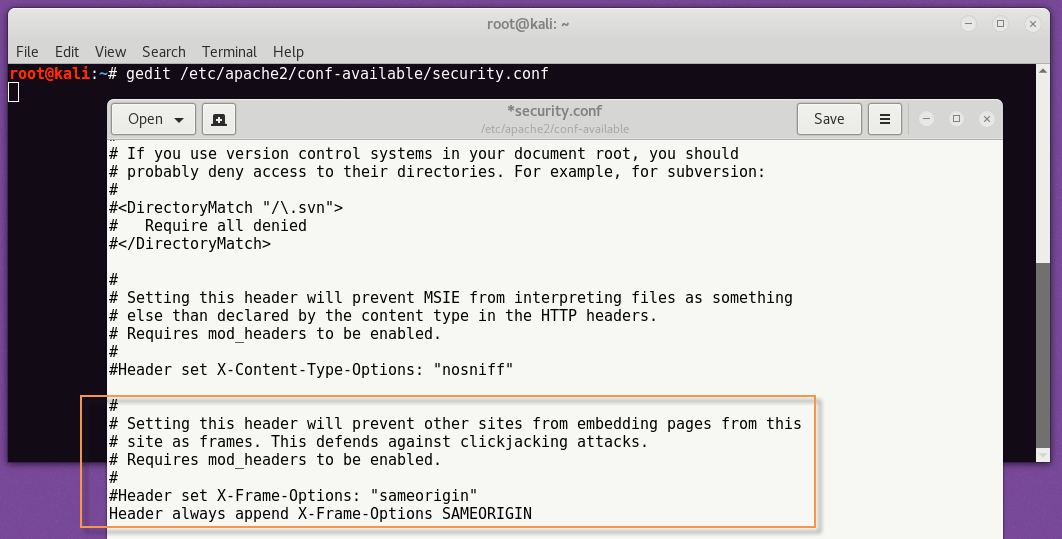
Prevent ClickJacking Attacks –
To prevent your website from clickjacking attacks, you just need to add the following code into same security.conf file which we used above for setting up the cookie values.
Code: Header always append X-Frame-Options SAMEORIGIN
For XSS (Cross Site Scripting) Protection –
One way is to sanitize the variable before passing to the SQL Query which actually gives you the XSS protection from being hacked/attacked and along with you need to add the X-XSS-Protection Header value to 1 by adding the following code in “/etc/apache2/conf-available/security.conf” file.
Code: Header set X-XSS-Protection “1; mode=block”

Enforce HSTS (Secure connections to the server) –
To enforce HSTS, you just need to set the Strict-Transport-Security Header value which includes your all domains and sub-domains.
Code: Header always set Strict-Transport-Security “max-age=31536000; includeSubDomains”

MIME Sniffing Protection –
For this, you need to enable the following code from /apache2/conf-available/security.conf file and put nosniff as a value.
Code: Header set X-Content-Type-Options: “nosniff”

Prevent XSS and other Injections –
To prevent other injections other than XSS, you also need to set the Content-Security-Policy Header by adding the following piece of code into “/etc/apache2/conf-available/security.conf” file.
Code: Header set Content-Security-Policy “default-src ‘self’;”

Decrease Timeout Value –
You should decrease the timeout value to 60 from 300.

And last but not least, don’t forget to restart your Apache server by typing “service apache2 restart” in your same server which you can easily see the service status by typing the following command in below screenshot.

In below screenshot, you can easily see all the header values which we set in our local web server Apache in Kali Linux machine.


