Like many successful dot-com era startups, Amazon found itself with an enviable problem at the turn of the century: the scale of their business had grown beyond the capacities of any available pre-packaged software solutions.
AWS calls their individual data centers Availability Zones or AZs. Each data center has multiple redundant power and bandwidth providers, and AZs are organized into Regions which are collections of physically close data centers that are interconnected via high-bandwidth, low-latency fiber.
Amazon currently has 11 Regions (although one is strictly for U.S. government use), and each region has between one and five AZs. For production use, AWS recommends only using regions with two or more AZs, but they have launched some Regions, like Beijing, in beta mode with only a single AZ.
Although AWS currently offers nearly 50 services, there are a select few that provide the majority of the utility and benefits. If your company starts using AWS, it’s likely that it will be for one or more of the following services:
- Simple Storage Service (S3)
- Elastic Compute Cloud (EC2)
- Elastic Block Store (EBS)
- Relational Database Service (RDS)
- Elastic Load Balancer (ELB)
- AutoScaling
- CloudWatch
In this article, we’ll go with EC2 server which is one the most popular way to run node.js applications.
What we cover –
- Configuring AWS Server
- SSH into the server
- Installing Node.js
[#1] Configuring AWS Server –
Let’s create a new account on AWS server by clicking “Create an AWS Account” link showing at top-right side.
Make sure that you’ll use a valid email address and a real phone number while creating the account because you need to verify both things before to get into the console dashboard.
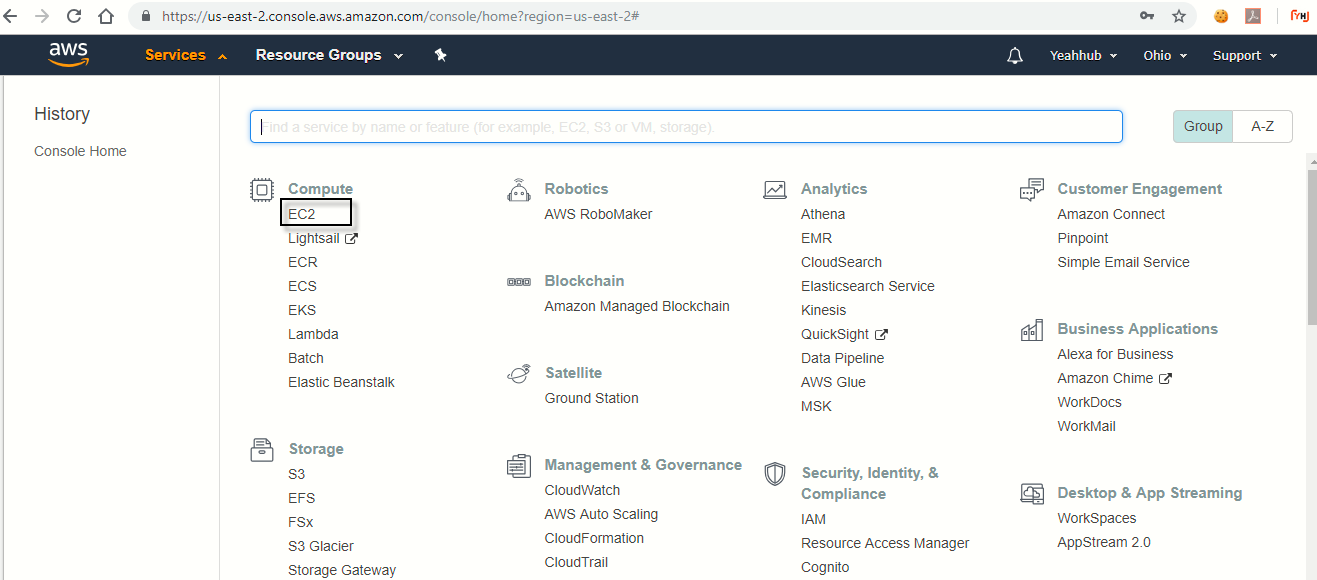
Once logged into your AWS account, Click Services on the navigation bar and select EC2 option under compute category.
Amazon EC2 is a web service that provides compute capacity in the AWS cloud. Amazon EC2 allows you to configure the memory, CPU, instance storage, and your choice of operating system and applications.
You can bundle the operating system, application software, and associated configuration settings into an Amazon Machine Image (AMI). Then, use it to provision or decommission multiple virtualized instances using web service calls. EC2 instances can be resized and the number of instances scaled, up or down, to match your requirements or demand.
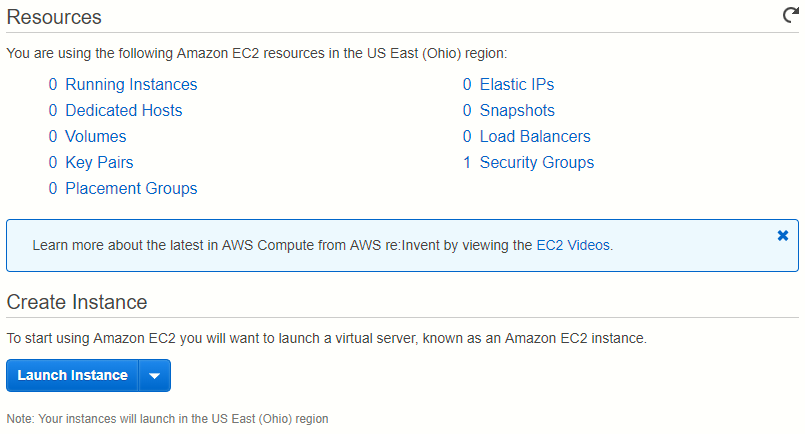
After that you need to click on Launch Instance button which will start the process of provisioning an EC2 instance.
Next you need to choose the right AMI (Amazon Machine Image) as per your requirement.
There are different version of Windows/Linux servers are available but most servers run Linux (Ubuntu) for deploying node.js applications.
Note – Windows servers are only useful for specialized applications such as .NET.
So we choose to go with UBUNTU 18.04 Server machine because it is most widely used machine.

After selecting an AMI image, the next option is to choose Instance type.
The instance type is a virtual server that will run your application. Select t2.micro instance, which is included in the free-tier for a period of 1 year.
And then click on “Next: Configure Instance Details” button.

Here we’ve several options at each step and we need to make the most appropriate choices which is more complicated but you can ignore most of it now.
So simply click on “Next: Add Storage” button to provision persistant storage as shown below:

This persistent storage is also known as ESB (Elastic Bloc Storage) which comes up with default 8GB of storage which is sufficient for deploying a basic node.js application.
EBS does not go away when the system reboots or crashes. It is the hard disk for your EC2 instance. Up to 30 GB of disk is available in the free tier, which is sufficient for most applications.
Select General Purpose SSD (GP2) from Volume Type column. The data access speed of the disk is proportional to the size of the disk. It is defined in terms of IOPS which stands for input output operations per second. One IOP is defined as a block of 256 KB data written per second.
Next Click on “Next: Add Tags” button to tag the EC2 instance.

Tags do not have any semantic value and are treated purely as strings in a key-value form. You can work using the tags with the AWS management console, EC2 API and EC2 command-line interface tools.
We don’t need any tags but they are useful for when you have a large number of instances and you need to filter and search through them.
Click on “Next: Configure Security Group” button.

A Security Group is a config for your server, telling it which ports it should expose to which IP address.
Here, you need to click on “Create a new security group” radio option and add the two ports i.e. 80 and 22 into it.
Port 80 is for HTTP Protocol and Port 22 is for SSH so that you can access the server by remotely logging into it. There is a warning about the source being 0.0.0.0/0 which allows us to SSH from any IP address however this is fine because this option can only be useful if you’re on VPN or some kind of private network which could limit your SSH access only for those IPs.
Next Click on “Review and Launch” button.

Next, you can review all the options which you’ve selected, and modify them, if required.
Click on Launch to launch the instance.

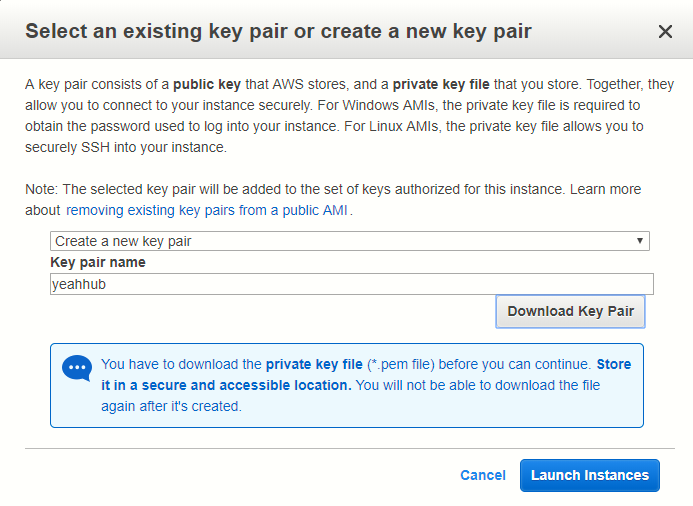
Upon launch, the EC2 instance will prompt you to select the public/private key pair.
Choose create a new key pair, and name the key, we named it “yeahhub“. Click Download Key Pair. This should download a yeahhub.pem file which can be used to SSH into the server. The key pair once assigned to instance cannot be changed. Make sure you store your private key, securely.
Keep this file safe because anyone can connect to your server using it, if you lose the file you will need to generate a new one.
So you’re are almost ready and it takes few minutes to ready your instance.

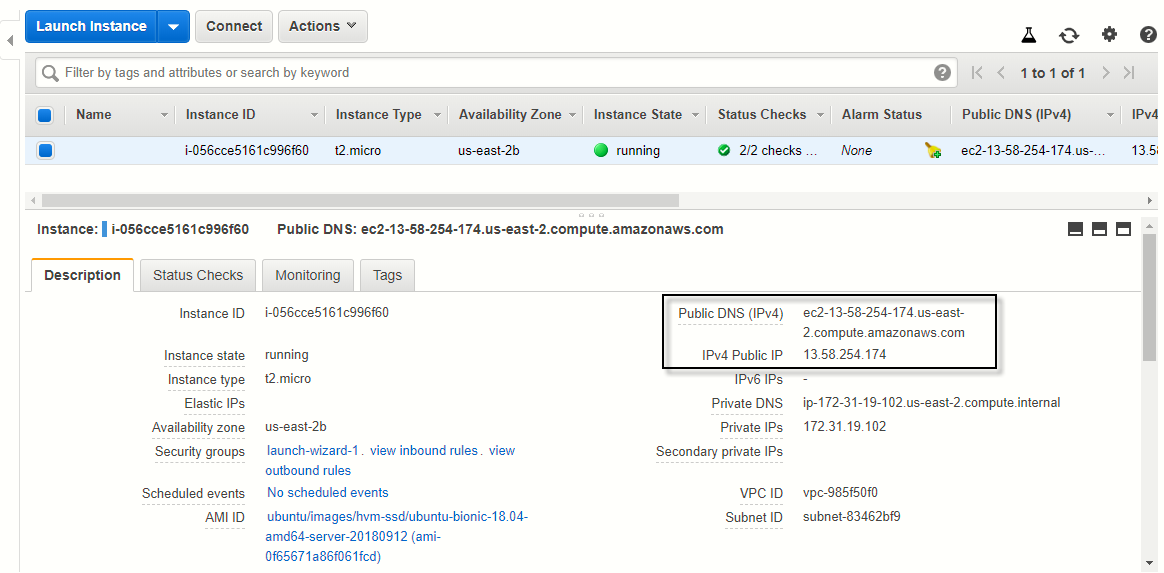
After the EC2 instance is up and running, you should see it listed in the console. You can review the details of the instance to ensure that it is as per what you configured.
The EC2 instance is assigned an IP address from the VPC subnet, in this case, it is 13.58.254.174. This EC2 instance can be used only for communication between the instances in your VPC.
And in case, if you want to stop the instance, then right click on the instance and navigate to “Instance State” and click on Stop which instantly stops your instance.
Once the Instance State is Running then you are ready to SSH in.

[#2] SSH into your server –
Now again right click on your instance and click on “Connect” button which opens a prompt screen with all the details and procedure for login.

Before to login into SSH, make sure that you’ve moved your .pem key pair (yeahhub.pem) file into ~/.ssh folder which is a hidden folder.

Furthermore, you need to give 400 permissions to your .pem file by typing “chmod 400 yeahhub.pem” command.
Now, you can login remotely. The default user name for Ubuntu AMI’s is ubuntu, the IP address to connect to is the EIP of the EC2 instance is ec2-13-58-254-174.us-east-2.compute.amazonaws.com.
Type Yes when you get a warning that the authenticity of the host 13.58.254.174 can’t be established.
Note – By default, connecting to your instance without a username will try to login as root which is generally not allowed.

[#3] Installing Node.js –
Once you are logged in to the server, the first thing you need to install is NVM (Node Version manager) by typing the following command:
Command: curl -o- https://raw.githubusercontent.com/creationix/nvm/v0.34.0/install.sh | bash
This command pulls down a script from a remote URL and runs it.

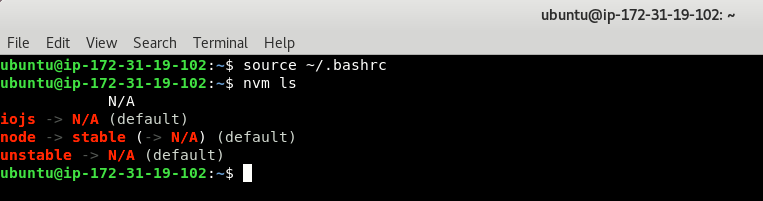
You now have NVM! But if you run “nvm ls”command you will see that it’s not found.
This is because NVM adds some code to your ~/.bashrc. This file is a special file that is run every time you log in to your instance, so to get NVM running you could logout and login again.

However you can just run the file manually by using the source command as shown below:
Command: source ~/.bashrc
Now running nvm ls works! But there aren’t any node versions installed!
To get the latest version, just type nvm install <latest version number> as shown below:
Command: nvm install 7

And to the check the node version, the command is “node –version“.

Now you need to make a public URL so that anyone can request to your server from a browser application.
So make a directory named “server” and cd into it where you need to run the following command:
Command: npm init
The above command will create a package.json file which will be used to track all dependencies.
By running npm init command, it will ask for some info like name, version, description etc, simply press enter to use all the defaults.

Now you need to install the express package to make it fully run.
Command: npm install express –save-dev
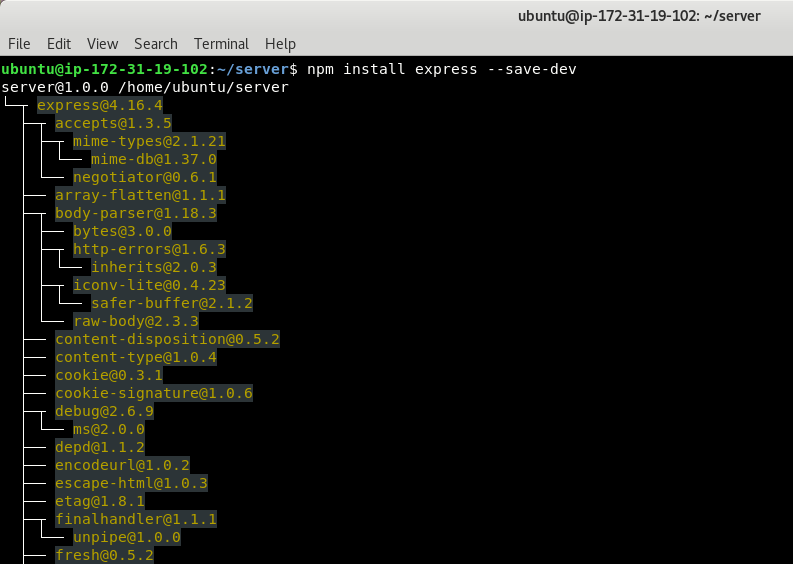
Now you should have a node_modules directory and package.json file.

Now we just need to add some code to run the server. We will use nano to write the server in an index.js file.
Code:
const express = require(‘express’)
const app = express()
app.get(‘/’, (req, res) => {
res.send(‘HELLO YEAHHUB USERS!’)
})
app.listen(3000, () => console.log(‘Server running on port 3000’))
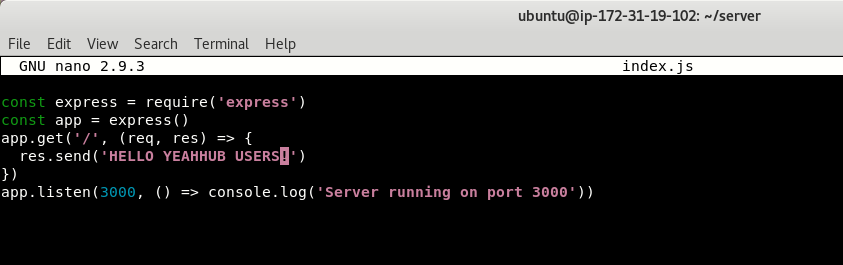
Press CTRL + x to exit, ensuring you save when you exit by pressing y followed by enter.
Now you can use node to start the server by tying the following command:
Command: node index.js

Once listening, this should log “Server running on port 3000“.
You may have noticed however we didn’t open our server traffic to port 3000, we opened it to port 80.
Port 80 is a privileged port and running the server there using Node.js is unusual, generally using a router is better. If you change the index.js file to use 80 and then run node index.js you will notice you get a permission denied error.
So you need to open the 3000 port from the security group.
Right click the security group you setup and click on “Edit Inbound rules” option.

Click on “Add Rule” button and add the Custom TCP rule on port 3000, open to anywhere.
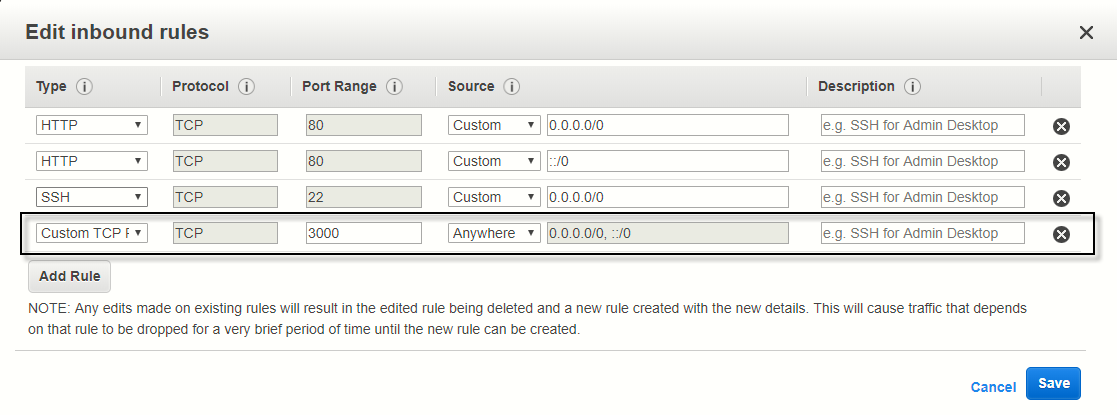
Click Save. You should now have access to the server! Using a browser, visit your public DNS URL with port 3000 and you should see the response.

AWS takes its role in security extremely seriously, and has successfully managed to create the seemingly impossible strong security that is not overbearingly difficult to use. In addition to the many practices, AWS also ensures that a customer’s first login to an EC2 instance can only be performed by the customer themselves.


