
MAC Address generally called as Multimedia Access Control, and you should change your MAC Address before to do any hacking activity through Kali Linux so that no one can trace you actually back.
Before to change or assign new MAC Address to any interface, make sure that you must down that interface and then run the command for changing the MAC Address.
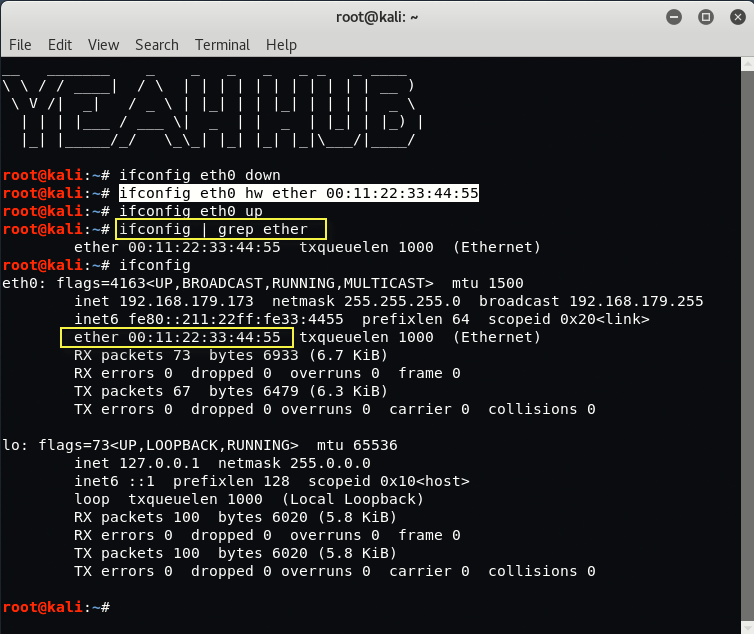
For Example, if you want to change the MAC Address of eth0 (Ethernet-0) interface, then you need to turn down that interface by typing “ifconfig eth0 down” command in your terminal. After that you need to run the following command which actually changes your MAC Address of eth0 interface quickly.
Command: ifconfig eth0 hw ether 00:11:22:33:44:55
After that just UP that eth0 interface by typing “ifconfig eth0 up” in same terminal as shown in below screenshot.
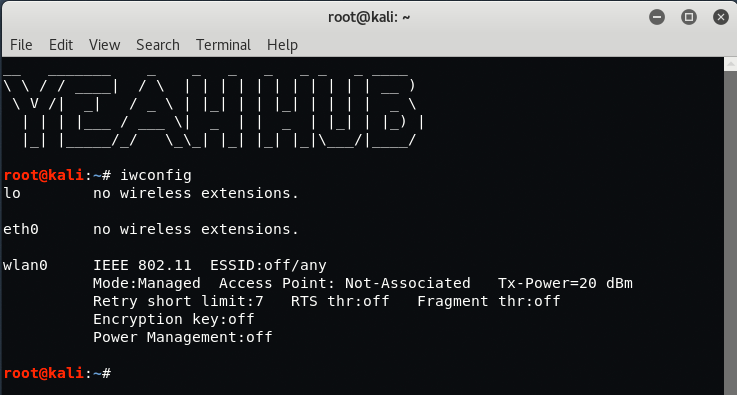
If you want to change the MAC address of wireless interface (wlan0 in our case, it might be different for you, depends upon the Wireless Card/Adaptor you are using).
Type “iwconfig” to see all the available wireless interfaces.
Furthermore, you need to repeat same steps as you did for Ethernet interface, but here you need to use some another tool called as “Macchanger” which is an open source tool and is already pre-installed in every Kali Linux machine.
Type “ifconfig wlan0 down” to down the interface and then type the following command to change the mac address with macchanger as shown below:
Command: macchanger -m 00:11:22:33:44:55 wlan0
At the end, just UP that wlan0 interface by typing “ifconfig wlan0 up“.

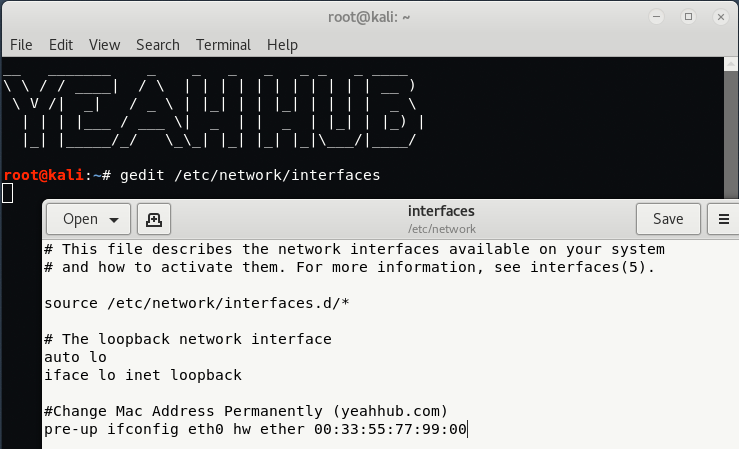
To make it permanent for every restart, you need to edit the configuration file of Network Interfaces which is located at “/etc/network/interfaces” and add the following line at the end of the file.
pre-up ifconfig eth0 hw ether 00:33:55:77:99:00
Don’t forget to restart the network services (service network-manager restart).
Furthermore, if you simply want to see the current and permanent MAC then you can type “macchanger -s eth0” and to set the MAC address randomly, the command is “macchanger -r eth0” which gives you a new random MAC address for eth0 interface.
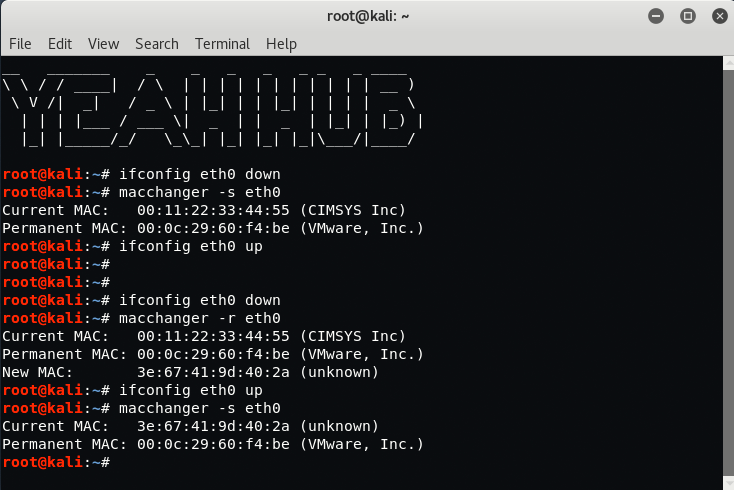
As shown on above screenshot, Macchanger will show you the permanent, current and changed MAC address. The permanent MAC Address will be restored to your network adapter after a reboot or you can reset your network adapters MAC address manually. Use the following command to restore the permanent MAC address to your network adapter manually:
Command: macchanger -permanent eth0
If you are getting some errors related to MAC Changing like “ERROR: Can’t change MAC: interface up or not permission: Cannot assign requested address” then you need to turn down the interface by typing “ifconfig eth0 down” or “ifconfig wlan0 down” then try to change the Mac address.
You can also program your computer to automatically generate a random MAC address upon reboot by entering the following commands in Terminal:
First, login as root, then enter crontab -e. This will either load a program, or allow you the option to select a program to load it with like nano editor. Once crontab is loaded, enter a new line at the bottom like this: @reboot macchanger -r eth0. (Make sure it does NOT have a # before the line. The pound sign basically tells the program, “ignore this line.“)
Then just “Write Out” (save) and exit crontab. Reboot your computer to test it.
You may encounter an issue, like we have, where the randomly generated MAC address does not grant network access…. don’t freak out, simply generate a new one with macchanger -r eth0 until it does.


Sir i tried all possible ways to fix that error. ERROR: Can’t change MAC: interface up or System already running many process
Cannot assign requested address
Pls fix it